www.scheppach.com / service@scheppach.com / +(49)-08223-4002-99 / +(49)-08223-4002-58
GB
|
31
to ensure that the set screw (20) is loose and the ma-
chine head (4) can move.
Attention!
For 90° crosscuts, the moveable stop rail (16a) must
• Open the set screw (16b) for the moveable stop
rail (16a) and push the moveable stop rail (16a) in-
wards.
• The moveable stop rails (16a) must be locked so
that the distance between the stop rails (16a) and
the saw blade (6) is no more than 8 mm.
• Before making the cut, check that the stop rails
(16a) and the saw blade (6) cannot collide.
• Re-tighten the set screw (16b).
• Move the machine head (4) to its upper position.
• Use the handle (1) to push back the machine head
on the cutting width).
• Place the piece of wood to be cut at the stop rail
(16) and on the turntable (14).
• Lock the material with the clamping devices (7) on
moving during the cutting operation.
• Release the lock switch (3) and press the ON/OFF
switch (2) to start the motor.
• With the drag guide (21) xed in place (21):: use
the handle (1) to move the machine head (4) stead-
• With the drag guide (21) not xed in place (21):
through the work piece.
• When the cutting operation is completed, move the
machine head back to its upper (home) position and
release the ON/OFF button (2).
Attention! The machine executes an upward stroke
release the handle (1) after completing the cut; in-
stead allow the machine head to move upwards
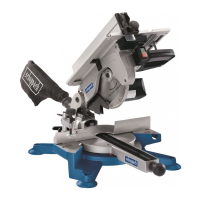
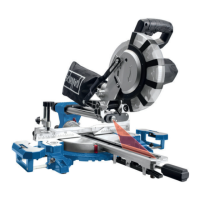
9.5 Crosscut 90° and turntable 0° - 45°
(g. 1/7/8)
The crosscut, drag and mitre saw can be used to
make crosscuts of 0° -45° to the left and 0° -45° to the
right in relation to the stop rail.
Important!
For 90° crosscuts, the moveable stop rail (16a) must
• Open the set screw (16b) for the moveable stop
rail (16a) and push the moveable stop rail (16a) in-
wards.
• 45° - position angle stop (B) between the saw blade
• Loosen the lock nut (27a) and adjust the screw (27)
until the angle between the saw blade (6) and the
• Tighten the lock nut (27a) again.
• -
Phillips screwdriver, set to position 45° on the angle
scale (18) and re-tighten the retaining screw.
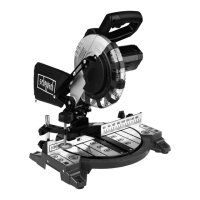
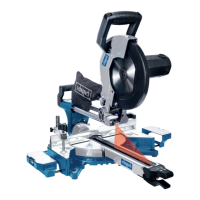
9. Operation
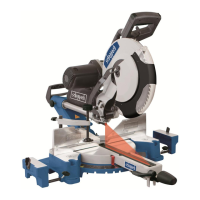
9.1 Using the laser (g. 18)
• To switch on: Press the ON/OFF switch laser (33)
wish to process, providing an exact guide for the
cut.
• To switch o: Press again the ON/OFF switch la-
ser (33).
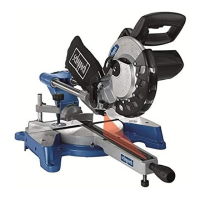
9.2 Limiting the cutting depth (cutting grooves)
(g. 3/13)
m WARNING
Risk of kickback! When cutting grooves, it is par-
ticularly important that no lateral pressure is ex-
erted on the saw blade. Otherwise, the saw head
might suddenly kick back! Use a clamping device
when cutting grooves. Avoid lateral pressure on
the saw head.
•
screw (24). To do this loosen the knurled nut (24a) on
the screw (24). Turn the screw (24) in or out to set the
required cutting depth. Then re-tighten the knurled
nut (24a) on the screw (24).
•
9.3 Serial cutting
For repeated cuts of the same length, the length stop
(37) can be opened. You can use the length stop (37)
on the right and on the left.
• Fold up the length stop (37).
• Loosen the set screw for workpiece support (9).
• Pull out the workpiece support (8).
• Set the required dimension between saw blade and
length stop (37).
• Re-tighten the set screw for workpiece support (9).
• Perform cutting as described in sections 10.4 to
10.7.
9.4 Crosscut 90° and turntable 0° (g. 1/2/7)
In the case of cutting widths up to approx. 100 mm it
the set screw (20) in the rear position. In this position
the machine can be operated in cross cutting mode.
 Loading...