www.scheppach.com
GB
|
33
4. Install the saw blade (21) (as described in 8.2)
through the drilled hole in the workpiece and set
the blade tension.
5. After completing the inside cut, remove the saw
blade (21) from the blade holders (as described in
8.2).
6. Remove the workpiece from the table.
9.7 Carrying out mitre cuts (g. 14)
m WARNING
Be particularly careful when making mitre cuts. The
incline of the saw table supports slipping. There is a
danger of injury.
1. To carry out mitre cuts, adjust the distance be-
tween the saw blade guard (5) mounted to the re-
taining device (23) and the work table accordingly.
2. Swivel the table by loosening the knurled nut (14)
and tilting the saw table (6) into the desired po-
sition.
3. Tighten the knurled nut (14).
10. Electrical connection
The electrical motor installed is connected and
ready for operation. The connection complies with
the applicable VDE and DIN provisions.
The customer‘s mains connection as well as the
extension cable used must also comply with these
regulations.
Damaged electrical connection cable
The insulation on electrical connection cables is often
damaged.
This may have the following causes:
• Pressure points, where connection cables are
passed through windows or doors
• Kinks where the connection cable has been improp-
erly fastened or routed
• Places where the connection cables have been cut
due to being driven over
• Insulation damage due to being ripped out of the wall
outlet.
• Cracks due to the insulation ageing.
Such damaged electrical connection cables must not
be used and are life-threatening due to the insulation
damage.
• Anyone who wants to use the saw requires a cer-
tain amount of learning time. During this time some
blades are sure to break.
• When cutting thick timbers, particular care must
be taken to ensure that the saw blade is not bent
or twisted.
• Working carefully will increase the service life of the
saw blade.
9.2 Fine-wire fuse (7)
The ne-wire fuse (7) is inserted at the factory and
does not need to be installed. If the ne-wire fuse (7) is
defective, proceed as described in point 12.2.4.
9.3 On/off switch (16)
• Switching on: Press the “I” button.
• Switching off: Press the “0” button.
ATTENTION
The machine is equipped with a safety switch against
reactivation if the voltage drops.
If the scroll saw is switched on and the power supply
in the mains is interrupted, the scroll saw remains
switched off, even if the power supply is re-established.
Press the “I” button to switch it on.
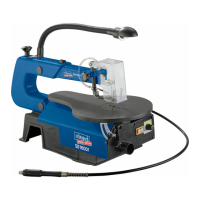
9.4 Work lamp operation (g. 4)
Press the on/off switch (20) to switch the work lamp
(19) on and off.
9.5 Speed regulator (g. 2)
The speed regulator (17) allows you to set the stroke
rate according to the material to be cut. In case of
soft material, we recommend high stroke rates, while
strokes rates should be kept low for hard material.
Turn the speed regulator (17) clockwise to increase the
stroke rate. Turning counterclockwise lowers the stroke
rate.
9.6 Making inside cuts
This scroll saw allows inside cuts in workpieces with-
out damaging the outside or the circumference of the
workpiece.
1. Remove the saw blade (21) as described in 8.2.
2. Drill a hole into the workpiece.
3. Place the workpiece with the drilled hole over the
opening of the table inlay (25) on the saw table (6).

 Loading...