5
Controller
Installation
Battery
Installation
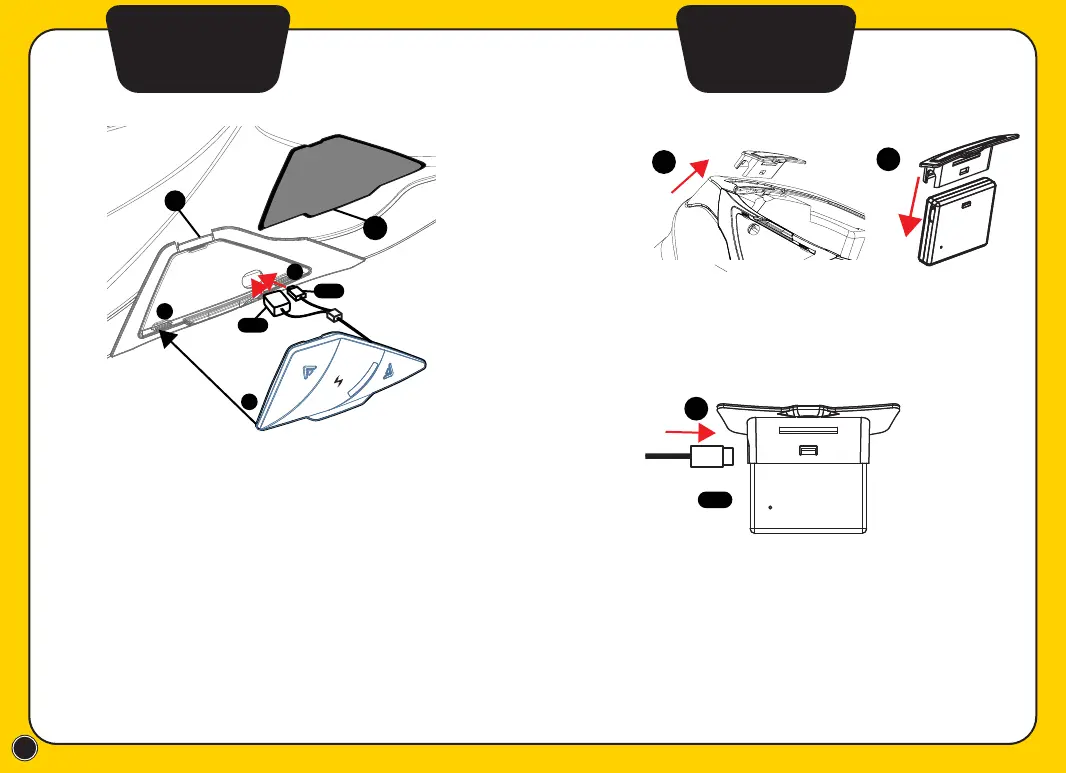
Push up the Locking Lever (1) to remove EXO-COM
Controller Cover (2), and put Mic/Speaker Female
Connector (3A) into the hole first, and then Battery Pack
Male Connector (3B) referring to the above picture.
Install the EXO-COM Controller (4), and make sure it is
properly positioned by sitting on two bumps (5) at the
bottom.
Connect the mic/speaker’s female connector (3A) to its
male connector (3a).
Reverse the process to remove the EXO-COM.
1. Remove the Battery Pack Cover from the
back/bottom side of the helmet.
2. Assemble it to the Battery Pack.
3. Plug the Battery Pack male connector (3B) to
the Battery Pack referring to the above picture.
Mic/Speaker
Female
Connector
Battery Pack
Male Connector
1
2
4
3A
3B
5
5
Battery Pack
Male Connector
1
2
3
3B
Male connector