r3bEL mini User Manual
18
4.2 Setting up Pronterface
1. Connect the provided power cable and microUSB cable to the power and microUSB
ports on the rear of the bioprinter.
2. Turn on the bioprinter using the power switch.
3. Connect the microUSB cable to a USB port on your computer and wait for the device
drivers to install.
4. Open Pronterface.
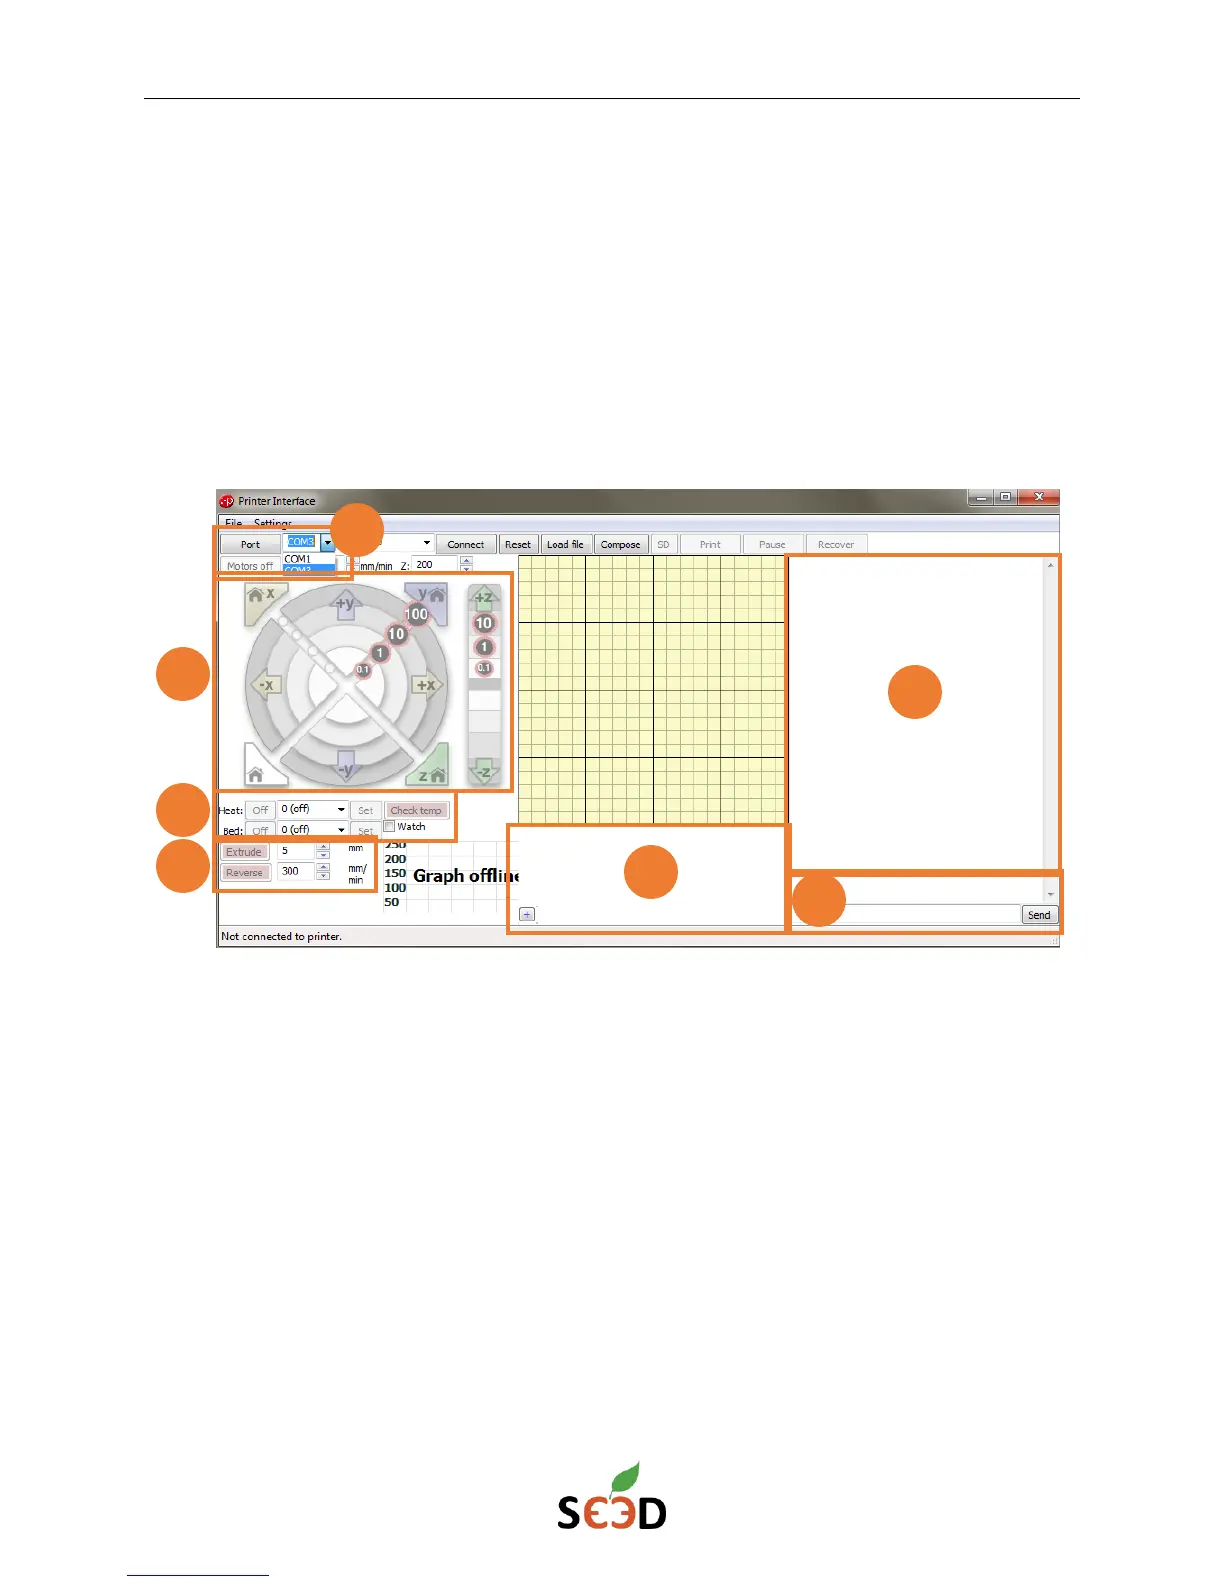
5. Familiarize yourself with the interface by recognizing each feature and function as
listed below:
A. Port Selection
B. X, Y, Z Control Panel
C. Heater Control (Note: this feature is not used on the r3bEL mini)
D. Extruder Control
E. Custom Button Area
F. Command Line
G. Command Window
6. To connect the bioprinter to Pronterface, select the proper COM port. This will be
whatever port your computer assigns the device to. In macOS, ports may have a
different naming designation similar to “/dev/ttyUSB0” or “/dev/ttyACM0.”
7. Click the “Connect” button. If successful, the command window should display “Printer
is now online” and the buttons should activate/no longer be grayed out.


 To Next Page