G4K Pro User Guide
3.1.2.5. Set up daisy chain in management software
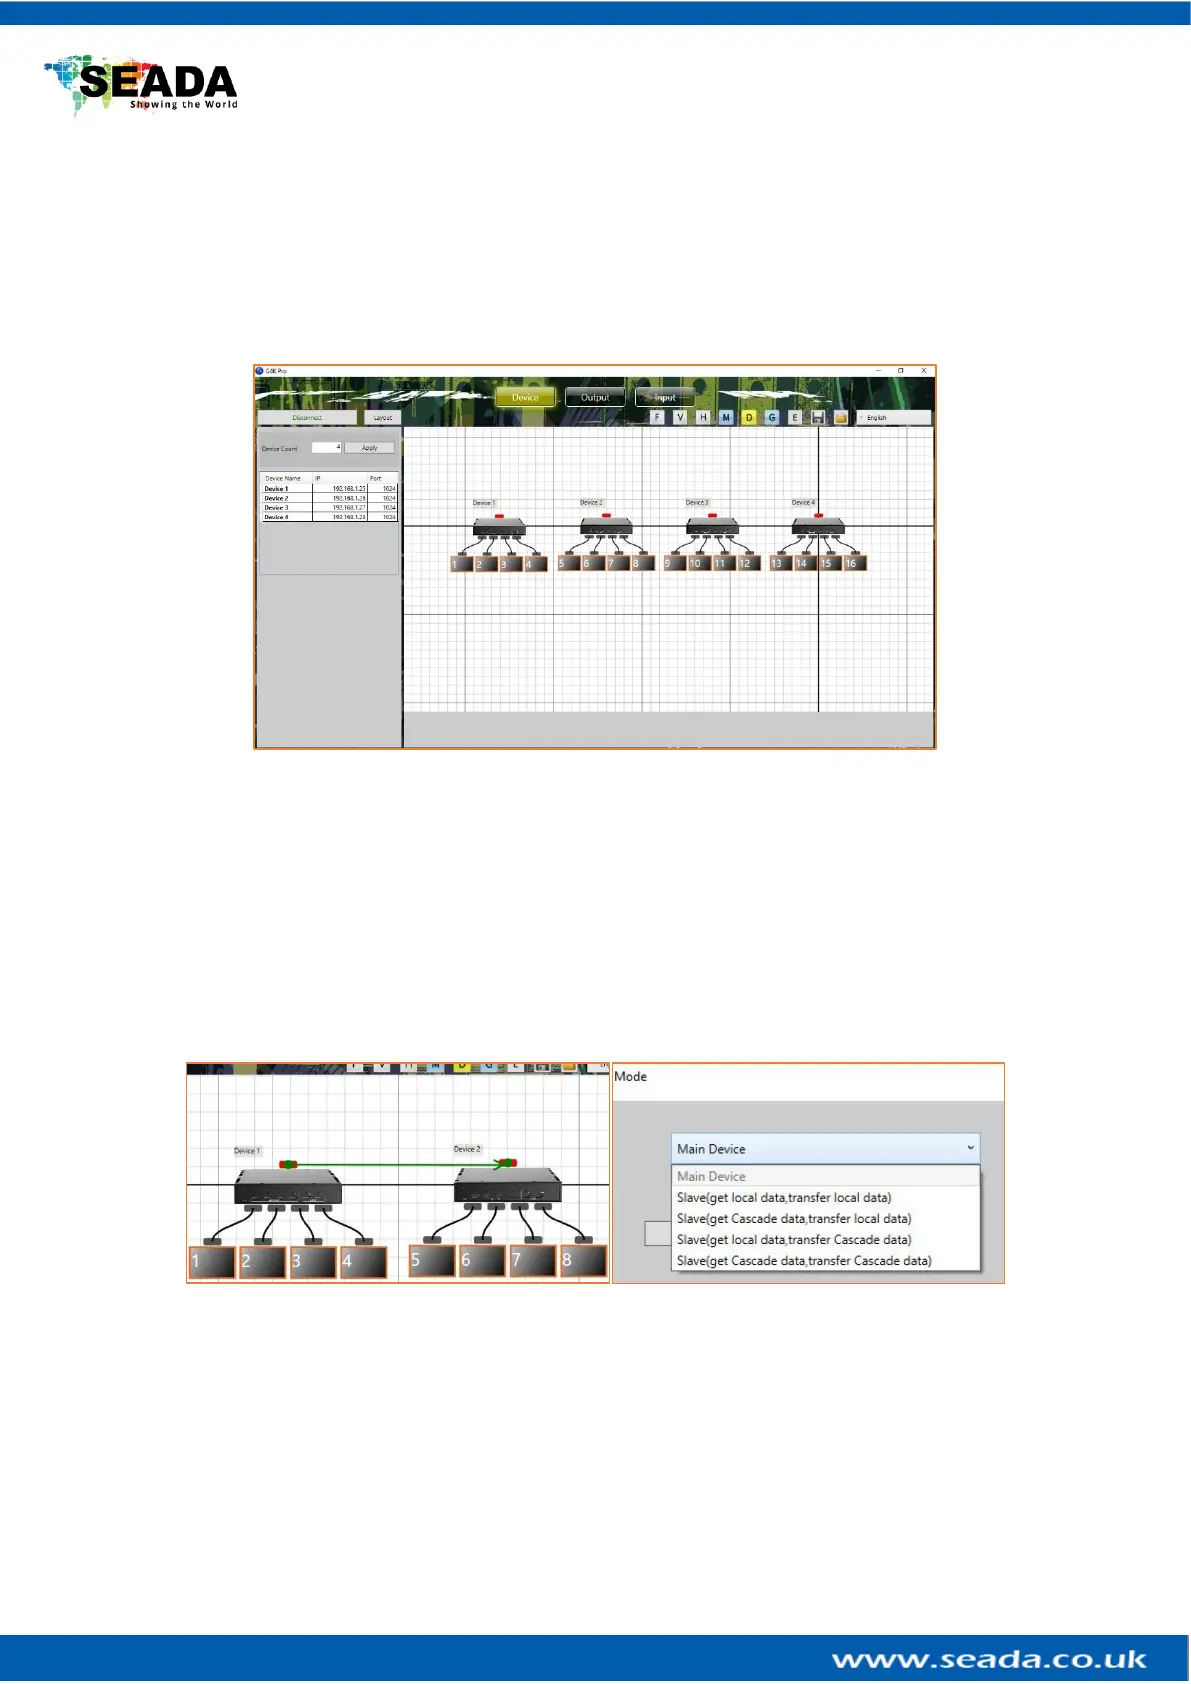
1) Add the quantity of the G4K Pro into Device Count and press Apply button.
a. Give a name for each device if preferred
b. Enter the unique IP address for each device (3.1.2.1)
c. Set the Port to 1024 for all devices
2) Press Connect button to connect all the G4K Pro into one system and users will get the
following users interface
3) Click on the header of 1
st
device and drag the line to the 2
nd
device to open the ‘Change
Device Mode’ dialog window to choose the Slave Mode (Daisy Chain mode) for the 2
nd
G4K Pro. And then 2
nd
to 3
rd
and 3
rd
to 4
th
unit.
For a 4x4 video wall with only one video to be displayed across the entire video wall,
the settings are as follows:
G4K Pro 1 Main Device
G4K Pro 2 Slave (get Cascade data, transfer Cascade data)
G4K Pro 3 Slave (get Cascade data, transfer Cascade data)
G4K Pro 4 Slave (get Cascade data, transfer Cascade data)
4) Once the daisy chain relationship between each G4K Pro device has been established,
users need to
a. set up the layout of the screens according to the video wall in Output of
management software (see 3.2)
b. set up the video input window for the video wall in ‘Input’ of G4K Pro
management software (see 3.3)