6JDL V1.0 8 2022
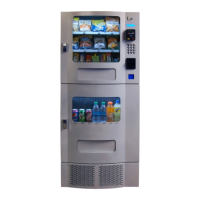
The refrigeraon system is installed at the boom of the Beverage Vendor and there is a foamed separaon
between the cabinet interior and the refrigeraon system. The installaon, setup and funconality of the
refrigeraon system is explained in the secon tled Refrigeraon.
RECEIVING, INSPECTION, UNPACKING AND TESTING
Aer you have received your vending machine, inspect all three individual vendor components. Note: Any
damages that may have occurred during shipping must be reported to the delivery carrier immediately.
Reporng damages and the seeking of restuon is the responsibility of the equipment owner. The factory
is willing to assist you in this process in any way possible. Feel free to contact Seaga Customer Care with
quesons you may have on this process. Once you have your vending machine located, we suggest that you
keep this manual for future reference.
The vending machine is placed on a wooden pallet and stretch-wrapped. Please exercise cauon while cung
into the stretch-wrap with a sharp tool such as a ulity knife, as it may cause scratch marks on the machine.
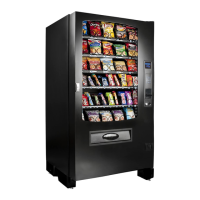
The Snack and Beverage Units are boxed in two (2) separate cardboard boxes. The Snack Unit box is placed
on top of the Beverage Unit. Aer removing the stretch wrap, remove the Snack Unit and place it aside. USE
EXTREME CAUTION AS THE TOP OF THE BOX IS NOT ATTACHED TO THE BOTTOM OF THE BOX. The top of
both the snack and beverage units slide up for removal. Remove the Beverage Unit from its box and place it
in the desired vending locaon. Remove the Snack Unit from its box and place it on top of the Beverage Unit
carefully. Please use proper liing and safety precauons while placing the Snack Unit on top of Beverage Unit.
Open all Unit doors and remove the packing materials. Keys can be found in the white envelope placed in the
vend area of the Snack Unit. Remove the tape on the tray levers of the Snack unit. Also remove the protecve
paper from under each coil as well as es securing the ends of the coils during shipping. Remove all protecve
plasc from the window lenses.
Remember: at least two people are necessary to move any of the components of the vending machine. Follow
proper safety standard for liing and working with electronic/refrigerated equipment.
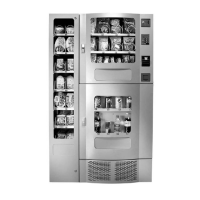
LOCK
Your vendor has two Locks, more commonly known as a T-handle lock. The keys for the T-handle locks are in a
white parts envelope in the vend bin.
To unlock the front door of the snack unit (top secon), insert key and turn clockwise ¼ turn. When unlocked
the ‘T’ of the Lock will pop out from its base. Turn the ‘T’ clockwise ¼ turn to unlock the door. To lock the door,
close it and turn the ‘T’ counterclockwise ¼ turn and push the ‘T’ into the base. Remove the key.
To unlock the front door of the beverage unit (boom secon), insert the and turn clockwise ¼ turn. When
unlocked the ‘T’ of the Lock will pop out from its base. Turn the ‘T’ counterclockwise unl door opens.
To lock the door, rmly close the door and turn the ‘T’ handle clockwise 1 to 2 mes and then pull on the door
to test that the lock has engaged. If so, then push the ‘T’ into the base to lock the door. Remove the key. Note:
Do not over-ghten when locking – this could strip the threads and damage your machine.