HARRIER 3D Instruction Manual
12
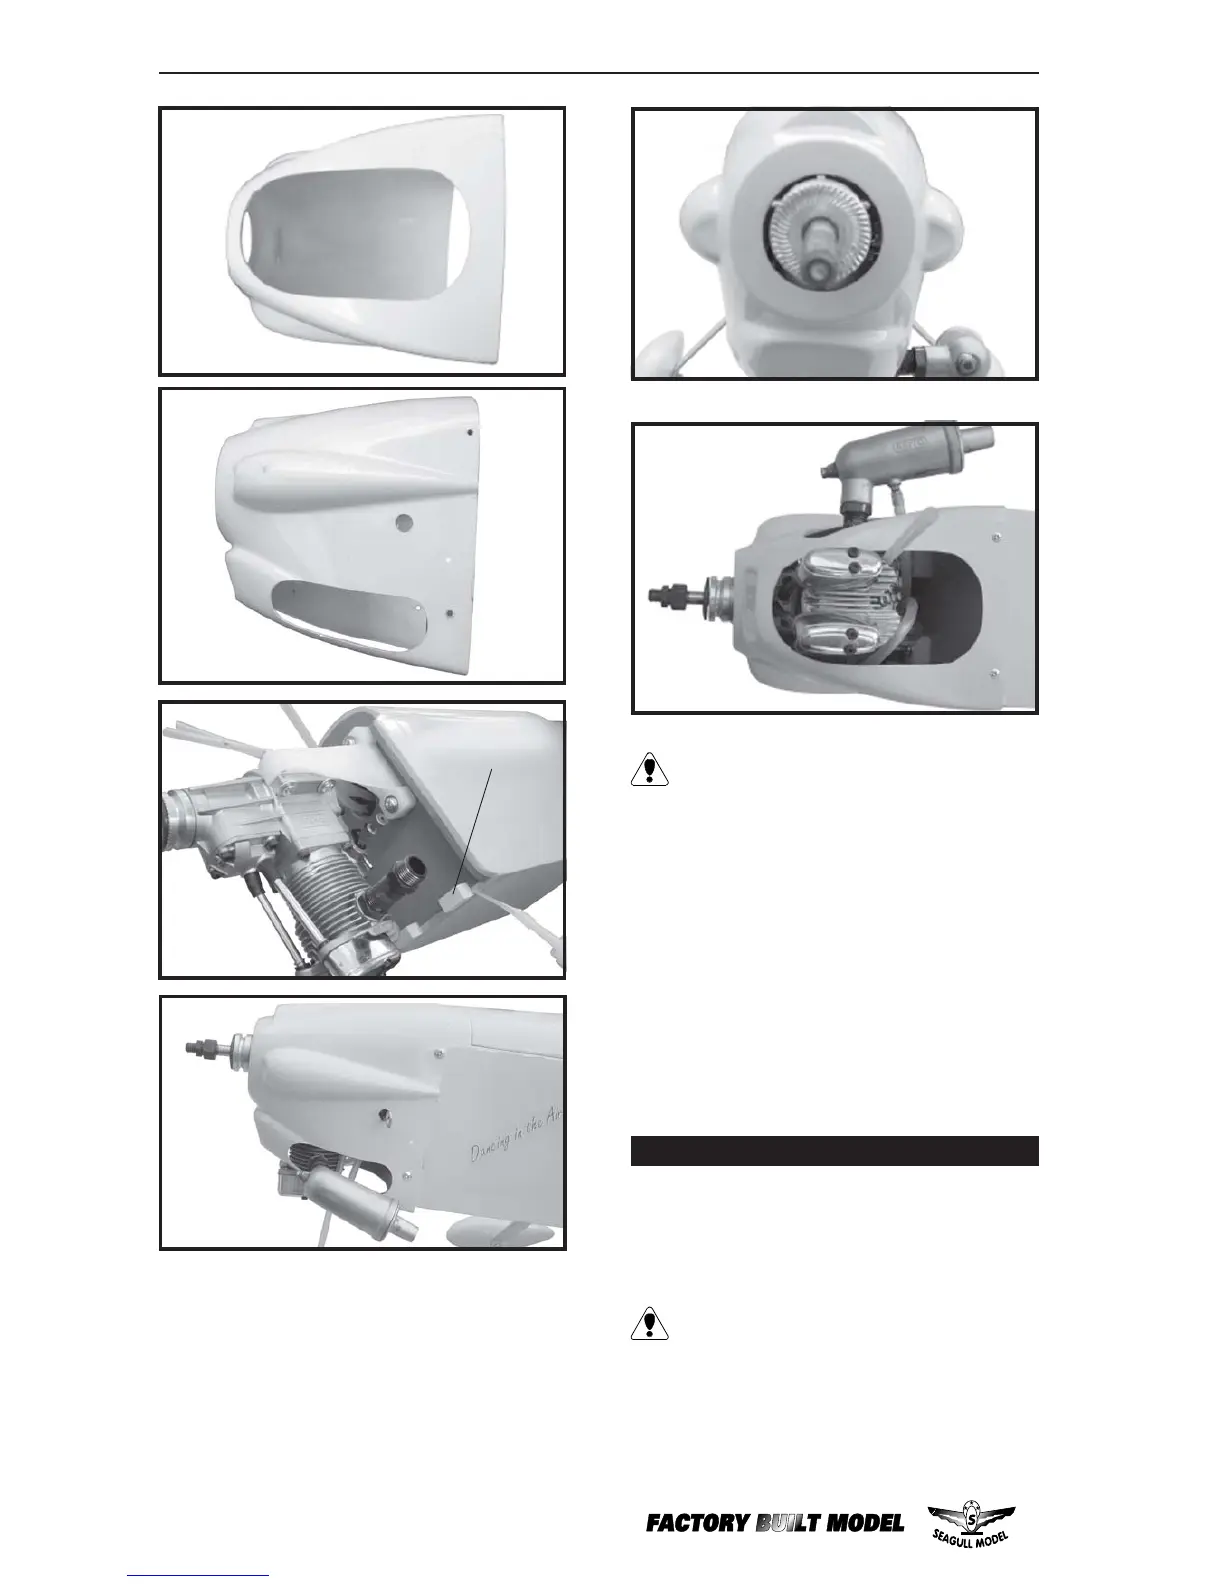
2) While keeping the back edge of the cowl
flush with the marks, align the front of the cowl
with the crankshaft of the engine. The front of
the cowl should be positioned so the crank-
shaft is in nearly the middle of the cowl open-
ing. Use the spinner backplate as a guide. Hold
the cowl firmly in place using pieces of mask-
ing tape.
Because of the size of the cowl, it may
be necessary to use a needle valve ex-
tension for the high speed needle valve. Make
this out of sufficient length 1.5mm wire and
install it into the end of the needle valve. Se-
cure the wire in place by tightening the set
screw in the side of the needle valve.
3) Install the muffler and muffler extension
onto the engine and make the cutout in the
cowl for muffler clearance. Connect the fuel
and pressure lines to the carburetor, muffler
and fuel filler valve. Secure the cowl to fuse-
lage using the 3mmx12mm screws (4).
1) Install the spinner backplate, propeller
and spinner cone. The spinner cone is held in
place using two 3mm x 12mm wood screws.
The propeller should not touch any part
of the spinner cone. If it does, use a
sharp modeling knife and carefully trim away
the spinner cone where the propeller comes
in contact with it.
This item is not included.
INSTALLING THE SPINNER
Hard wood block.
 Loading...