HARRIER 3D Instruction Manual
6
6) Using C/A remover/debonder and a
paper towel, remove any excess C/A glue that
may have accumulated on the horizontal
stabilizer or in the elevator hinge area.
8) After both horizontal stabilizer are
securely hinged, firmly grasp the horizontal
stabilizer panel and elevator to make sure the
hinges are securely glued and cannot be pulled
out. Do this by carefully applying medium
pressure, trying to separate the elevator from
the horizontal stabilizer panel. Use caution not
to crush the horizontal stabilizer structure.
7) Repeat this process with the other
horizontal stabilizer panel, securely hinging the
elevator in place.
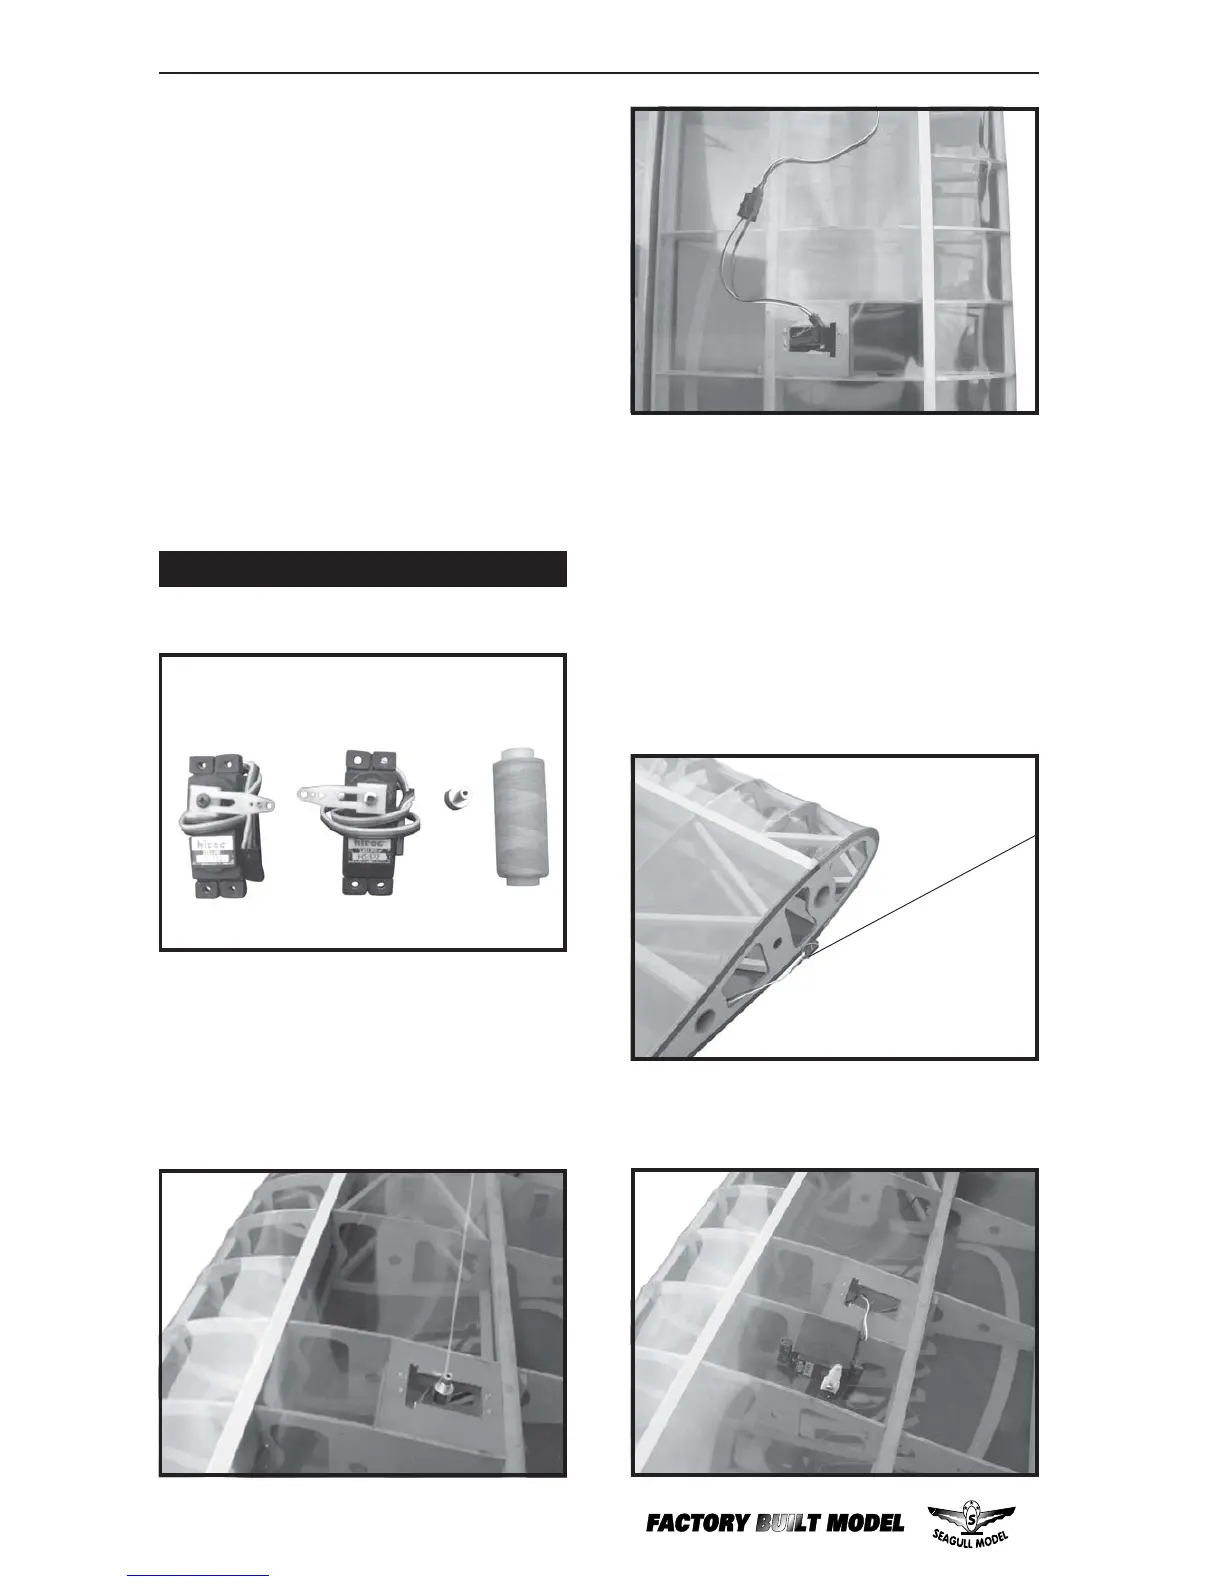
Using a small weight (Weighted fuel pick-up
works well) and thread, feed the string through
the wing as indicated.
INSTALLING THE AILERON SERVOS
Attach a 12 inch servo lead to the aileron servo.
Attach the string to the servo lead and carefully
thread it though the wing. Once you have
thread the lead throught the wing, remove the
string so it can use for the other servo lead.
Tape the servo lead to the wing to prevent it
from falling back into the wing.