SENTINEL
PROPRIETARY INFORMATION AND MATERIALS OF UNITEC INC. 49
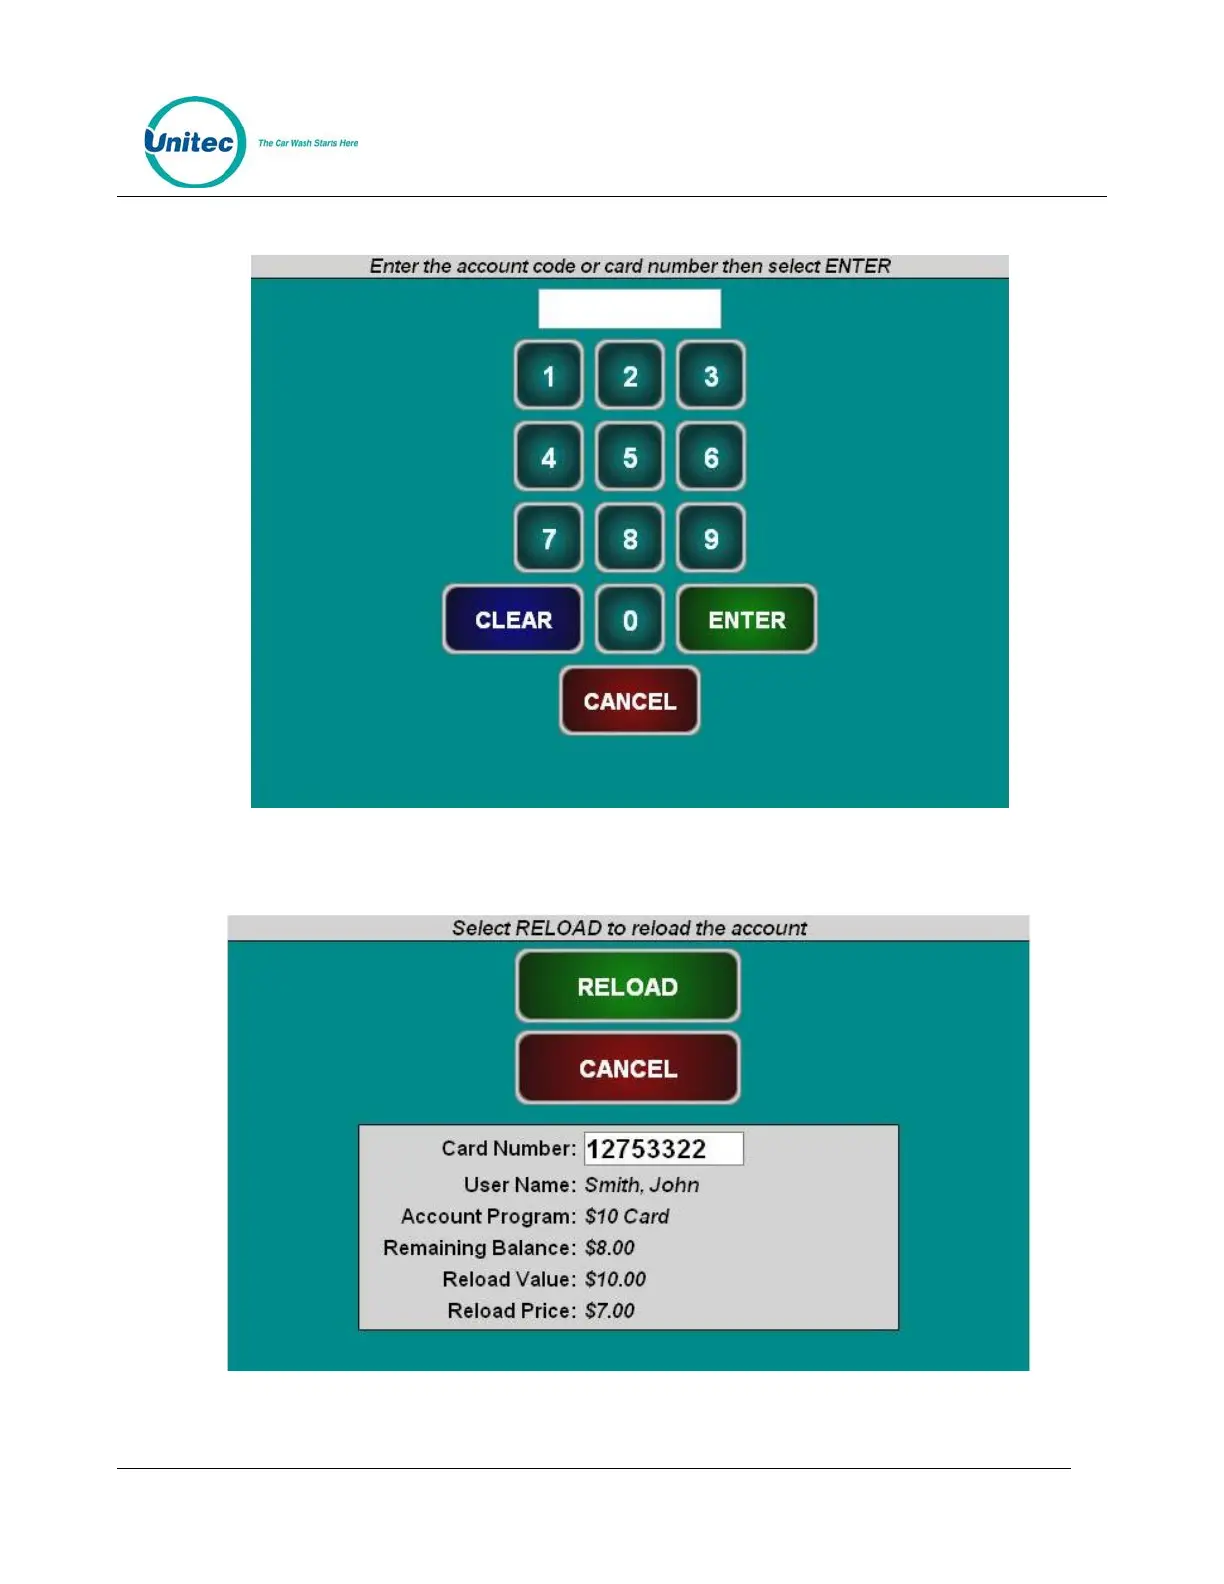
To reload an account, click Reload and enter the account number.
Figure 8.5. Reload Account Screen
Ensure the account holder’s information is correct, then click Reload.
Figure 8.6. Reloaded Account Screen