34
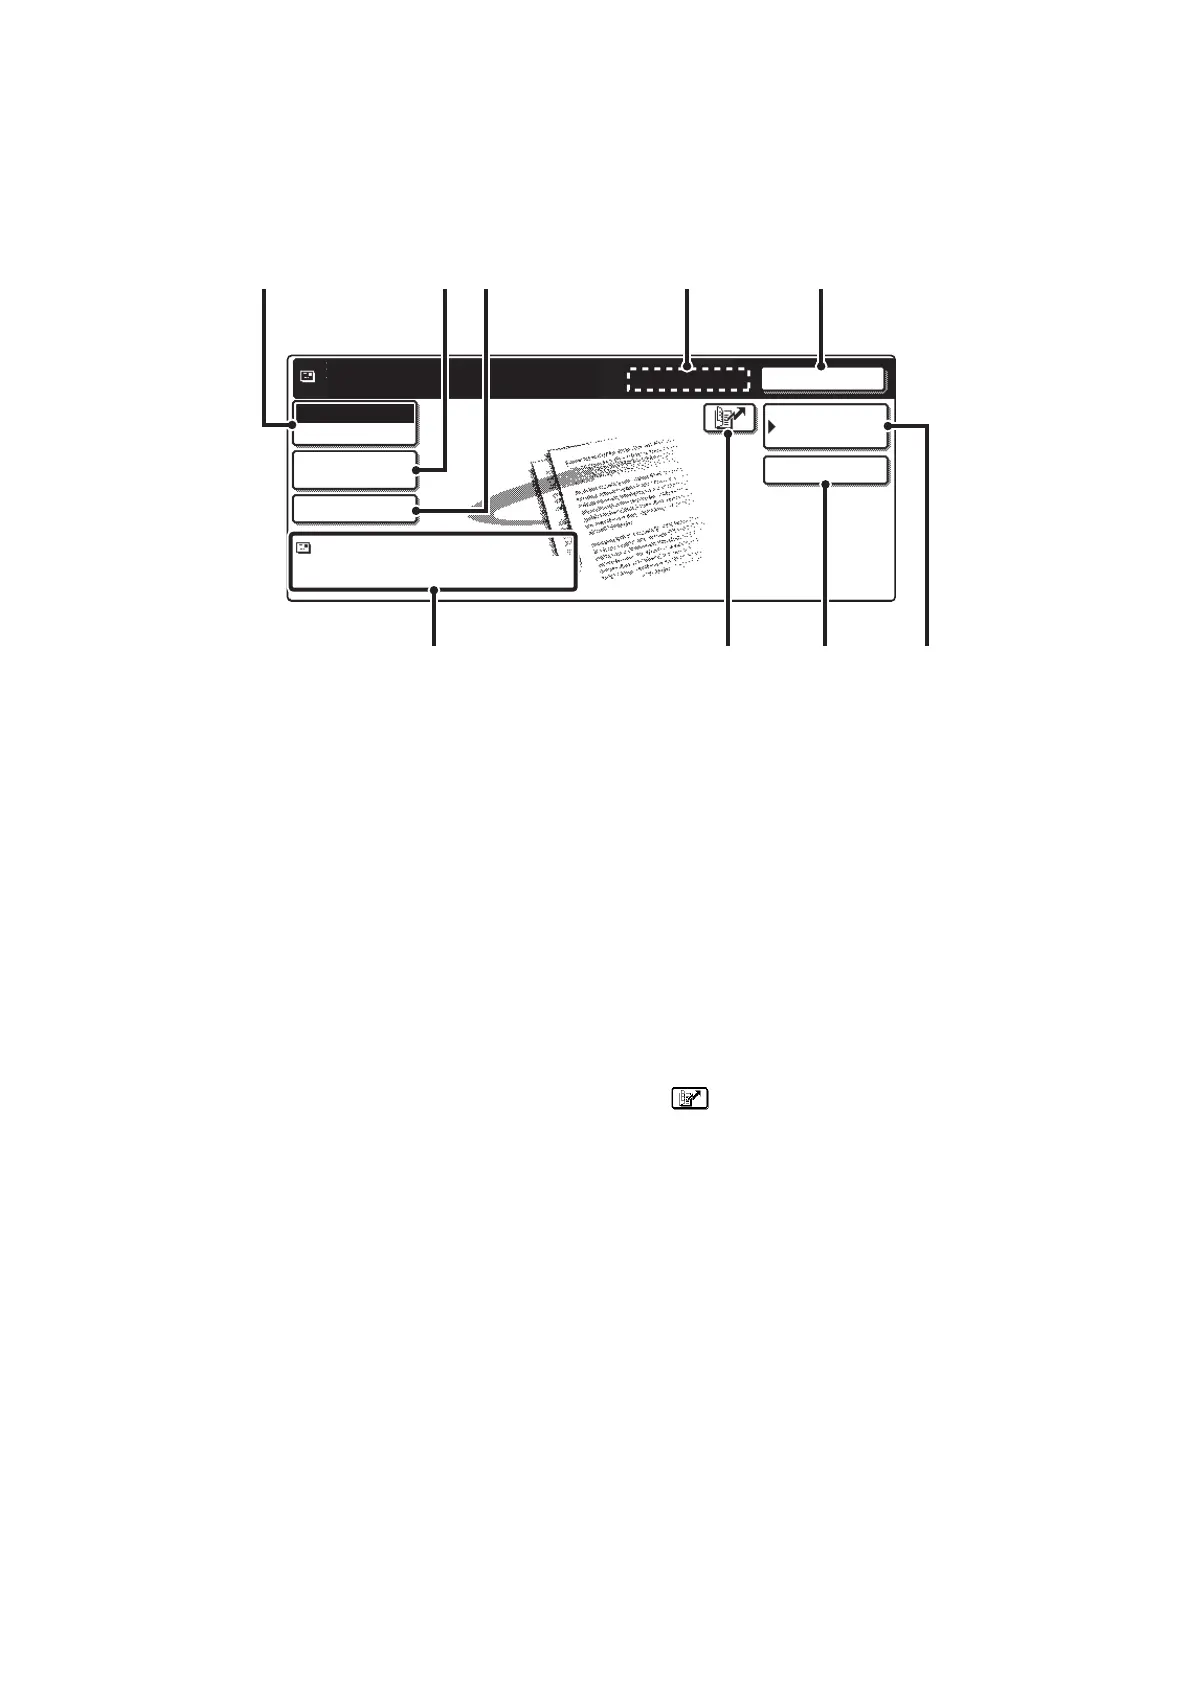
SEND SETTINGS SCREEN
The keys that appear in the send settings are explained below. For more information on each of the settings, see "BASE
SCREEN OF FAX MODE" in the Facsimile Guide and "BASE SCREEN" in the Scanner Guide.
Example of scan mode
(1) [Mode Switch] key
Use this key to select fax mode, scan mode, or Internet
fax mode.
(2) [Image Settings] key
Touch this key to select send settings. The settings that
can be selected vary by mode.
• Fax mode
[Resolution] key
Use this to select the resolution. A resolution setting
higher than the resolution at which the file was stored
cannot be selected.
[Special Modes] key
This displays the [Timer], [Own Name Select] and
[Transaction Report] keys.
• Scan mode
[Resolution] key
Use this to select the resolution. A resolution setting
higher than the resolution at which the file was stored
cannot be selected.
[File Format] key
This lets you select the file type, compression ratio,
and color mode.
[Special Modes] key
This displays the [Timer] key.
• Internet fax mode
[Resolution] key
Use this to select the resolution. A resolution setting
higher than the resolution at which the file was stored
cannot be selected.
[File Format] key
[TIFF-S] or [TIFF-F] can be selected.
[Special Modes] key
This displays the [Timer] and [Transaction Report]
keys.
(3) [Send Settings] key
This key appears in scan mode and Internet fax mode.
Touch the key to enter a subject and a file name. In scan
mode, a sender can also be specified.
(4) [Next Address] key
This key appears when at least one address has been
entered. Use this key to send a file to multiple
destinations.
(5) [Cancel] key
This returns you to the base job settings screen.
(6) File name / User name display
This shows the icon of the file to be sent, the file name,
the user name, and the color mode (color / black and
white).
(7) key
A destination can be selected by touching this key and
entering the 3-digit number that was assigned to the
destination when the e-mail address or fax number of the
destination was stored in a one-touch key or group key.
(8) [Address Entry] key or [Sub Address] key
Use this key to directly enter an address when sending a
file in scan mode or Internet fax mode. In fax mode, use
this key to enter a sub-address and password for F-code
communication.
(9) [Address Book] key
Touch this key to display the destinations stored in the
address book.
Ready to send.
Cancel
Address Book
Address Entry
file-01
Name 1 F. Color
Scan
Mode Switch
Image
Settings
Send Settings
(1) (2) (3) (4) (5)
(9)(8)(7)(6)