22
PG-B10S
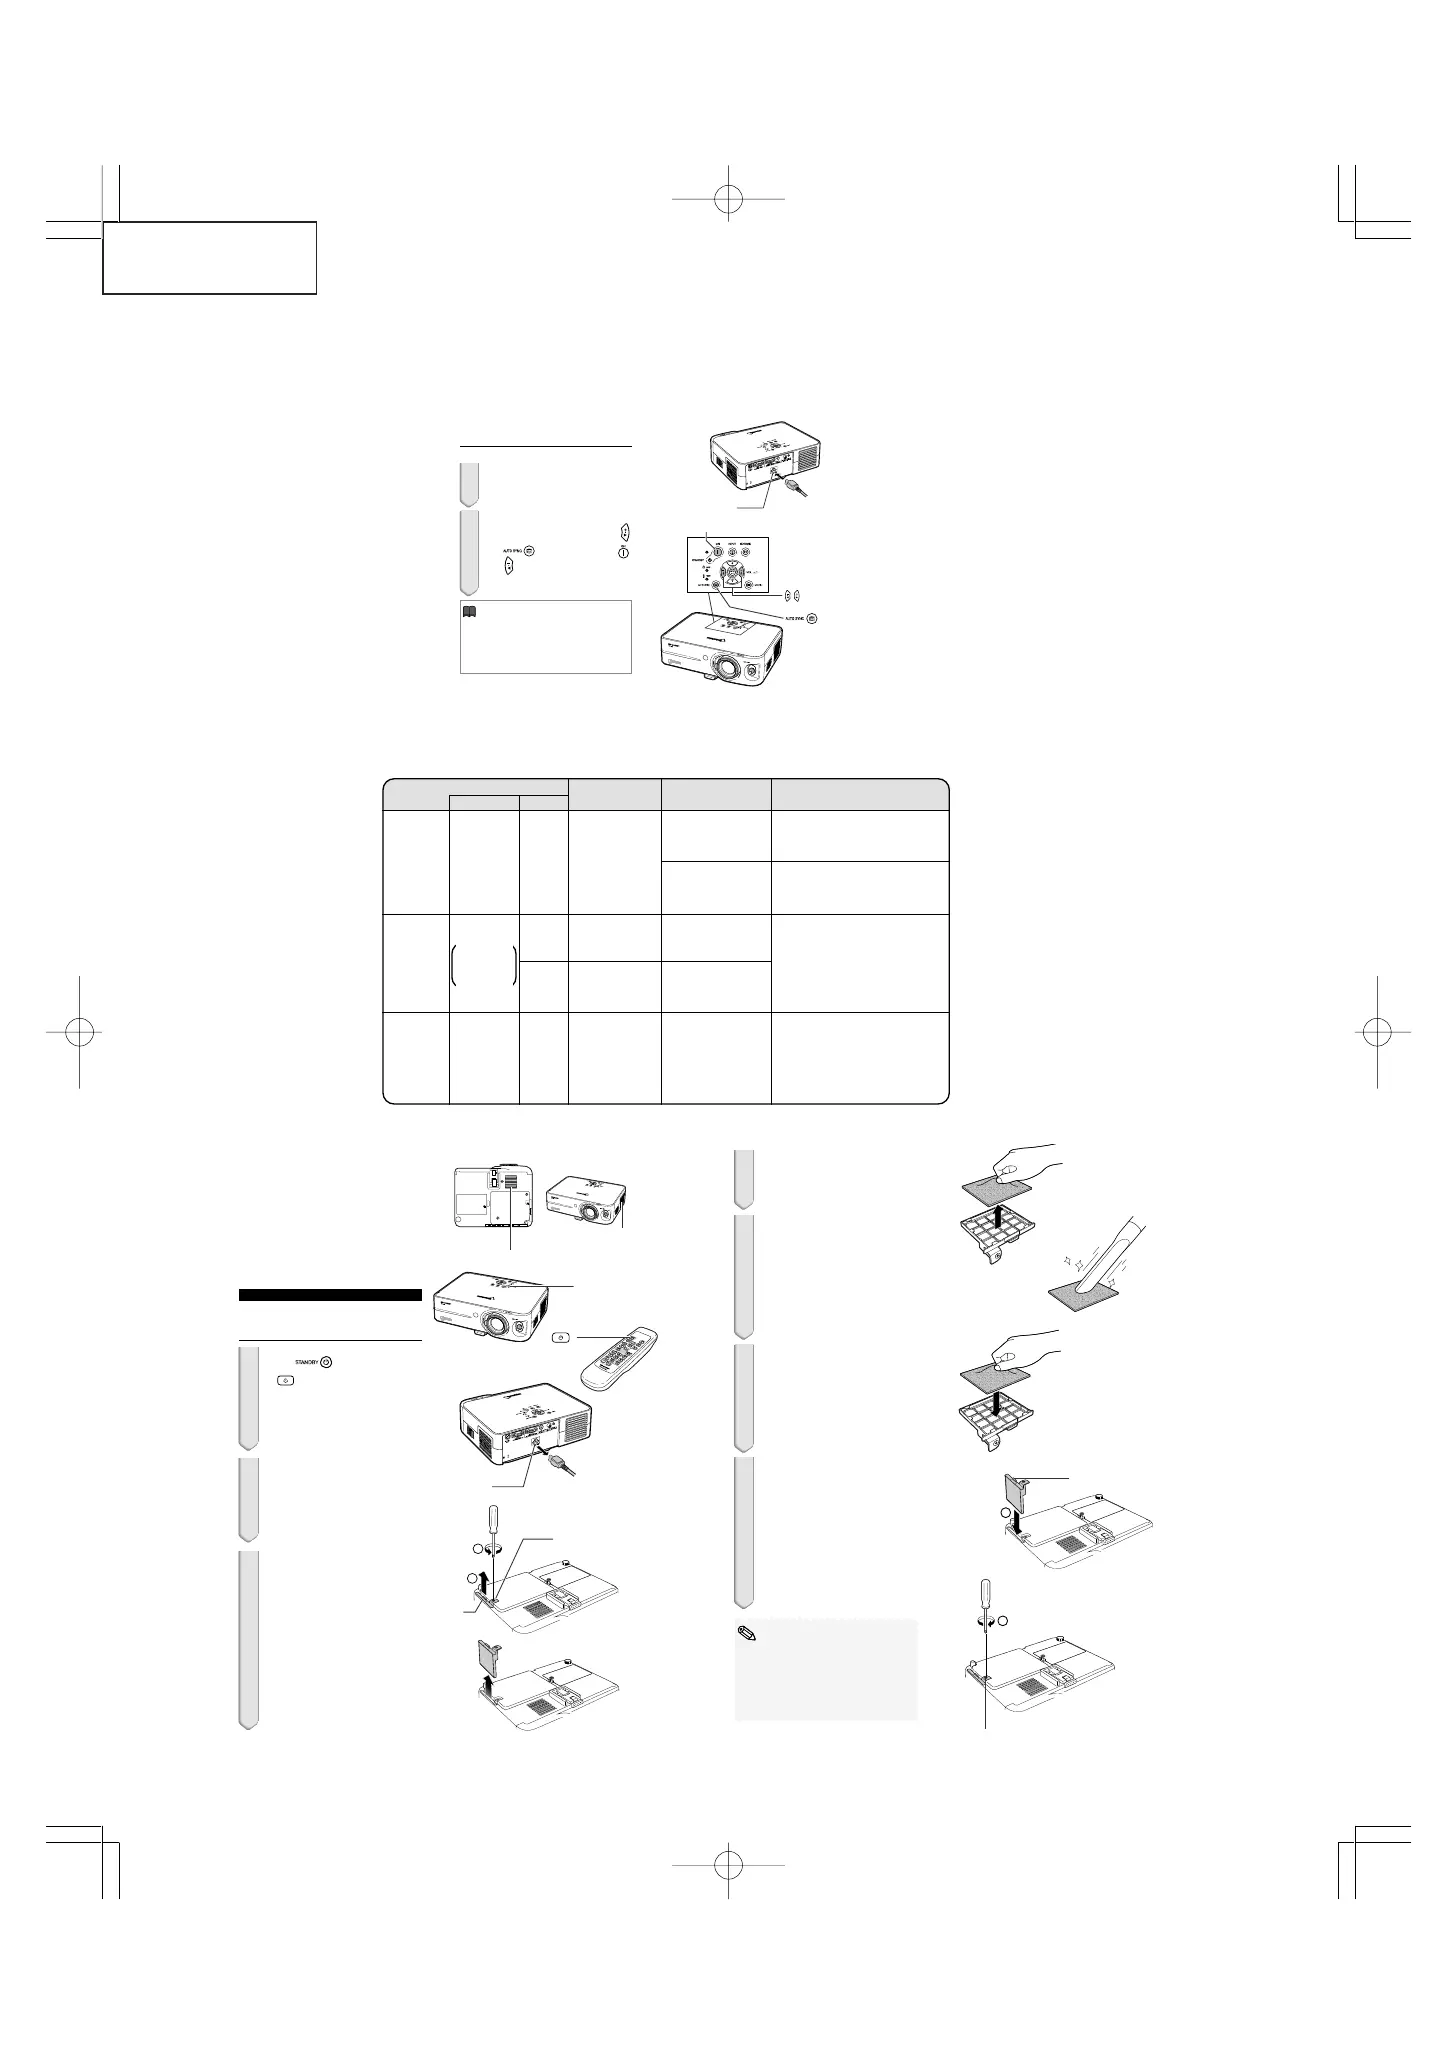
RESETTING THE TOTAL LAMP TIMER
● Resetting the total lamp timer
When replacing the lamp, reset the total lamp timer in the procedure below.
■ The warning lights on the projector indicate problems inside the projector.
■ If a problem occurs, either the temperature warning indicator or the lamp replacement indicator will illumi-
nate red, and the power will turn off. After the power has been turned off, follow the proce-duresgiven
below.
■ Replacing the Air Filter
Resetting the Lamp Timer
Res
et the lamp timer after replacing the lamp.
1 Connect the power cord.
• Plug the power cord into the AC socket
of the projector.
2 Reset the lamp timer.
•
While simultaneously
holding down
and on the projector, press
and on the projector.
• “LAMP 0000H” is displayed, indicati
ng
that the lamp timer is r
eset.
Info
• Make sure to reset the lamp timer only
when replacing the lamp. If you reset the
lamp timer and continue to use the same
lamp, this may cause the lamp to become
damaged or explode.
AC socket
AUTO SYNC
button
ON button
buttons
Maintenance indicator
Condition
Problem Possible Solution
Temperature
warning
indicator
Normal
Abnormal
Off
Red on/
Standby
The internal
temperature is
abnormally high.
Abnormal
• Blocked air intake
• Relocate the projector to an area
with proper ventilation.
• Clean the air filter of the projector.
• Cooling fan break-
down
• Internal circuit failure
• Clogged air intake
• Take the projector to your nearest
Sharp Authorized Projector Dealer
or Service Center for repair.
Lamp
indicator
Red on/
Standby
The lamp does
not illuminate.
• Burnt-out lamp
• Lamp circuit failure
• Carefully replace the lamp.
•
Take the projector to your nearest
Sharp Authorized Projector Dealer
or Service Center for repair.
•
Please exercise care when
replacing the lamp.
Red on
Time to change
the lamp.
• Remainin
g lamp life
becomes
5% or less.
Po wer
indicator
The power
indicator blinks
in red when the
projector is on.
• The filter cover or
lamp unit cover is
open.
• Securely install the cover.
• If the power indicator blinks in red
even when the filter cover and
lamp unit cover is securely
installed, contact your nearest
Sharp Authorized Projector Dealer
or Service Center for advice.
Green on/
Red on
Red blinks
Green on
Green blinks
when the
lamp is
warming up.
1
2
Tab
• This projector is equipped with air fil-
ters to ensure the optimal operating
condition of the projector.
• The air filters should be cleaned every
100 hours of use. Clean the filters more
often when the projector is used in a
dusty or smoky location.
• Ask your nearest Sharp Authorized Pro-
jector Dealer or Service Center to ex-
change the filter (PFILDA010WJZZ)
when it is no longer possible to clean.
Cleaning and Replacing
the Air Filter
1 Press on the projector
or
STANDBY
on the remote control to
put the projector into the
standby mode.
• Wait until the cooling fan stops.
2 Disconnect the power cord.
• Unplug the power cord from the AC
sock
et.
3 Remove the filter cover.
• Turn the projector over. Loosen the user
service screw (1) that secures the fil-
ter cover. Pressing the tab,
remove the
filt
er cover (
2).
STANDBY button
Air filter (not removable)
User service screw
Air filter (removable)
""
""
" Bottom view
""
""
" Front view
STANDBY
button
STANDBY
AC socket
4 Remove the air filter.
• Pick the air filter up with your fingers and
lift it out of the filter cover.
5 Clean the air filter.
• Clean the dust off the air filter and cover
with a vacuum cleaner extension hose.
6 Replace the air filter.
• Place the air filter underneath the tabs
on the filter cover.
7 Replace the filter cover.
• Align the tab on the filter cover and place
it while pressing the tab to close it (1).
Then tighten the user service screw (2)
to secure the filter cover.
1
2
Tab
User service screw
Note
• Be sure the filter cover is securely installed.
The power will not turn on unless it is
correctly installed.
• If dust or dirt has collected inside the rear
and bottom air filters (not removable), clean
the filter with a vacuum cleaner extension
hose.