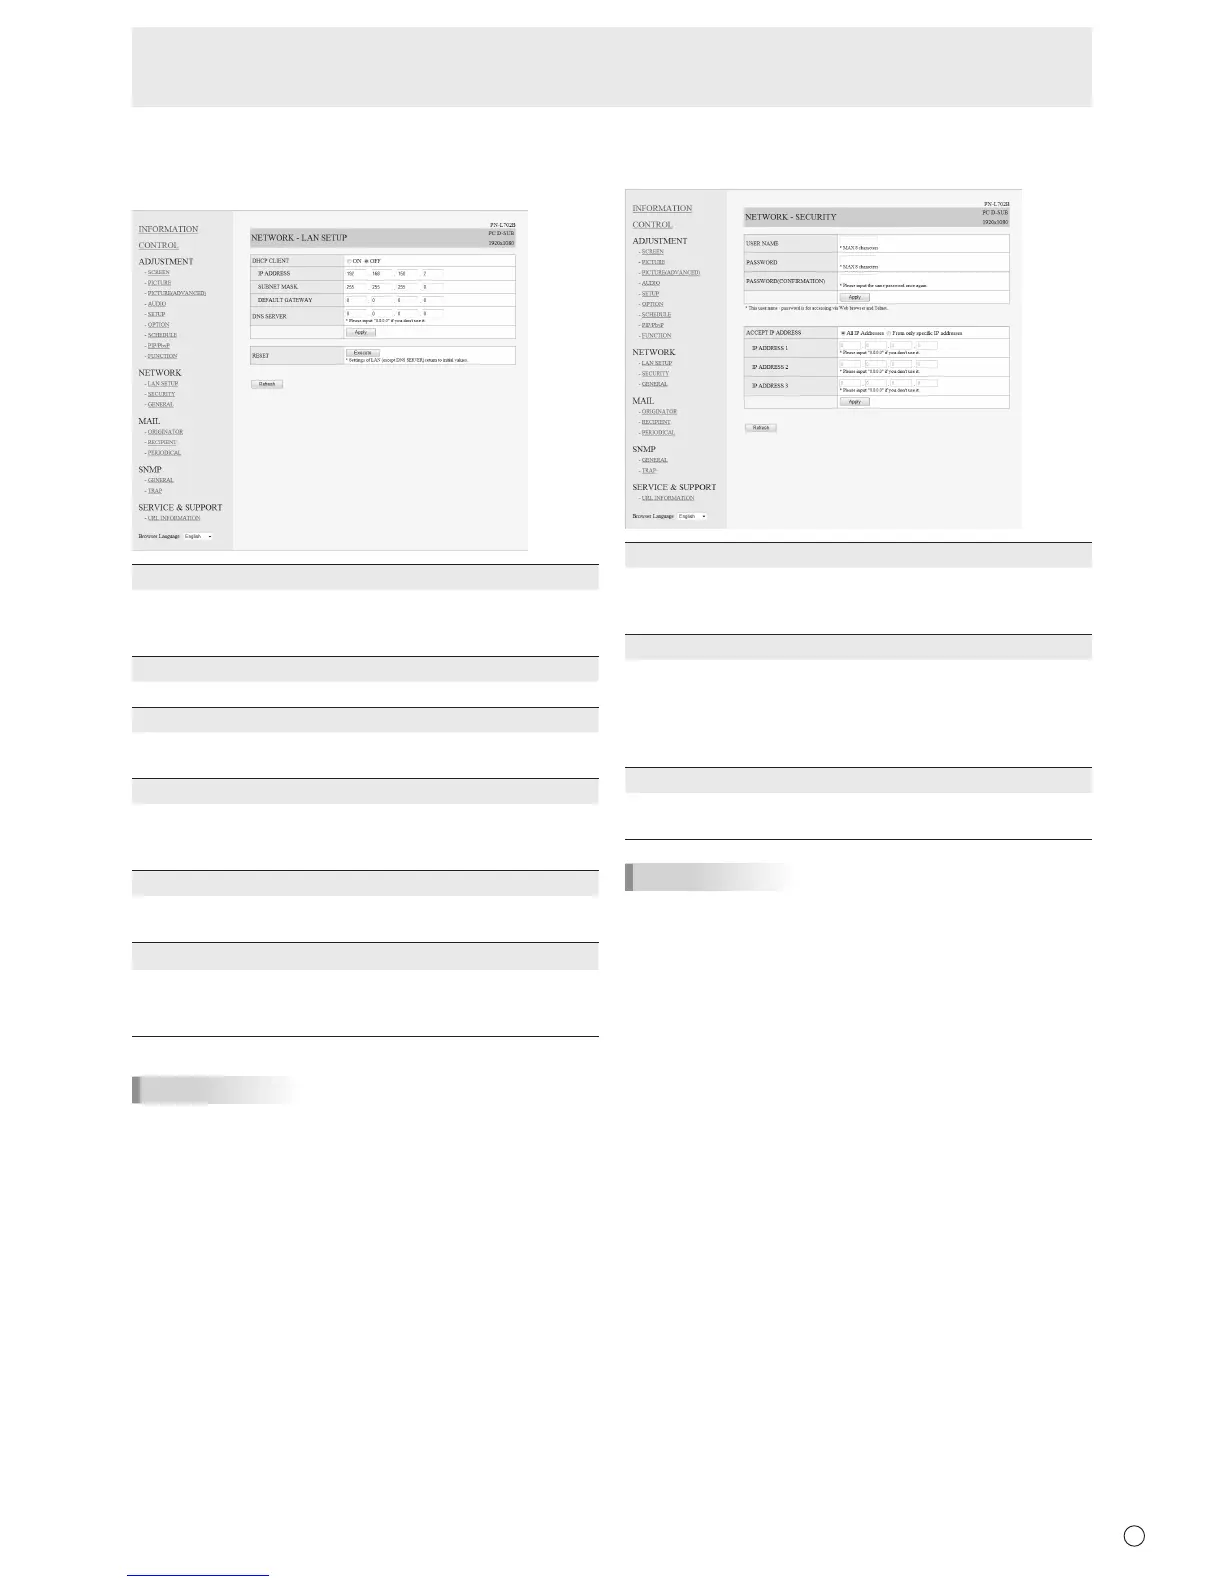
■ NETWORK (LAN SETUP)
This screen allows you to set the settings necessary when the
monitor is connected to a LAN.
DHCP CLIENT
If your LAN has a DHCP server and you wish to obtain an
address automatically, change this setting to “ON”.
To set the address manually, set this to “OFF”.
IP ADDRESS
If the DHCP CLIENT is set to “OFF”, specify an IP address.
SUBNET MASK
If the DHCP CLIENT is set to “OFF”, specify the subnet
mask.
DEFAULT GATEWAY
If the DHCP CLIENT is set to “OFF”, specify the default
gateway.
If you are not using a default gateway, specify “0.0.0.0”.
DNS SERVER
Specify the DNS server address.
If you are not using a DNS server, specify “0.0.0.0”.
RESET
Clicking [Execute] returns all of the LAN SETUP settings
to the factory-preset values except for the DNS SERVER
setting.
TIPS
• WhentheIPaddressissetmanually,theIPaddressesof
the monitor connected to the RS-232C output terminal and
the daisy chain of connected monitors that follows can be
assigned automatically. (See page 26.)
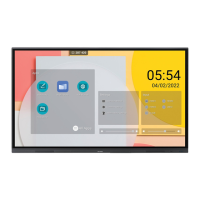
■ NETWORK (SECURITY)
This screen allows you to specify the security-related settings.
USER NAME / PASSWORD
Sets up a user name and password to restrict access to this
monitor.
After entering a user name and password, click [Apply].
ACCEPT IP ADDRESS
You can limit access to this monitor by registering IP
addresses of PCs that should have access.
Tolimitaccess,specifytheoption“FromonlyspecicIP
addresses”. Otherwise, to allow access from any PC, specify
“All IP Addresses”.
IP ADDRESS 1 to 3
If“ACCEPTIPADDRESS”issetto“FromonlyspecicIP
addresses”, enter the IP addresses that you want to allow.
TIPS
• TheUSERNAMEandPASSWORDcanbeupto8
alphanumeric characters or symbols.
• Tocanceltheusernameand/orpasswordafterithasbeen
set, make the box empty and click [Apply].
Controlling the Monitor with a PC (LAN)