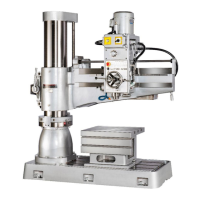
4-4
4.3.2 Level
adjusting
(1) Tools
a. A level scale, with tolerance within 0.02mm/m
b. Spanners, Level adjusting blocks.
(2) Procedure
a. Please ad
ust the level ad
ustin
bolts to
contact the level adjusting blocks.
b
.
Have the level scale put on the worktable.
c. Locate the peak point usin
the level scale and
make it as a reference level.
d
.
Ad
ust the tolerance of the level ad
ustin
bolts to be within one
rad usin
the level
adjusting scale.
1.
The level adjusting bolts.
`
4.3.3 The installation of the electricity
a. Prepare lon
enou
h wire. (about 30 meters). The diameters for all the models
are as follows:
b. Connect L1、L2 and L3 to the main power switch.
c. Connect the ground wire to PE base.
Note: The following are the main power switches and its other relating data.
Power supply AC±10%1Φ 50/60HZ±1HZ
Cross-sectional area of phase
conductors supplying the
equipment` (mm
2
)
Rated current
(A)
Item
Type
220V 380V 415V 440V PE 220V 380V 415V 440V
Power
equipment
capacity
(KVA)
TPR-1230 3.5 3.5 3.5 3.5 3.5 19.3 11.12 10.2 9.7 9.753
TPR-1230H 3.5 3.5 3.5 3.5 3.5 19.7 11.89 11.04 10.33 9.753
TPR-1600H 5.5 5.5 5.5 5.5 5.5 34.8 19.95 18.59 17.38 20.203
TPR-2000H 5.5 5.5 5.5 5.5 5.5 37.8 21.65 21 20 22.193
4.4 The test after installation
a. Have the main power on.
b. Press the emergent stop button to see whether it stops immediately.
c. Power on again.
d Please check whether the motor is running smoothly. If there is any errors,
Please select two of the wires L1, L2 and L3 and change its position.
e Check every mechanism to see whether it works normally.
4.5 The procedure for dismantling the machine
The dismantling procedure is the reverse of the installation one.