5-7
(For TPR-1230, TPR-1230H) (Type II)
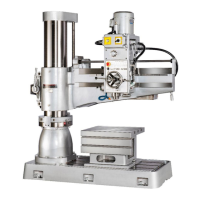
The front view of the machine(Type II) The rear view of the machine
Description for Switches.
1. Cross switch
Main Spindle forward-reverse Switch : When Switch to SPDL .For
The Spindle will forward . When switch to SPDL.REV,The spindle
will reverse.
2. Electric current meter It is for operator’s understanding whether the working situation is
normal.
3. Feeding light It lights when at feeding. After work finished and power off, it turns off .
4. The cutting fluids
switch
It is a switch to start on or off the lubrication when at boring, where the
boring or shearing causes high temperature, making the drilling bit easy
to wear. The lubrication can reduce the temperature and lengthen the life
of the drilling bit. Turn on to start and off to stop the lubrication. The
floating capacity is decided by another knob called the cutting fluids
adjusting knob.
5. Emergent stop It is pressed to stop the machine when at processing and emergence
occurs. Pull it again for back to release the stop.
6. Power light When the external power and the main machine power switch are on, the
power light will be on, indicating to the operator that the power is on.
7. Pole change switch The spindle motor is a pole variable one. A regular motor has 4 pole. But
this one is changeable between 4 and 8 pole. It can change the spindle
rotating speed.
8. Release switch It is to release the clamping of the Arm and the Gearbox so that the
Gearbox can elevate, move for or backwards, left or rightwards.
9. Clamping switch It is used to clamp the Arm and the Gearbox. After the Gearbox, moveable
up and down, for and backwards, left and rightwards, is positioned, You
can use this switch to fasten the above mechanisms in positions.
10. Work light switch It is used to improve lighting where illumination is not enough.
11. Arm uplift switch The arm will uplift when pushing the”UP” button.
12. Arm downlift switch The arm will be lowered down when pushing the”Down” button.