6
4
. STOP Pedal
Press this pedal to stop recording a loop, overdubbing a loop, or playing back a recorded loop.
When in Single Mode, press and hold this pedal to clear all recorded layers of the current loop
recording. When in Multi, Song, or Sync Modes, press and hold this pedal to clear all recorded layers
of the current loop on the currently selected track. Continue to hold the pedal to clear both Track
A and Track B layers of the current loop. These actions cannot be undone.
When your loop is stopped, quickly double-press this pedal to switch to between Track A and Track
B in Multi, Song, or Sync Modes. This allows playback to remain stopped as you switch tracks, as
double-pressing the RECORD + PLAY ( + ) Pedal will initiate playback/overdub directly on the
first press.
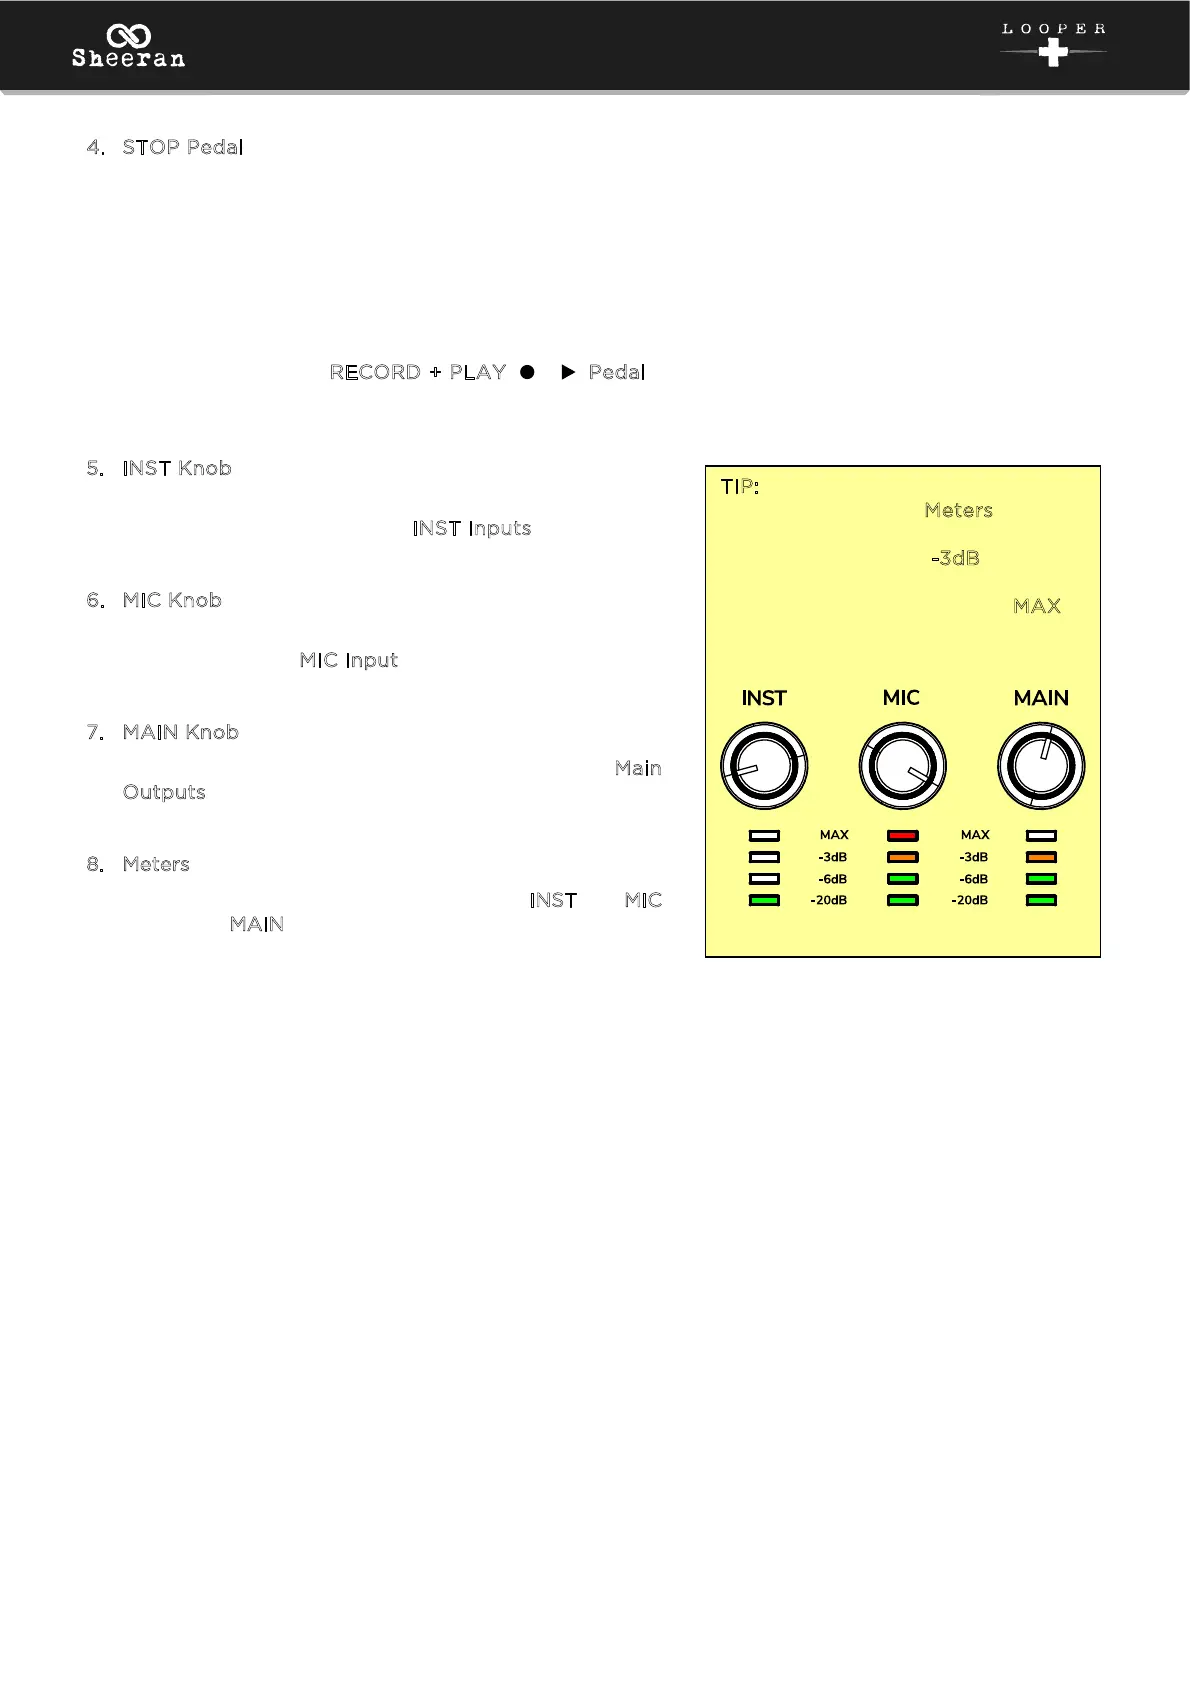
5
. INST Knob
Turn this knob to adjust the input gain of the
instrument connected to the I
NST Inputs.
6
. MIC Knob
Turn this knob to adjust the level of the microphone
connected to the M
IC Input.
7
. MAIN Knob
Turn this knob to adjust the volume level of the M
ain
O
utputs.
8
. Meters
These LEDs indicate the signal level of the I
NST and MIC
inputs and M
AIN output.
TIP: Set these knobs so that the
corresponding LED M
eters (located
below each knob) display a “healthy”
level (amber LED at -
3dB is lit), but
not so high that the meter frequently
“clips” or peaks (red LED at M
AX is
constantly lit), causing distortion in
the audio.
Too low Too high Just right!