ENGINE SYSTEMS
76
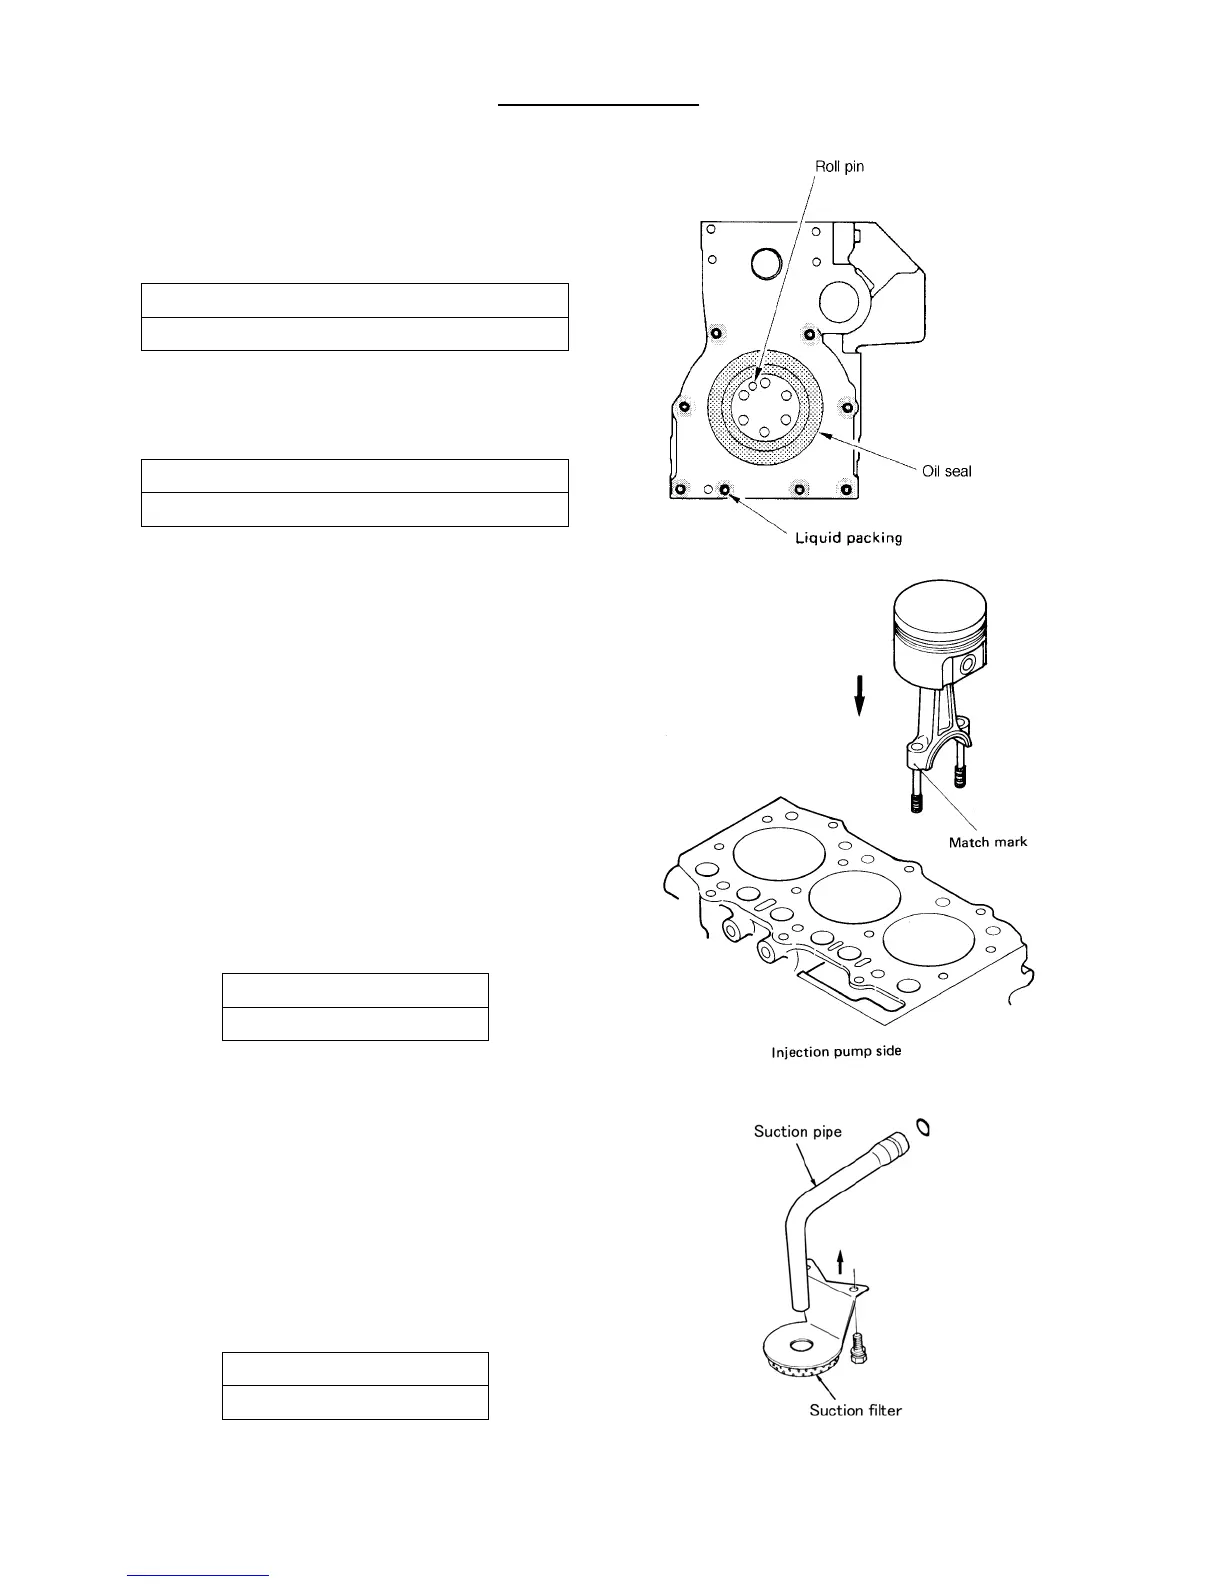
3) Oil seal
4) Rear plate
NOTE: Apply the liquid gasket to around the M 10
screw holes for rear plate.
Rear plate tightening torque:
46 ~ 54 N·m (4.7 ~ 55 k
f·m)
5) Fly wheel
Align the hole to the roll pin on the crankshaft.
Fly wheel tightening torque
69 – 78 N·m (7.0 ~ 8.0 kgf·m)
6) Piston and connecting rod assembly
➀ Coat the metal surface, piston and piston ring with
engine oil.
➁ Turn the ring to allow the oil to ensure the ring
groove sufficiently, and set the ring end gaps at
120° respectively avoiding piston pin direction and
the direction at a right angle to the piston pin.
➂ Insert the ring facing the connecting rod figure
match mark toward the injection pump side, using
ring pliers.
NOTE: Place the smallest connecting rod figure
match mark to the front side so that the
figures increase gradually.
➃ Tighten the connecting rod cap with the specified
torque and check for the axial play.
Connecting rod tightening torque
29 ~ 34 N·m (3.0 ~ 3.5 kgf·m)
NOTE:
1. After tightening, confirm that the crankshaft
moves lightly.
2. The connecting rod should move 0.1 – 0.3 mm in
the axial direction.
7) Suction pipe and Suction filter
➀ Fit an O-ring to the suction pipe and insert the
suction pipe to the cylinder block.
➁ Place the suction pipe end into the suction filter and
fix the suction filter.
Suction filter tightening torque
9 ~3 N·m (0.9 ~ 1.3 k
f·m)
55
56
57