RB-473-B02M
26
Pressing Memory/Add switch after the measurement
allows you to store the Add value (Ad2) at any given
position aside from the Add value already stored in
memory.
After completion of the measurement, set the lens for the left
eye and press . The progressive judgment screen
appears again.
Measure the lens following the same procedure for the right
lens.
You can start measurement from either right or left lens.
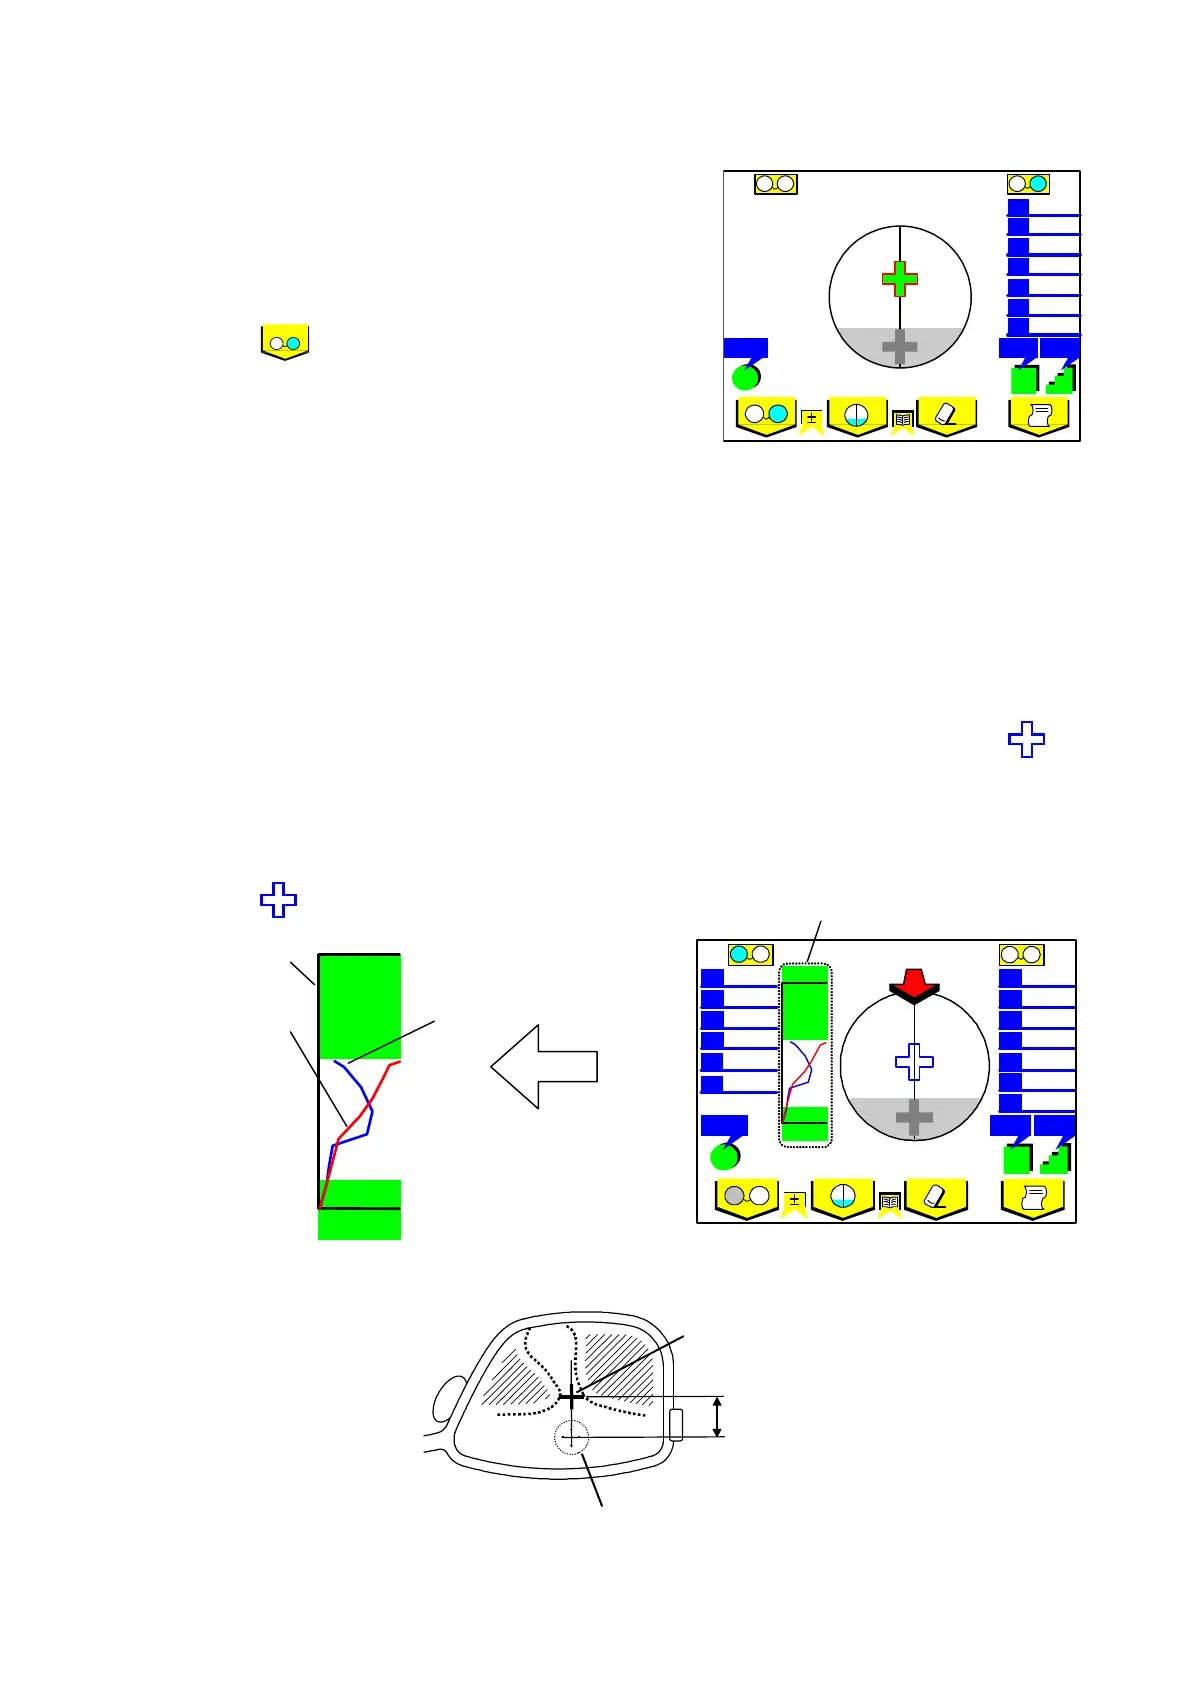
Manual Operation and Graphical Representation of ADD value and Assessment
When you set "Prog. Graph" for ON in the Set up screen, a graph for progressive lens is displayed on the
measurement screen.
Normally the near and far points are automatically detected. However, some lenses may be difficult to do
so. In such a case, measure manually based on the graphs of Add value and assessment.
To measure the far point manually, carry out alignment a ccording to the shape of the alignment cursor
as you do for auto measurement.
For near point measurement, press Memory/Add switch where the Add value becomes the highest while the
alignment cursor stays in the progressive area.
When the near point is achieved, the assessment graph touches the Y coordinate. Pay attention to the shape
of the cursor and the graph position when you do alignment.
<Frame Lens (Reference)>
Far point area
Near the center of the lens
N V
F V
Assessment graph
Add value
graph
Y coordinate
±
25
.
Cyl
Abbe
+
+
Step
(5)
R
S
C
A
Px
Py
Ad1
L
+2.75
+1.25
10
1.00
217
1.00
3.00
±
25
.
+2.75
+1.25
10
1.00
217
1.00
L
Cyl
Step
Abbe
N V
F V
Graph
R
L
S
C
A
Px
Py
Ad1
S
C
A
Px
Py
Ad1
 Loading...