The Showtec Net-8/3 is a cutting-edge network routing device designed to convert ArtNET to DMX512 and DMX512 to ArtNET, making it suitable for a wide range of events, from small to large scale. This device facilitates the transportation of a maximum of 4096 channels over a single CAT5 cable. It integrates a built-in network switch, allowing it to function as an Ethernet repeater, and features 8 isolated DMX-512 universes that can be configured as either inputs or outputs. All settings are easily adjustable through an intuitive menu on a graphic display and buttons located on the front panel.
The Net-8/3 supports both Artnet and Klingnet protocols, offering versatility in control systems. It operates at a data speed of 1 Gbps, ensuring efficient and high-speed network input and output. The device is designed for easy setup, featuring an LCD display and menu buttons on the front for straightforward configuration.
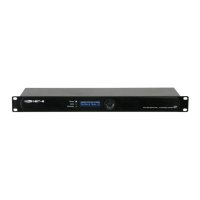
To set up the Net-8/3 with a laptop/PC, first, secure the distributor to a 19-inch rack. Then, connect the Net-8/3 to your DMX fixtures using 3-pin XLR cables. The network switch should be connected to the Net-8/3 using a CAT5, 6, or similar cable, and the laptop/PC should also be connected to the network switch with a compatible cable. Ensure all units are supplied with electric power by plugging their mains power cords into appropriate sockets, but only after the entire system is set up and properly connected. Finally, configure the IP address of the PC/Laptop to 2.0.0.1 and the node to 2.0.0.2.
For setup with a lighting controller, the process is similar. Fasten the distributor to a 19-inch rack and connect the Net-8/3 to your DMX fixtures using 3-pin XLR cables. Connect the network switch to the Net-8/3 with a CAT5, 6, or similar cable, and then connect the lighting controller to the network switch with a compatible cable. As with the PC setup, supply electric power to all units only after the system is fully set up and connected. Set the IP address from the console to 2.0.0.1 and the node to 2.0.0.2.
Fixture linking is crucial for running light shows. The Net-8/3 enables the use of a serial data link to control multiple fixtures with a DMX-512 controller or to synchronize shows in a master/slave operating mode. The total number of channels required by all fixtures on a serial data link determines the number of fixtures the link can support. It's important to daisy-chain fixtures in a single line, with no more than 30 devices connected on one data link to comply with the EIA-485 standard. Exceeding this limit without an optically isolated DMX splitter can degrade the digital DMX signal. The maximum recommended DMX data link distance is 100 meters.
Data cabling requires certified DMX cables or self-constructed data-grade cables to ensure high-quality signal transmission and minimize electromagnetic interference.
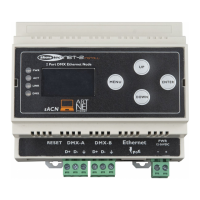
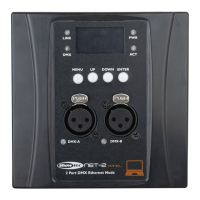
The control panel features an LCD display, along with UP, RIGHT, HOME, LEFT, and DOWN buttons for navigation. Upon startup, the display shows four status modes, providing instant information on key parameters. These modes can be scrolled through using the UP/DOWN buttons. The "Device Name" mode displays the device's name, which can be customized in the main menu. The "Port Status" mode indicates whether each port is connected, not connected, or disabled, and whether it's configured as an input or output. The "Device ID" mode shows the device's ID, also configurable in the main menu. Lastly, the "IP Address" mode displays the device's IP address, which can be set manually or obtained from the network switch.
The main menu offers several options for configuration. "Rename" allows you to change the device's name by scrolling through letters and confirming selections. "Set DHCP" enables or disables DHCP, determining if the device automatically obtains an IP address or requires manual configuration. "Set IP Address" allows for manual input of the IP address. "Set Netmask" provides options for selecting different netmask configurations. "Set DMX Port" allows detailed configuration of each DMX port, including display type (Hexadecimal or Decimal), DMX status (Output, Input, or Disable), and DMX mode (NORMAL or BACKUP for input; SINGLE, HTP, or LTP for output). The DMX mode for input ports determines how the DMX signal is sent to the ArtNet universe, with BACKUP providing redundancy in case of signal loss. For output ports, SINGLE sends the DMX signal from the first selected ArtNet universe, HTP (Highest Takes Precedence) merges signals from two ArtNet universes by taking the highest value for each channel, and LTP (Latest Takes Precedence) merges signals by taking the last changed value. DMX merging is a feature that combines two or more DMX sources to control a single set of lighting fixtures.
Further DMX port options include "Protocol" (ArtNet, SACN, or KlingNet), "Framerate/fs" (DMX frames per second, adjustable from 10 to 35 fr/second, with a factory setting of 40 fr/second), "Network" (defining your network from 0-127), "Sub network" (defining your sub network from 0-15), "Primary" (selecting the 1st Artnet Universe for the port), "Secondary" (selecting the 2nd Artnet Universe for the port), and "Resend" (ensuring merged signals continue sending data even without activity, applicable when DMX Status is Output and DMX Mode is HTP/LTP).
"Set Device ID" allows you to change the device's ID from 0-255. "Set LCD Backlight" controls the LCD display's backlight, allowing it to be always on or to black out after 30 seconds of inactivity. "Set Display" offers "Normal" or "Inversion" options for the text orientation on the LCD. "User preset" provides five pre-programmed configurations: "8 x INPUT" (converts 8 DMX512 inputs to 8 ArtNet universes), "DMX Split 1-7" (DMX port 1 as input, ports 2-8 as outputs), "DMX Split 1-3" (DMX port 1 as input, ports 2-4 as outputs, DMX port 5 as input, ports 6-8 as outputs), "DMX Clone" (converts 4 DMX512 inputs to 4 ArtNet universes and duplicates them to DMX ports 5-8), and "Isolated mode" (receives 8 ArtNet universes and sends them to 8 DMX output ports). "Set Default" resets all settings to factory defaults. "Version" displays the current software version of the device.
Maintenance of the Showtec Net-8/3 is minimal, but regular inspections are recommended. Annually, a qualified expert should inspect safety-related and machine-technical installations. This includes checking that all screws are tightly connected and free from corrosion, ensuring no deformations on housings or fixations, verifying that mechanically moving parts show no signs of wear, and confirming that electric power supply cables are undamaged. The unit should be kept clean by disconnecting the mains power supply and wiping the cover with a damp cloth. The front glass panel can be cleaned with glass cleaner and a soft cloth. Avoid alcohol or solvents, and never immerse the device in liquid. Keep all DMX and audio connections clean and dry before linking equipment or supplying electric power.
In case of a fuse blowout due to power surges, short-circuits, or inappropriate electrical power supply, the fuse can be replaced. First, unplug the unit from the power source. Use a flat-headed screwdriver to gently push and turn the fuse cover to the left to remove it. Take out the old fuse (if brown or unclear, it is burned out) and insert a replacement fuse of the same type and specification as indicated on the product label. Reinsert the fuse holder.
Troubleshooting simple problems involves a systematic approach. If there is no light, check the power supply, the distributor, and the fuse. Ensure the unit is plugged into an appropriate power supply, and if the fuse is blown, replace it. If the problem persists, do not open the Net-8/3, as this may void the warranty; return it to your dealer. If there is no response to DMX, suspect issues with the DMX cable or connectors, the controller, or the light effect's DMX card. Verify DMX settings and addresses. Change the DMX cable and retest. Determine if the DMX recorder, light controller, or light effect is at fault by testing with other DMX products. If a fixture is defective and disrupts data transmission, bypass it by unplugging its connectors and connecting them directly. If 3-pin XLR Out pins are reversed, install a phase-reversing cable or swap pins 2 and 3 in the erratic fixture. If LEDs are damaged or power supply settings don't match local AC voltage and frequency, disconnect the fixture and return it to your dealer, or check and correct settings as necessary.