Shure Incorporated
31/38
2.
3.
1.
2.
3.
4.
5.
6.
•
•
•
•
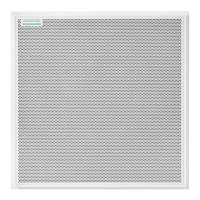
Use masking tape to cover the hook-and-loop fastener strips on the grille.
Paint the frame and grille. Let them dry completely before reassembling. Do not paint any part of the main assembly.
Step 3: Reassembly
Attach the foam piece to the grille with the hook-and-loop fastener strips.
Remove one side of the frame as in step 1.4. Slide the grille back into the frame.
Attach the remaining side of the frame and secure it with the 4 screws.
Attach the LED lightpipe to the black plastic guide piece.
Align the LED with the lightpipe and put the main assembly back in place on the frame.
Note: The label on the assembly is in the corner that corresponds to the LED.
Install 6 screws per side to secure the main assembly to the frame. Do not over-tighten.
Using Command Strings
This device receives logic commands over the network. Many parameters controlled through Designer can be controlled using
a third-party control system, using the appropriate command string.
Common applications:
Mute
LED color and behavior
Loading presets
Adjusting levels
A complete list of command strings is available at:
pubs.shure.com/command-strings/mxa902.