Electrical installation
74 © SICK AG · Germany · All rights reserved · Subject to change without notice 8012471/ZN27/2017-06-09
Operating Instructions
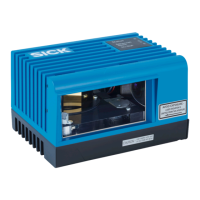
LMS1xx Laser Measurement Sensors
Chapter 6
6.4.3 LMS10x/LMS12x/LMS173/LMC12x: Wiring the system connector
Reduced enclosure rating!
If the system connector is removed, the LMS10x/LMS12x/LMS173/LMC12x are no longer
compliant with the enclosure rating IP 65.
To prevent damage due to the entry of moisture and dirt, only open the system
connector in dry, clean surroundings.
If necessary, pre-wire and fit the system connector in suitable surroundings.
Prerequisites on the device for enclosure rating IP 65
The system connector is plugged on the device, its four screws are tightended.
The cable in the PG7 cable entry has a suitable outside diameter and is fixed by the lock
nut.
The cable plugged into the M12 round plug-in connection (Ethernet) is screwed tight.
If the conncetion is not used,it must be fitted with a protective plug that is screwed tight
(as in the delivery condition).
The black rubber plate of the auxiliary interface on the front is closed and must be flush
mounted on the housing.
1. Ensure the power supply to which the LMS1xx is connected is switched off.
2. Remove system connector on the underside of the device. For this purpose undo the
four fixing screws (
Fig. 10.3.1 on page 99) and pull the system connector carefully off
the device perpendicular to the base.
3. The PG7 cable entry (metal) has an earth connection to the device. If a screened con-
necting cable is used, as necessary connect the screen braid on the cable to the cable
entry. For this purpose, shorten the screen braid as appropriate before assembling the
cable entry and fit over the plastic insert for the cable entry.
4. Undo fitting for the PG7 cable entry.
5. Pull the cable for power supply voltage, switching outputs and data interface (RS-232)
with maximum outside diameter 5.6
mm through the plastic insert for the PG7 cable
entry.
6. Connect electrically isolated wires without draw to the terminal block regarding the
terminal assignment (
Tab. 19 on page 67).
7. If necessary, connect screen braid on the cable to the cable entry.
8. Fit PG7 cable entry fitting and tighten.
9. Carefully re-fit the system connector to the LMS1xx.
10. Tighten the fixing screws for the system connector.