5 Mounting
5.1 Installation
Important information
NOTICE
•
Arrange the safety switch and actuator so that damage due to unintentional out‐
side influences is prevented.
•
If any metal drilling occurs during the mounting work, protect the safety switch
from metal particles.
Prerequisites
•
Project planning is completed.
•
Assembly is carried out according to the project planning.
•
Dangerous condition of the machine is and remains switched off during mounting.
•
Do not use a safety switch and actuator as a stop.
•
The set-up and mounting of the safety switch and actuator must be stable enough
to maintain proper operation.
•
Use only reliable mounting elements that can only be removed with tools.
•
The supplied mounting bracket is used for the actuator.
•
If possible, use non-detachable mounting methods for actuators (such as welding,
gluing, safety screws, or rivets).
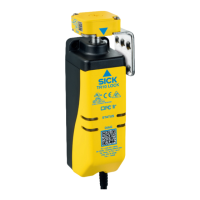
Mounting the actuator
1. Mount the actuator to the mounting bracket with 2 TX10 Torx wrench screws.
When doing so, note the following:
°
Max. torque: 2Nm
°
The guard locking pin must first pass through the mounting bracket.
Figure 10: The guard locking pin must first pass through the mounting bracket
°
The alignment triangles on the actuator and safety switch must point to one
another.
Figure 11: Correct alignment between safety switch and actuator
5 MOUNTING
20
O P E R A T I N G I N S T R U C T I O N S | TR10 Lock 8019972/1CS1/2022-07-20 | SICK
Subject to change without notice