0 – VI 3ZW1012-0WL11-0AB1
0.5 Inhaltsverzeichnis
Symbole 0- II
Warnhinweise 0- III
Sicherheitshinweise 0- V
Hinweis zum Umfang der Anleitung 0- V
Inhaltsverzeichnis 0- VI
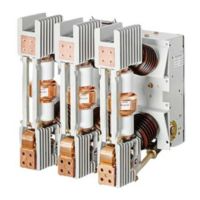
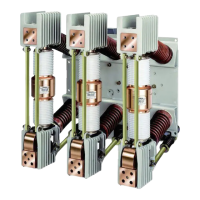
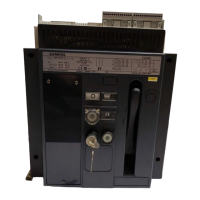
1Aufbau 1- 1
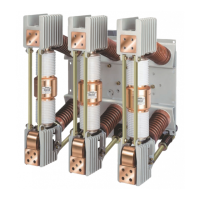
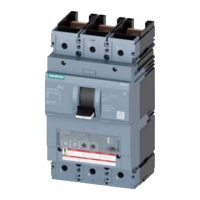
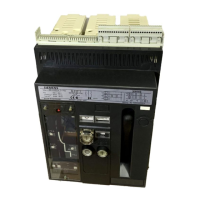
Leistungsschalter 1- 1
Einschubrahmen 1- 2
2Schilder 2- 1
Ausstattungsschild Leistungsschalter 2- 1
Schild Bemessungsstrommodul 2- 1
Typschild Leistungsschalter 2- 2
Typschild Einschubrahmen 2- 2
3 Normen, Bestimmungen 3- 1
Normen 3- 1
4 Transport 4- 1
Überseeverpackung 4- 1
Auspacken 4- 1
Transport mit Kran 4- 2
5Montage 5- 1
Einbau 5- 1
Einbaulage 5- 1
Einbau auf waagerechter Ebene 5- 2
Einbau an senkrechter Ebene mit Tragwinkel 5- 2
Anschlussschienen 5- 4
Horizontalanschluss 5- 4
Flanschanschluss (nur Einschubrahmen) 5- 4
Frontanschluss 5- 5
Festeinbauschalter 5- 5
Einschubrahmen 5- 6
Vertikalanschluss 5- 7
Festeinbauschalter 5- 7
Einschubrahmen 5- 8
Zulässige Anschlussschienen-Varianten für
Baugröße I 1000 V DC Leistungstrennschalter 5- 10
Zulässige Verschaltungen, Schaltpläne für
Baugröße I 1000 V DC Leistungstrennschalter 5- 10
Bestellnummern 5- 11
Hauptleiter anschließen 5- 13
Hauptleiteranschluss säubern 5- 13
Kupfer-Anlagenschienen säubern 5- 13
Anlagenseitige Schienen festschrauben 5- 13
Hauptleiter abstützen 5- 14
Hilfsleiteranschlüsse 5- 15
Querschnitte 5- 15
Messerleiste 5- 16
Anordnung 5- 16
Nachrüsten 5- 16
Leitungen anschließen 5- 17
Schleifkontaktmodul 5- 17
Nachrüsten 5- 17
Hilfsstromstecker 5- 18
Ausführungen 5- 18
Nur Festeinbauschalter:
Führungszungen anbringen 5- 18
Nur Festeinbauschalter
Kodierung Hilfsstromstecker - Messerleiste 5- 19
Hilfsstromstecker aufsetzen 5- 19
0.5 Table of contents
Symbols 0- II
Safety instructions 0- III
Security information 0- V
Note regarding the manuals scope 0- V
Table of contents 0- VI
1 Design 1- 1
Circuit breaker 1- 1
Guide frame 1- 2
2 Labels 2- 1
Circuit breaker options label 2- 1
Rating Plug label 2- 1
Type label circuit breaker 2- 2
Type label guide frame 2- 2
3 Standard specifications 3- 1
Standards 3- 1
4 Transport 4- 1
Overseas packing 4- 1
Unpacking 4- 1
Lifting by crane 4- 2
5 Installation 5- 1
Mounting 5- 1
Mounting position 5- 1
Mounting on horizontal surface 5- 2
Mounting to vertical surface with mounting angles 5- 2
Connecting bars 5- 4
Horizontal connection 5- 4
Flange connection (guide frame only) 5- 4
Front connection 5- 5
Fixed-mounted breaker 5- 5
Guide frame 5- 6
Vertical connection 5- 7
Fixed-mounted breaker 5- 7
Guide frame 5- 8
Permissible connection bar versions for frame
size I 1000 V DC non-automatic air circuit breaker 5- 10
Permissible connections, connection schemes for frame
size I 1000 V DC non-automatic air circuit breaker 5- 10
Order numbers 5- 11
Connecting the main conductors 5- 13
Cleaning the main conductor connection 5- 13
Cleaning the copper bars 5- 13
Bolt tight line-side bars 5- 13
Bracing the main conductors 5- 14
Auxiliary conductors 5- 15
Cross sections 5- 15
Receptacle 5- 16
Arrangement 5- 16
Retrofitting 5- 16
Connecting secondary wiring 5- 17
Sliding contact module 5- 17
Retrofitting 5- 17
Auxiliary connectors 5- 18
Versions 5- 18
Fixed-mounted breaker only:
mounting of guide tongues 5- 18
Fixed-mounted breaker only
Coding auxiliary connectors 5- 19
Mounting secondary disconnects 5- 19
 Loading...