Operation
196/214 Revision 11 • INSTALLATION AND OPERATING INSTRUCTIONS • 8DA10 • 861-9601.9
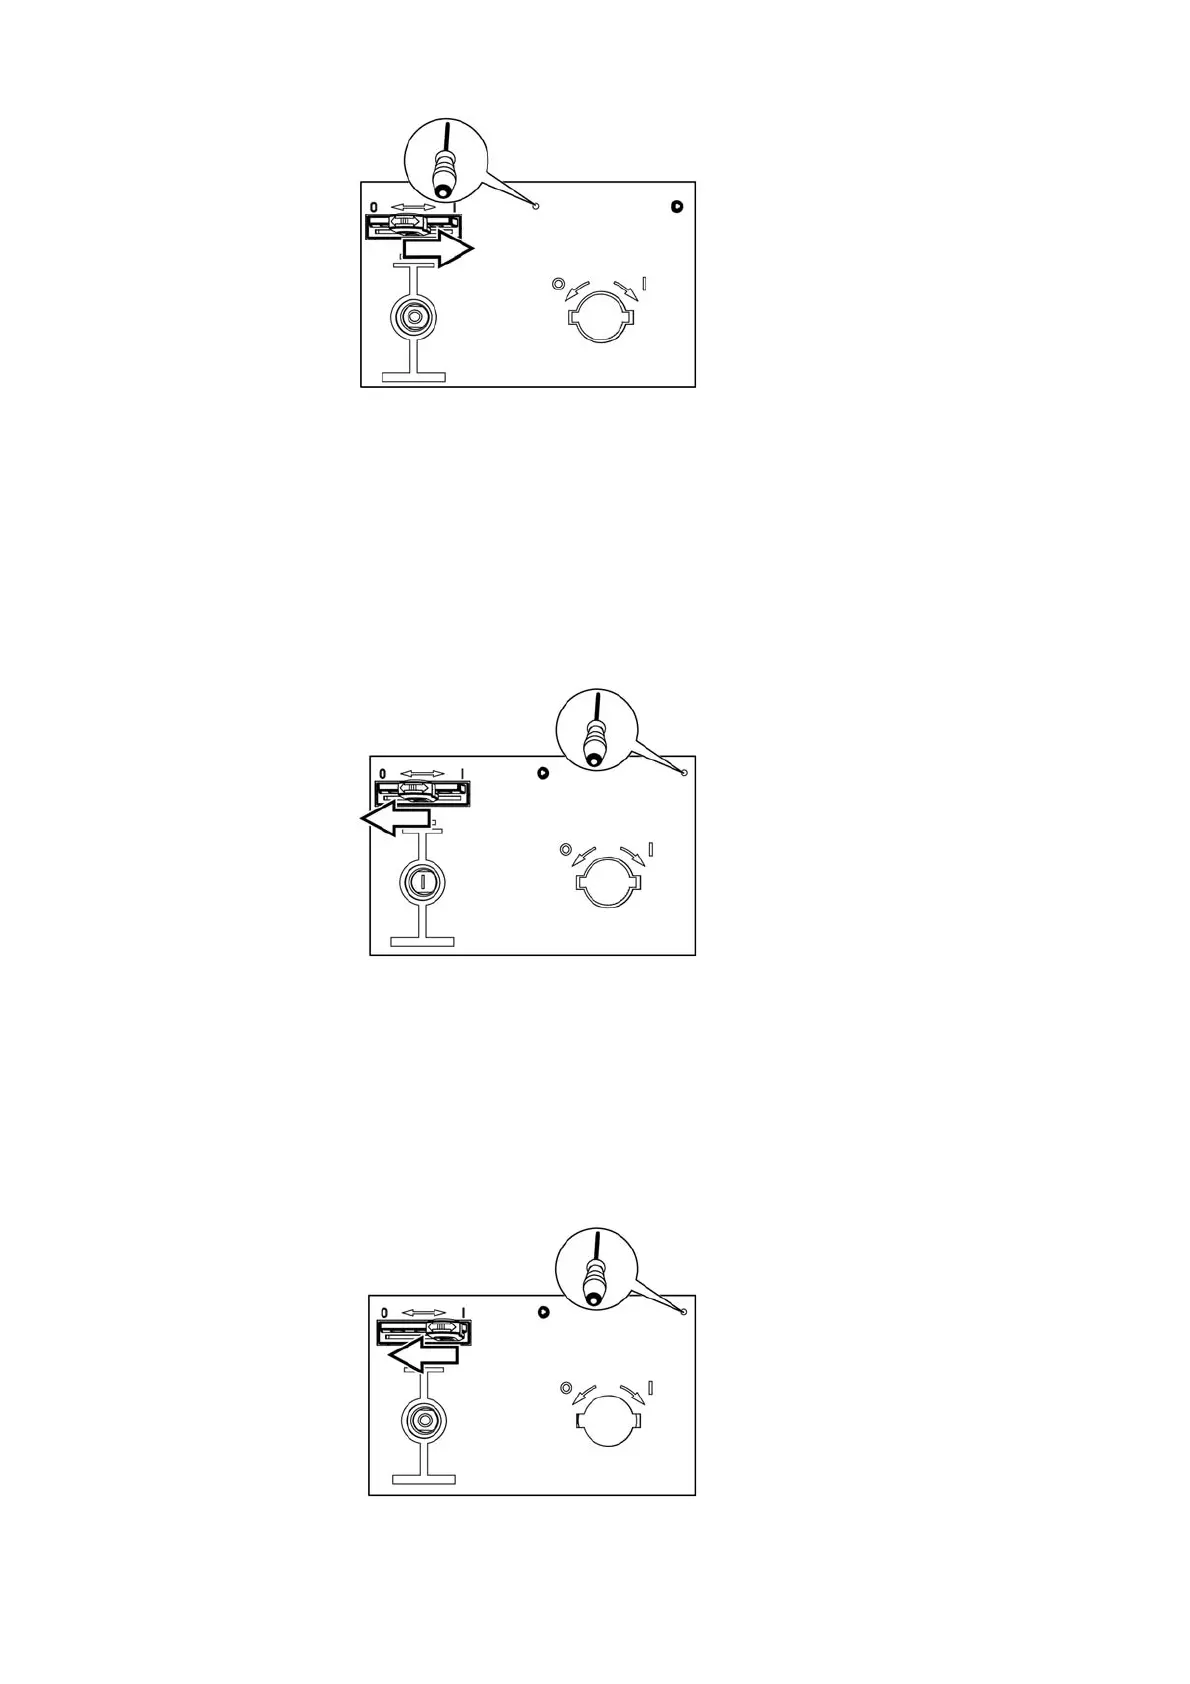
Fig. 209: Pushing the control gate to the right position
To push the control gate from center position to left position:
➭ Remove the right-hand plastic split rivet.
➭ Insert the screwdriver into the right-hand opening and push the solenoid back.
➭ Push the control gate to the left.
➭ Pull out the screwdriver.
➭ Push the control gate to the left as far as it will go.
➭ Reinstall the right-hand plastic split rivet.
✔ The right-hand solenoid is released again, blocking further movements.
Fig. 210: Pushing the control gate to the left position
To push the control gate from the right or left position to the center position again:
➭ Remove the plastic split rivet (according to the position of the control gate).
➭ Push the solenoid back using the screwdriver.
➭ Push the control gate to the center position.
➭ Pull out the screwdriver.
➭ Reinstall the plastic split rivet.
✔ The solenoid is released again, blocking further movements.
Fig. 211: Pushing the control gate to the center position

 Loading...