Do you have a question about the Siemens 8DA10 Series and is the answer not in the manual?
Manual detailing installation and operation procedures for the switchgear.
Defines hazard signal words (Danger, Warning, Caution, Notice) and symbols.
Covers important safety rules, handling, and general precautions for operation.
Lists the five fundamental safety rules for electrical work.
Specifies required personal protective equipment based on arc classification.
Describes the intended use and environmental conditions for the switchgear.
Details qualifications and roles required for installation and supervision.
Provides a general overview of the switchgear panel components and dimensions.
Illustrates different configurations of switchgear panels with schematic diagrams.
Detailed view of a circuit-breaker panel with numbered components.
Detailed view of a three-position disconnector panel with numbered components.
Detailed view of a bus sectionalizer panel with numbered components.
Describes the accommodation for protection, control, and metering equipment.
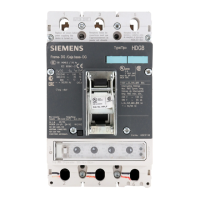
Details the components of the vacuum circuit-breaker.
Explains the design and components of the circuit-breaker operating mechanism.
Lists basic and additional equipment for the circuit-breaker, including release combinations.
Combines disconnector and earthing switch functions; designed for no-load operation.
Describes interlocks between the disconnector and the circuit-breaker for safe operation.
Explains the function and components of the busbar earthing switch.
Features, mounting locations, and electrical data of voltage transformers.
Details features, mounting locations, and electrical data of current transformers.
Explains the role of gas compartments in switchgear operation and restrictions.
Describes the characteristics of bushings for plug-in systems and connections.
Details plug sizes, current ratings, and withstand voltages for cable plugs.
Describes systems for voltage detection according to IEC and VDE standards.
Information on upgrading switchgear for earthquake-prone regions.
Lists standard accessories included with the switchgear.
Lists optional accessories available for the switchgear.
Provides electrical specifications for the complete switchgear, including insulation and current ratings.
Details operating times, number of operating cycles, and release types for the circuit-breaker.
Specifies endurance classes for switching devices according to IEC standards.
Describes the properties and handling of SF6 insulating gas used in the switchgear.
Lists relevant standards and prescriptions for the switchgear.
Illustrates the phase sequence of busbars.
Explains the information provided on the switchgear panel rating plate.
Outlines requirements for the switchgear room and general installation stipulations.
Details requirements for the installation location, including room planning and dimensions.
Discusses suitable floor constructions like steel girder, reinforced-concrete, and double floors.
Specifies requirements for the substation building's earthing system.
Provides details on floor openings, fixing points, and foundation requirements for panels.
Details dimensions, transport weights, and center of gravity for transport units.
Covers preliminary clarifications, installation materials, and tools required before starting.
Illustrates different busbar housing covers and their features.
Lists applicable tightening torques for various joints and components.
Provides recommendations for ensuring electromagnetic compatibility during installation.
Covers packing, transport, and intermediate storage procedures and precautions.
Guidelines for storing switchgear parts and accessories before installation.
Details procedures for safely transporting and unloading switchgear units.
Describes methods for safely setting down transport units at the installation site.
Provides instructions for aligning the switchgear panels after placement.
Explains how to check SF6 gas pressure in compartments before operation.
General steps for installing the switchgear assembly.
Details the process of preparing busbar assemblies by removing transport blocks.
Describes the procedure for aligning and joining switchgear panels.
Explains how to fasten busbars through the flanges of busbar housings.
Covers final steps like tightening bolts and checking contact overlapping.
Shows how panel groups are pre-assembled with panel links at the factory.
Details the mounting procedure for the cable bracket.
Describes how to install and interconnect earthing busbars across switchgear panels.
Explains the mounting of the short-circuit bridge on panel connection housings.
Details the mounting of an optional earthing bar for panel connections.
Describes how to mount the short-circuit bridge on bus sectionalizer housings.
Procedures for interconnecting panels using a twin busbar system.
Instructions for dismantling the upper row of busbar housings for panel interconnection.
Procedure for removing busbars linked to the twin busbar connection.
Steps for removing the upper busbar housing system.
Instructions for mounting supporting angles and protective caps.
Procedure for cleaning and greasing busbar housing flanges and sealing rings.
Details on setting down and mounting busbar housings for interconnection.
Instructions for bolting busbar housings together, including earthing lugs.
Procedure for inserting and bolting busbars together using bar supports.
Describes the assembly of the operating shafts and coupling rods for disconnectable components.
Instructions for securing the operating shaft with spring-type straight pins.
Details procedures involving SF6 gas before the switchgear is commissioned.
Details busbar assembly and filling gas compartments with SF6 gas.
Procedure for evacuating busbar runs using a vacuum pump before SF6 filling.
Steps for filling busbar runs with SF6 gas to the required pressure.
Covers installing panel connections and filling circuit-breaker housings with SF6.
Steps for assembling separately supplied panel connections.
Procedure for replacing desiccant bags in circuit-breaker housings.
Procedure for evacuating circuit-breaker housings before SF6 filling.
Describes installing solid-insulated bars and filling housings with SF6 gas.
Details the process of mounting solid-insulated bars into the circuit-breaker housing.
Instructions for performing high-voltage tests on the installed switchgear.
Steps required before performing the power-frequency voltage test.
Instructions for applying the power-frequency test voltage.
General procedures for installing voltage transformers.
Step-by-step guide for installing 4MT3 voltage transformers on the busbar.
Step-by-step guide for installing 4MU4 voltage transformers on the busbar.
Procedure for installing 4MT7 voltage transformers at the cable feeder.
General procedures for removing voltage transformers.
Instructions for safely removing 4MT3 voltage transformers from the busbar.
Procedure for safely removing 4MU4 voltage transformers from the busbar.
Steps for safely removing 4MT7 voltage transformers from the cable feeder.
Describes various busbar components and their basic assembly operations.
Example of assembly operations for busbar voltage transformers.
Assembly operations for solid-insulated bar connections.
Assembly operations for gas-insulated bar connections.
Step-by-step guide for installing bus sectionalizer panels for different current ratings.
Details the bus sectionalizer busbar installation for the 1250 A version.
Details the bus sectionalizer busbar installation for the 3150 A version.
Procedures for testing switchgear components and functions.
Procedures for checking SF6 gas pressure, leakage, and quality.
Covers checks for current transformer circuits and protection devices.
Ensures correct tightening and earthing of high-voltage cable connections.
Verifies screw and plug-in connections, and auxiliary cable connections.
Covers final steps after main installation, including cable and cover mounting.
Instructions for mounting cables with plugs and cable brackets.
Describes connecting low-voltage customer cables to terminals.
Procedure for screwing metal covers back onto the frames.
Details installation steps for IPX1 degree of protection.
Details mounting protection plates and sealing ledges for IP31D protection.
Procedure for fastening sealing ledges and angles for panel junctions.
Describes the process of installing the rear walls of the switchgear.
Instructions for fastening fixing cross members to busbar housings.
Specifies the number of bolts needed for attaching retainers.
Procedure for mounting the lower rear walls of the switchgear.
Procedure for mounting the upper rear walls of the switchgear.
Describes the installation process for the end walls of the switchgear.
Shows the fixing points for the termination plate on the panel.
Describes the insertion and tightening of the front end cover.
Illustrates fixing points for the rear end cover.
Shows fixing points for the upper arc protection walls.
Illustrates fixing points for central arc protection walls.
Shows fixing points for the lower arc protection walls.
Illustrates fixing points for the long air guide.
Shows fixing points for the lower end wall.
Illustrates fixing points for the upper end wall.
Procedures for verifying installation and performing initial tests.
Final check to ensure all installation work is completed correctly.
Verifies proper operation of switchgear components without high voltage.
Manual operation checks for circuit-breakers and disconnectors.
Checks electrical operation of circuit-breakers and motors.
Verifies proper function of mechanical and electromechanical interlocks.
Procedure to activate the undervoltage release for circuit-breaker operation.
Ensures all standard accessories are available and accessible.
Checks firmware versions on protection devices and suggests updates.
Notes modifications to circuit diagrams and requests corrections.
Ensures operating personnel are trained on technical details and operation.
Details hazards associated with internal arcing and explosion, and protective measures.
Provides an overview of control elements and indicators on the circuit-breaker panel.
Explains the meaning of various switch positions and faulty indications.
Details control elements and indicators specific to the circuit-breaker.
Details control elements and indicators for the three-position disconnector.
Shows the location of the position indicator at the rear of the switchgear.
Describes operating levers, adapters, and hand cranks for switchgear operation.
Explains mechanical interlocks between switching devices for safe operation.
Tabulates interlocking conditions between various switchgear components.
Procedures for operating the circuit-breaker, including manual and emergency actions.
Procedure for manually closing the circuit-breaker, including preconditions.
Procedure for manually opening the circuit-breaker, including preconditions.
Details the emergency release mechanism for the circuit-breaker.
Steps for performing test operations on the circuit-breaker without auxiliary voltage.
Procedure for manually charging the closing spring using a hand crank.
Describes operations involving both circuit-breakers and three-position disconnectors.
Describes switching operations on circuit-breaker panels, including disconnector precautions.
Step-by-step procedure for connecting a feeder to the busbar.
Step-by-step procedure for disconnecting a feeder from the busbar.
Procedure for earthing a feeder, including disconnector and circuit-breaker operations.
Procedure for de-earthing a feeder, including disconnector and circuit-breaker operations.
Describes switching operations for coupling busbar sections in bus sectionalizer panels.
Procedure for decoupling busbar sections in bus sectionalizer panels.
Steps for earthing busbar section 1 in the left-hand panel.
Procedure for de-earthing busbar section 1 in the left-hand panel.
Steps for earthing busbar section 2 in the right-hand panel.
Procedure for de-earthing busbar section 2 in the right-hand panel.
Describes switching operations for disconnectable busbar components.
Procedure for connecting voltage transformers or busbar connections to the busbar.
Steps for disconnecting voltage transformers from the busbar.
Procedure for earthing voltage transformers.
Procedure for de-earthing voltage transformers.
Describes switching operations for busbar connections with a three-position disconnector.
Procedure for earthing the feeder using a three-position disconnector.
Procedure for de-earthing the feeder using a three-position disconnector.
Control of disconnectors with motor operating mechanisms.
Manual operation procedures when motor mechanism fails.
Warning about potential damage from misaligned operating levers.
Notes on end positions when using operating levers with adapters.
Manual operation for DISCONNECTING function in case of failure.
Manual operation for READY-TO-EARTH function in case of failure.
Guidelines for switching operations after emergency procedures.
Instructions for operating the busbar earthing switch.
Describes control elements and indicators for the busbar earthing switch.
Step-by-step procedure for closing the busbar earthing switch.
Step-by-step procedure for opening the busbar earthing switch.
Procedure for emergency release of interlocks on the busbar earthing switch.
Procedures for verifying safe electrical isolation before work.
Details safe isolation verification using LRM plug-in sockets.
Explains indications from VOIS and CAPDIS voltage detecting systems.
Describes indications from WEGA voltage detecting systems.
Procedures for testing cables, including safety and test parameters.
Covers safety instructions related to high voltage during cable testing.
Specifies DC and AC test voltages and durations for cable testing.
Describes test arrangements for cables, both dismantled and connected.
Information on maintenance, inspection, and repair of the switchgear.
Provides maintenance recommendations and intervals for the switchgear.
Details maintenance procedures for the vacuum circuit-breaker operating mechanism.
Provides a lubrication chart for the 3AH49 operating mechanism.
Instructions for maintaining bolted joints and replacing sealing rings.
Lists recommended cleaning agents and aids for switchgear components.
Lists permissible lubricants for various switchgear parts.
Information on contacting Siemens for extension and replacement services.
Notes that specific spare parts are not recommended due to optimization.
Information on the expected service life and end-of-life procedures.
Estimates the service life of the switchgear and factors affecting it.
Details SF6 gas properties and environmental considerations.
Describes the environmentally compatible recycling of switchgear components.
Provides contact information for global, Brazil, and India customer support.
| Brand | Siemens |
|---|---|
| Model | 8DA10 Series |
| Category | Circuit breakers |
| Language | English |