861-9601.9 • INSTALLATION AND OPERATING INSTRUCTIONS • 8DA10 • Revision 11 129/214
Installation
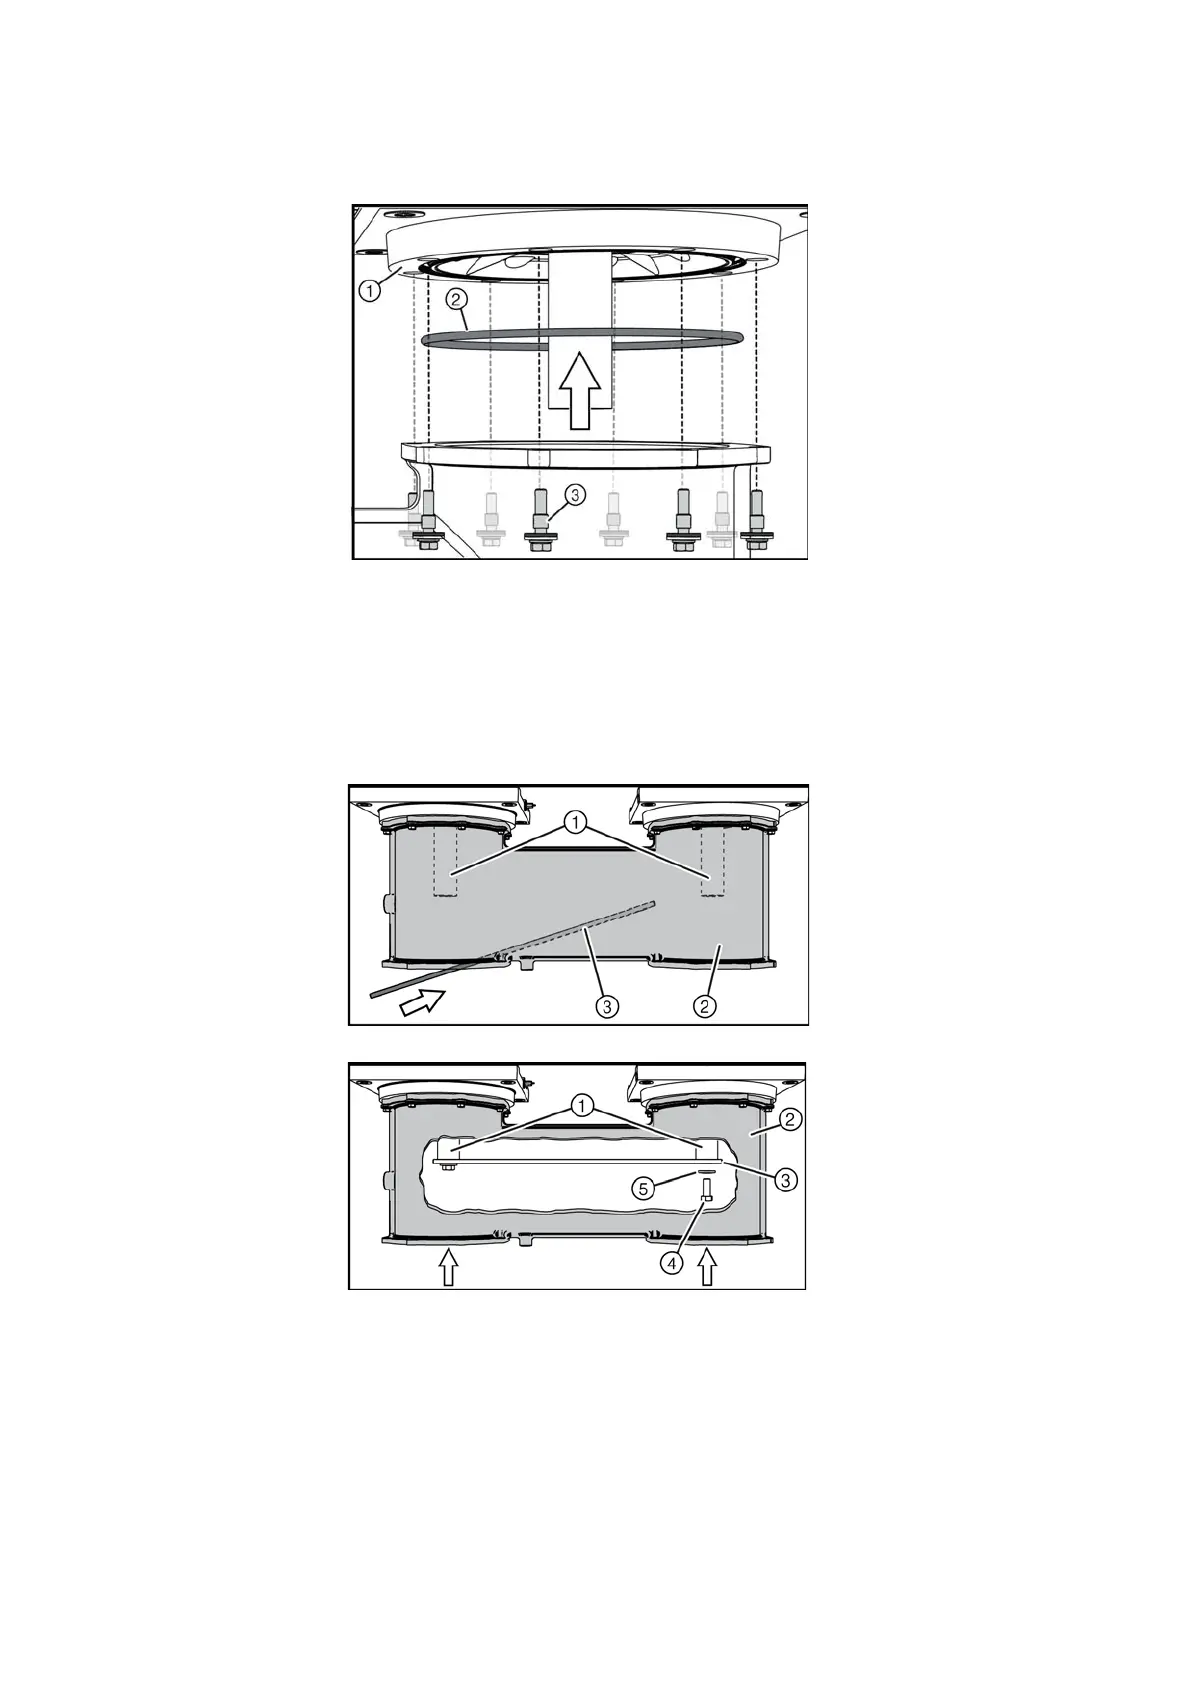
➭ Bolt the bus sectionalizer housing together with the pole supporting plate using bolt-and-
washer assemblies, conical spring washers, insulating washers and insulating sleeves M8.
Tightening torque: 20 Nm.
➭ Remove the 2 housing covers from the bus sectionalizer. Keep all bolt-and-washer
assemblies and nuts for later reuse.
➭ Undo the 2 hexagon head bolts and conical spring washers from the bus sectionalizer
busbar. Keep the bolting material for later reuse.
➭ Push the bus sectionalizer busbar into the bus sectionalizer housing and fasten it to the
contact studs on both sides using one hexagon head bolt M16x40 and conical spring
washer each. Tightening torque: 130 Nm.
①
Pole supporting plate
②
Sealing ring (O-ring)
③
Bolt-and-washer
assembly M8 with
conical spring washer,
insulating washer and
insulating sleeve
①
Contact stud
②
Bus sectionalizer housing
③
Bus sectionalizer busbar
Fig. 153: Bus sectionalizer busbar for 1250 A version
④
Hexagon head bolt
⑤
Conical spring washer
 Loading...