Installation
130/214 Revision 11 • INSTALLATION AND OPERATING INSTRUCTIONS • 8DA10 • 861-9601.9
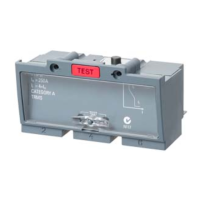
➭ Only for 3150 A version: Insert the 2 bus sectionalizer busbars into the bus sectionalizer
housing and fasten to the contact stud on both sides using three cup head square neck bolts
M10x75, conical spring washers and hexagon nuts each. Tightening torque: 40 Nm.
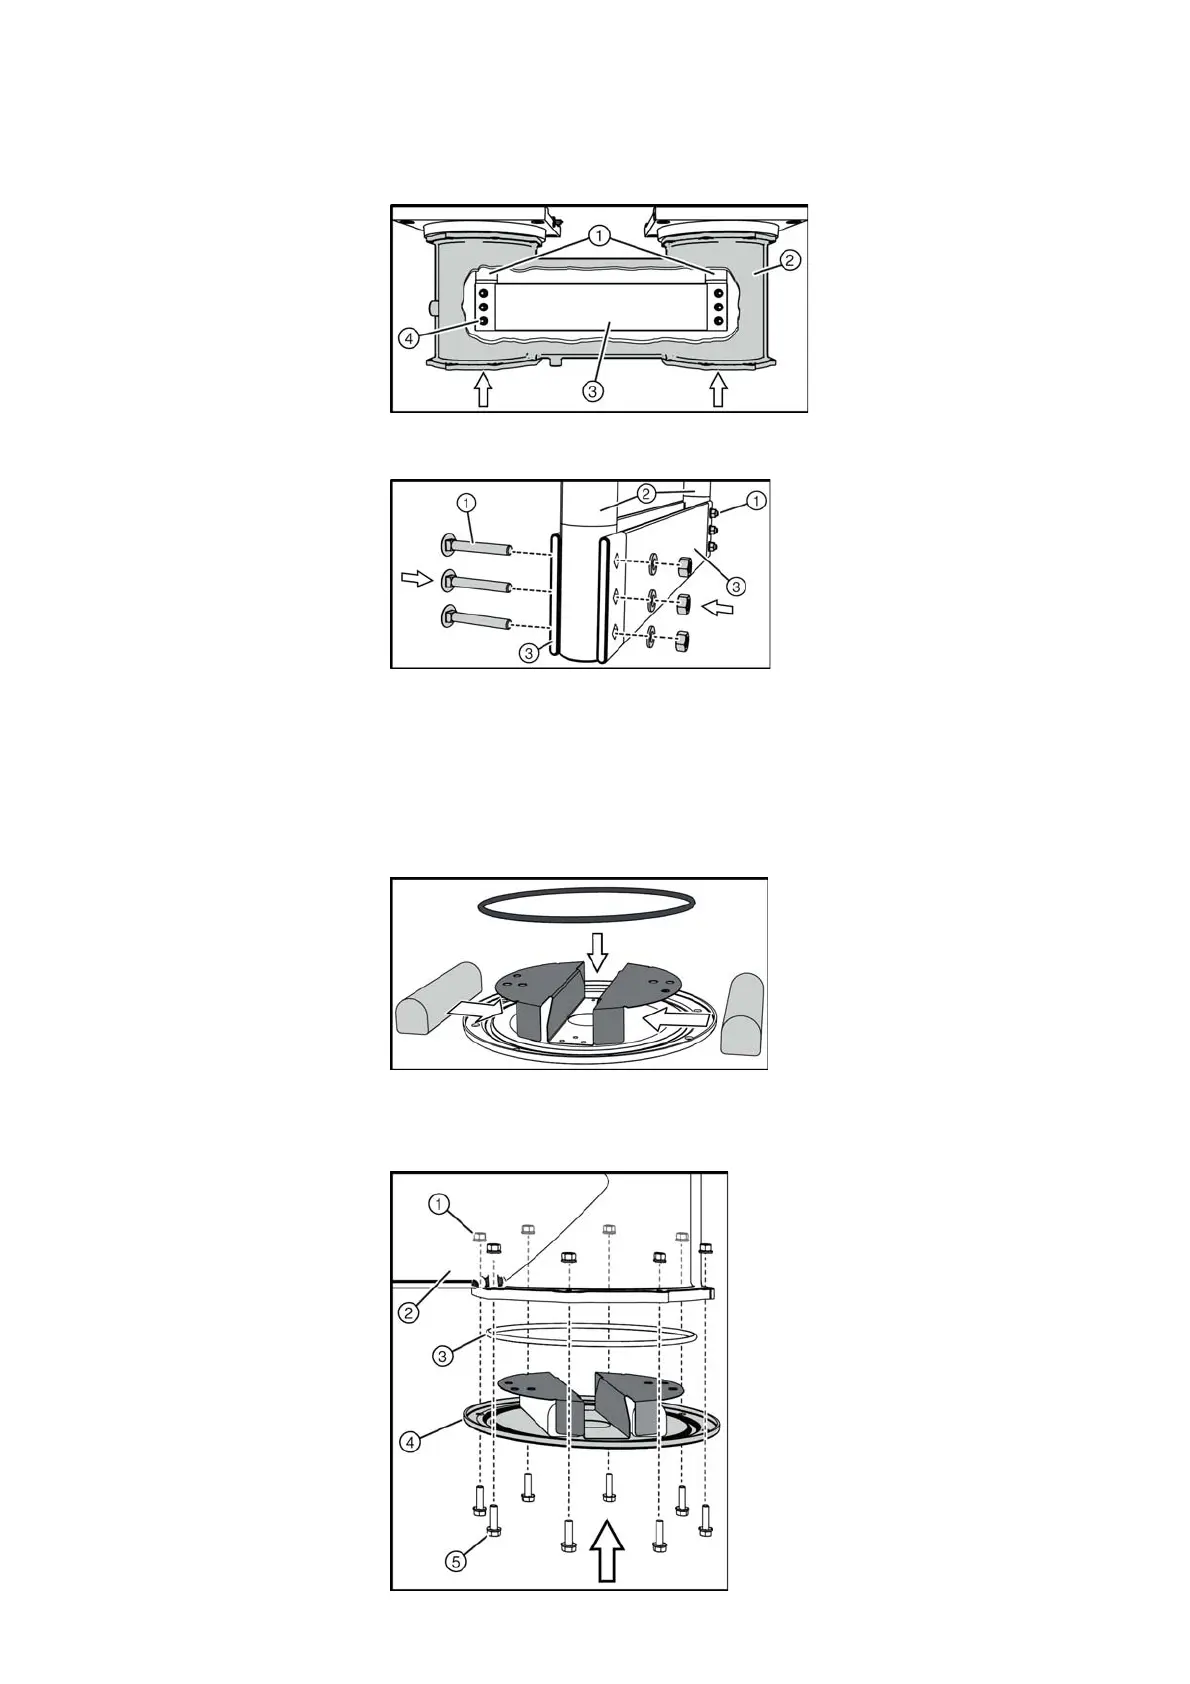
➭ Equip every housing cover with 2 desiccant bags of 250 g.
➭ Clean the sealing ring and groove of the housing cover and apply a uniform film of
Polylub GLY 801 mounting paste.
➭ Lay the sealing ring (O-ring) into the groove of the housing cover.
➭ Fasten the housing cover to the bus sectionalizer using 8 bolt-and-washer assemblies M8
and nut-and-washer assemblies each. Tightening torque: 20 Nm.
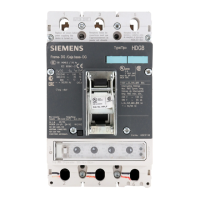
Fig. 154: Bus sectionalizer busbars for 3150 A version
①
Contact stud
②
Bus sectionalizer housing
③
Bus sectionalizer busbar
④
Cup head square neck bolt,
conical spring washers and
hexagon nuts
Fig. 155: Bolted joint of bus sectionalizer busbars for 3150 A
version
①
Cup head square neck bolts
②
Contact stud
③
Bus sectionalizer busbars
①
Nut-and-washer assembly
②
Bus sectionalizer housing
③
Sealing ring (O-ring)
④
Housing cover with desiccant holder
⑤
Bolt-and-washer assembly M8x30
 Loading...