Installation
92/214 Revision 11 • INSTALLATION AND OPERATING INSTRUCTIONS • 8DA10 • 861-9601.9
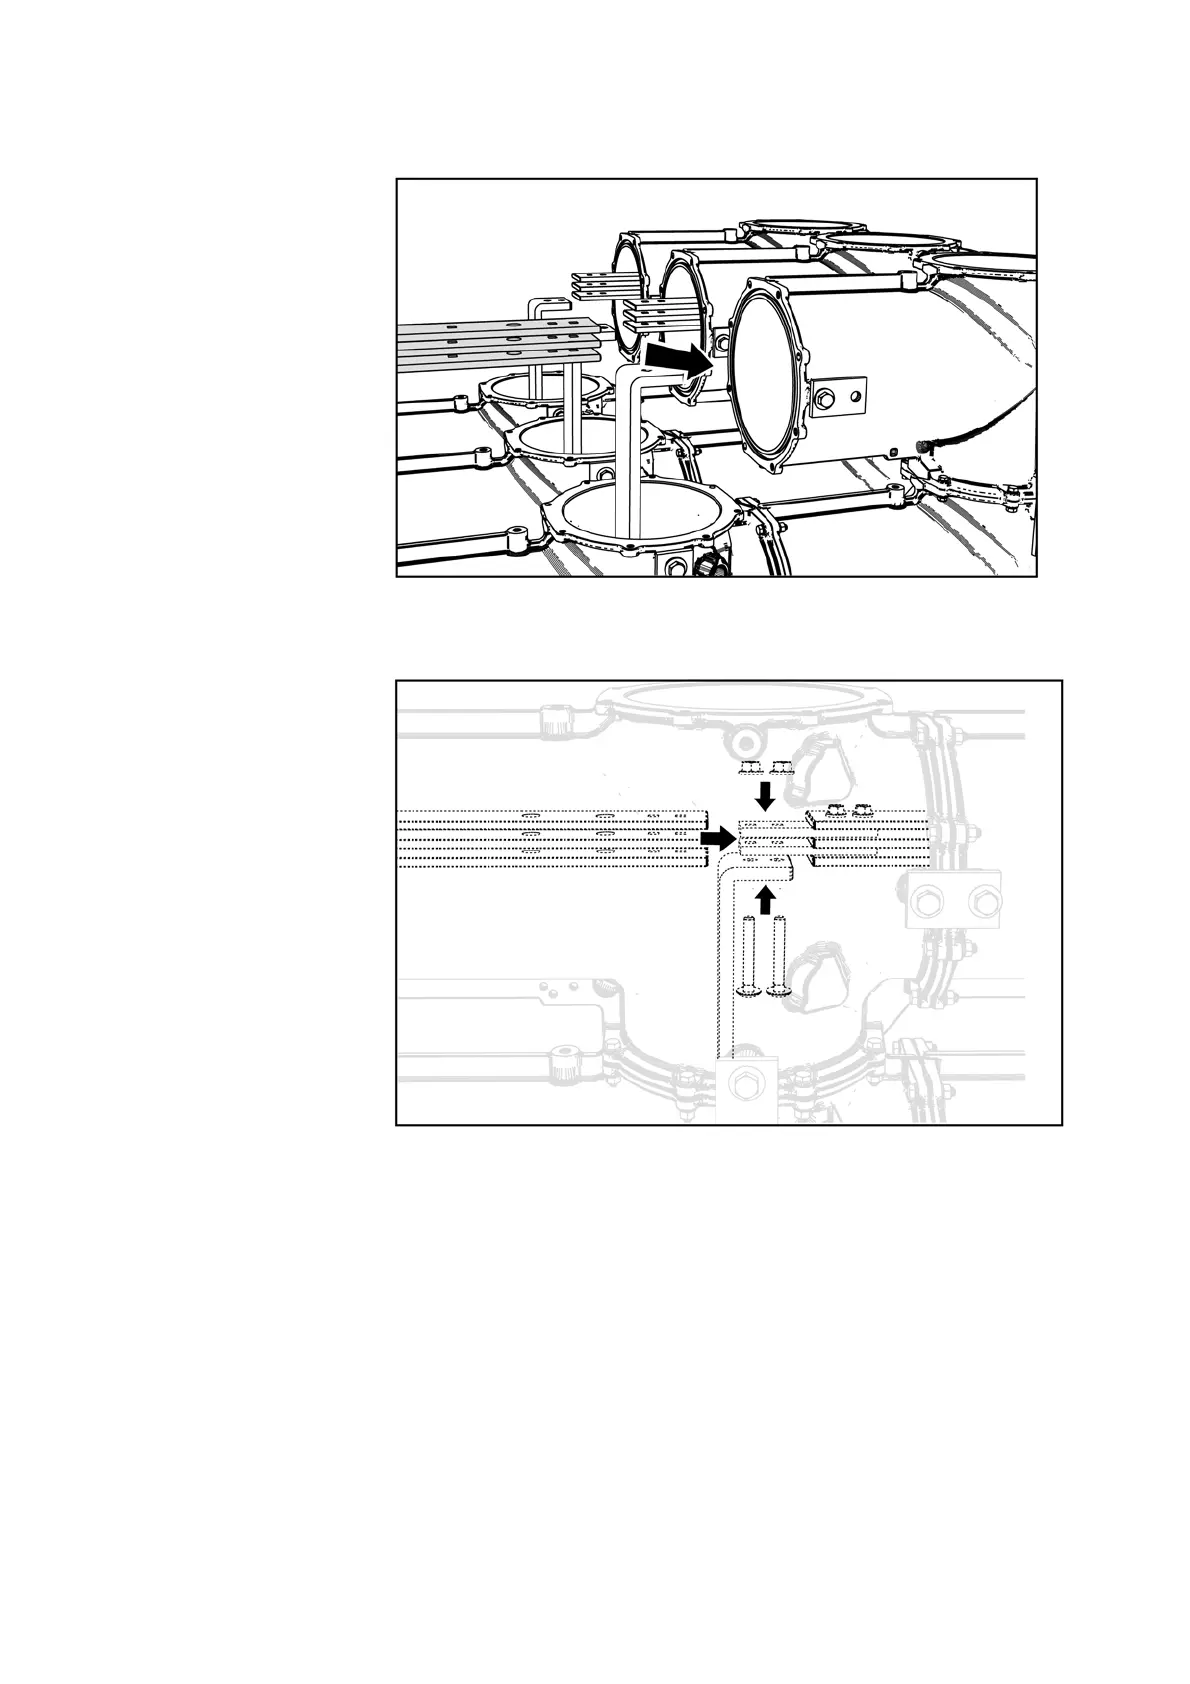
➭ To simplify installation, bolt the three busbars together using one bar support
(if not pre-assembled at the factory)
Fig. 101: Inserting the busbars
➭ Interconnect the busbars and bolt them together at the twin busbar connection.
Fig. 102: Bolting busbars together
➭ Tighten the bolts lightly. The busbar sections must still be able to move.
➭ Repeat the operations until all busbar housings are mounted.
➭ Tighten the fixing bolts of all busbars and fixed contacts at all panel joints of the switchgear.
Tightening torque: 40 Nm.
➭ Finally fit the protective caps on the bolted busbar joints.
➭ Mount the housing covers.

 Loading...