861-9601.9 • INSTALLATION AND OPERATING INSTRUCTIONS • 8DA10 • Revision 11 73/214
Installation
➭ Flange connections with current transformer: If there are busbar current transformers or
expansion joints available, the flange connections must be equipped with insulating
sleeves. Slide two insulating rings between the flanges. Fasten M8x45 bolts crosswise with
one insulating sleeve each (tightening torque: 20 Nm).
Fastening the busbars The busbars are accessed through the horizontal flanges of the busbar housings
(assembly openings).
➭ Check whether the busbar has been pre-assembled with a post insulator ① .
➭ After having joined all panels, align the busbar and the post insulator horizontally with each
other. To do this, use the clearance of the busbar hole.
➭ Align the busbars and the links so that the busbar sections are in line and the fixing bolts will
fit through the holes.
➭ Tighten the fixing bolts just a little. The busbar sections must still be able to move.
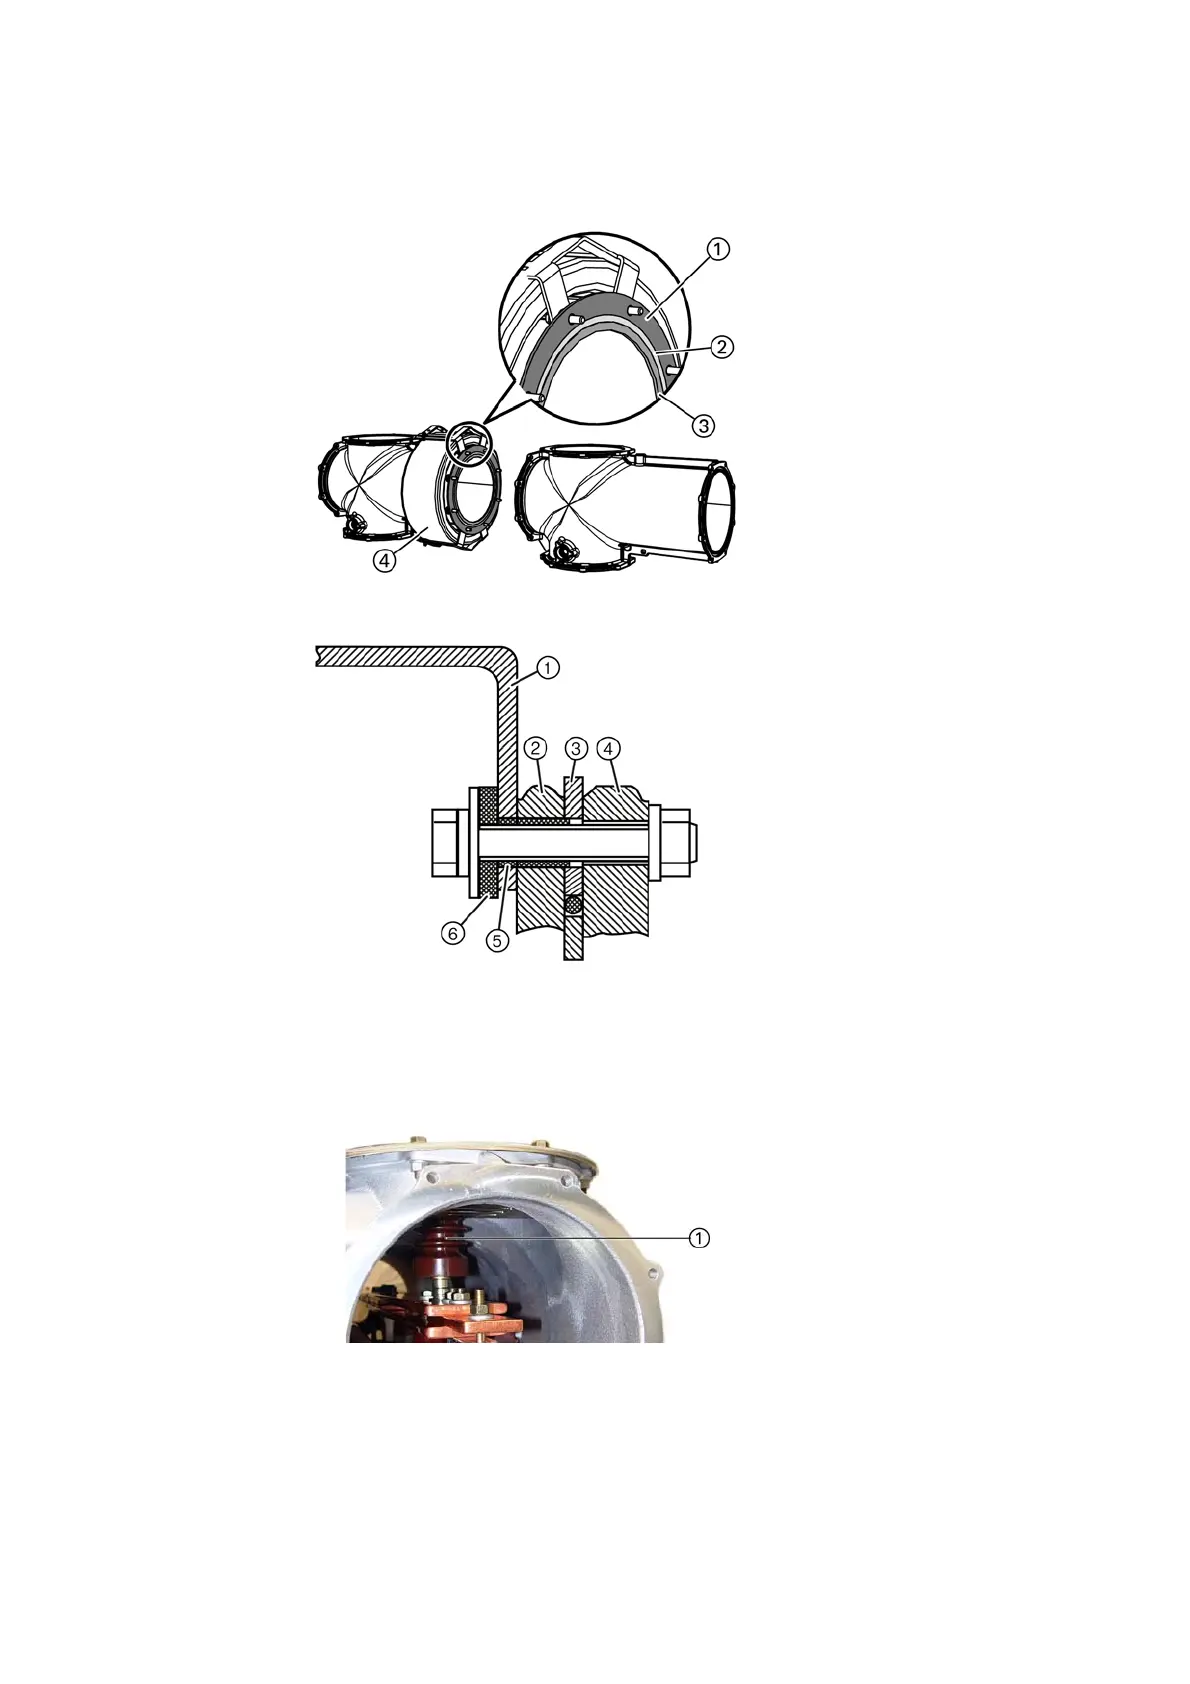
Fig. 62: Long busbar housing with insulating joint
①
Insulating ring outside
(thickness: 4 mm)
②
Toroidal sealing ring
③
Insulating ring inside
(thickness: 4 mm)
④
Current transformer
Fig. 63: Flange connections with insulating sleeve
①
Current transformer mounting
plate
②
Flange
③
Insulating ring inside and outside
④
Flange
⑤
Insulating sleeve
⑥
Insulating washer

 Loading...