Installation
72/214 Revision 11 • INSTALLATION AND OPERATING INSTRUCTIONS • 8DA10 • 861-9601.9
Bolting the flanges of the
busbar housings together
➭ Flange-to-flange connections:
8 tighten M8x40 bolts crosswise (tightening torque: 20 Nm).
➭ Flange connections with compensator: Push insulating ring between the flanges.
Fasten M8x55 bolts crosswise with one insulating sleeve each (tightening torque: 20 Nm).
➭ For flange connections with compensator, insulating sleeves must be inserted at the bolted
joints.
NOTICE
Risk of damage to property
Sensitive parts of the switchgear may be damaged during installation work at the busbar
and the busbar housings.
➭ While working at the busbars or the busbar housings, prop up only on the base frame of
the transport unit.
➭ Do not prop up on sensitive parts of the switchgear like gas pipes, bursting discs, shafts,
etc.
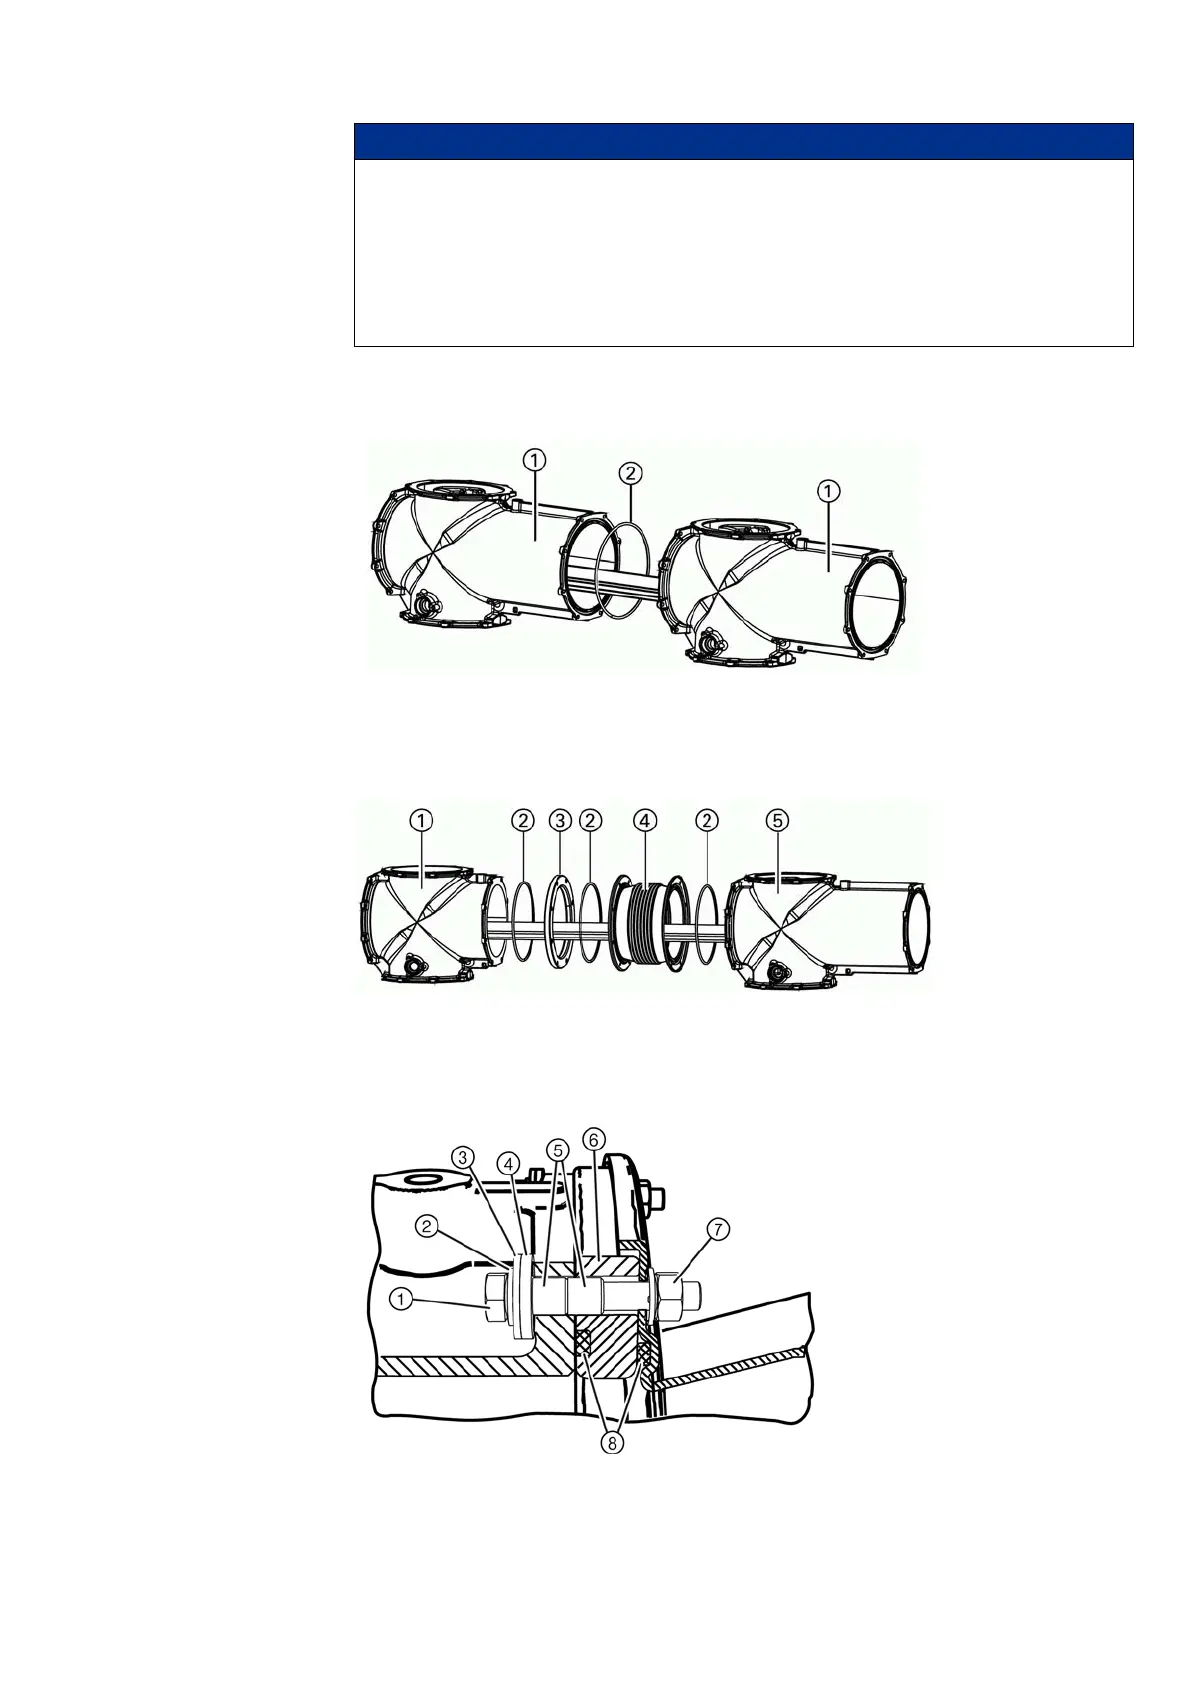
Fig. 59: Flange-to-flange connection
①
Busbar housing
②
Toroidal sealing ring
Fig. 60: Short busbar housing with compensator
①
Busbar housing
(bolts M8x55)
②
Toroidal sealing ring
③
Insulating ring
(thickness: 18 mm)
④
Compensator
⑤
Busbar housing
(bolts M8x35)
Fig. 61: Flange connection with compensator and
insulating sleeve
①
Hexagon head bolt M8x55
with washer
②
Busbar housing
③
Plain washer
④
Insulating washer
⑤
Insulating sleeve (2x)
⑥
Insulating ring
(thickness: 18 mm)
⑦
Hexagon nut with washer
⑧
Toroidal sealing rings

 Loading...