861-9601.9 • INSTALLATION AND OPERATING INSTRUCTIONS • 8DA10 • Revision 11 99/214
Installation
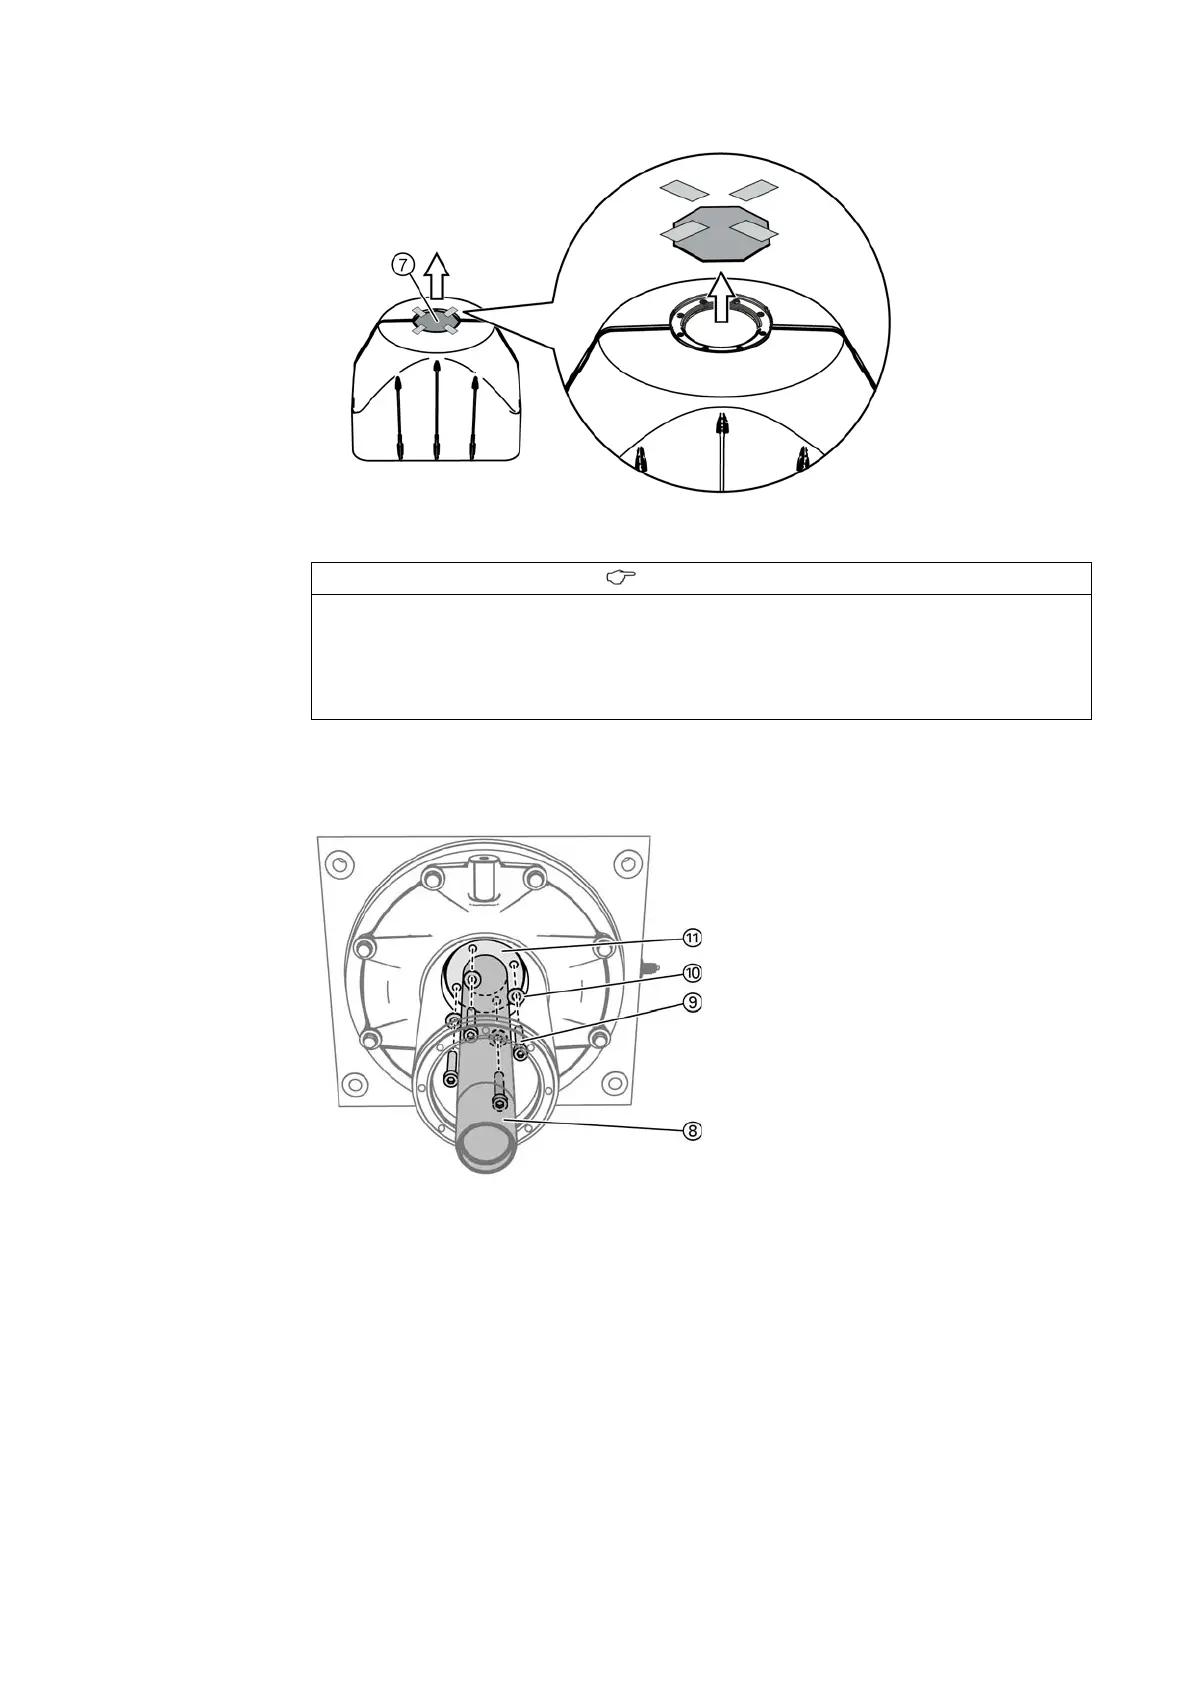
➭ Remove the cover of the panel connection housing ⑦ .
Fig. 114: Removing the cover of the panel connection housing
➭ Bolt the panel connection stud ⑧ to the bushing terminal ⑪ using 4 cheese head
bolts M8x50 ⑨ and 4 conical spring washers ⑩ from the accessories.
Tightening torque: 20 Nm.
➭ Clean the flange of the transformer housing and the groove for accommodation of the
sealing ring with lint-free paper.
➭ Carefully check the external contact surface of the flange and the groove for scratches and
other damages or pollution. Damages and pollution will cause leaks.
➭ If the external contact surface or the groove are damaged: Inform the regional Siemens
representative and coordinate the elimination of damages.
INFORMATION
The length of the panel connection stud depends on the version of the panel connection,
the feeder current, and on whether there are voltage transformers available.
➭ Before assembling the panel connection stud, verify the correct length of the panel
connection stud. To do this, use the overview (861-9582.9) provided with the
supplementary equipment.
Fig. 115: Fastening the panel connection stud
⑧
Panel connection stud
⑨
Cheese head bolt M8x50 (4x)
⑩
Conical spring washer (4x)
⑪
Bushing terminal
 Loading...