6
AOP Operating Instructions – Issue 07/05
6SE6400-5AP00-0BB0
1. Connect the RS485 using the Standard Panel Mounting Kit (PMK).
Notes
¾ Panel Mounting Kit
1. The correct wiring for the PMK and inverter is as follows:
PIN3 = +24 V
PIN4 = 0 V
PIN 1 & 2 = 485 Comms
On 420 PIN1 ⇒ PIN14 (420) PIN29 (440)
PIN2 ⇒ PIN15 (420) PIN30 (440)
2. The use of twisted twin cable or shielded cable is preferred.
3. The inverter at the end of the network should have a 120Ω
terminating resistor across the RS485 pins.
4. A common earth plane should be used for all inverters and the
PMK.
¾ For the early issue of the PMK Switch 1 of the DIP switch on
board must be UP or ON for correct communication.
1. Configure the inverter for network use.
2. Each drive should be assigned a unique RS485 USS address in the
range of 0 to 30.
To do this set P003 = 2 and using P2011 assign a unique address to
each inverter
3. Set the control over the USS on the communications port.
Follow the process as in 2.1 above, in step 15 set P0700 = 5 (USS
on Com link)
4. With the drives powered-up on the network, connect and power-up
the AOP on the PMK.
5. At start-up of the AOP select MASTER mode.
6. Select Operate.
7. The AOP will now show all inverters on the network.
8. Select either a single inverter or broadcast mode of operation.
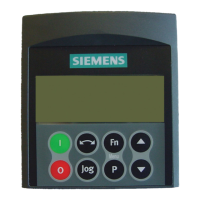
9. Press
to start the inverter/motor.
10. Press
to stop the inverter/motor.
Note
¾ If the AOP is to be used as the normal control means for the
inverter it is recommended that the user Set P2014.0 = 5000. To
do this first set P0003 = 3. This setting will cause the drive to trip if
communication with the control source, the AOP, is lost.
Press the and keys at the same time to go to the top-level
menu.