24 Adjustments
ARCADIS Varic / Orbic SPR2-310.842.01.07.02 Siemens AG
12.06 CS SD 24
Page 24 of 34
Medical Solutions
6. If necessary, adjust the potentiometer at the DAP chamber (Fig.6/p.23).
¹ Clockwise for a lower TW value.
¹ Counterclockwise for a higher TW value.
7. Repeat the DAP test and the potentiometer adjustment until the two values are equal.
8. Click on <Finish>.
9. Continue with “DAP accuracy check”.
Prerequisites
1. Register an emergency patient to allow radiation release.
NOTE
The “DAP accuracy check” is only possible if the “Dose Area Prod-
uct” is configured under <Configuration>-<Imaging Sys-
tem>-<Display Settings>.
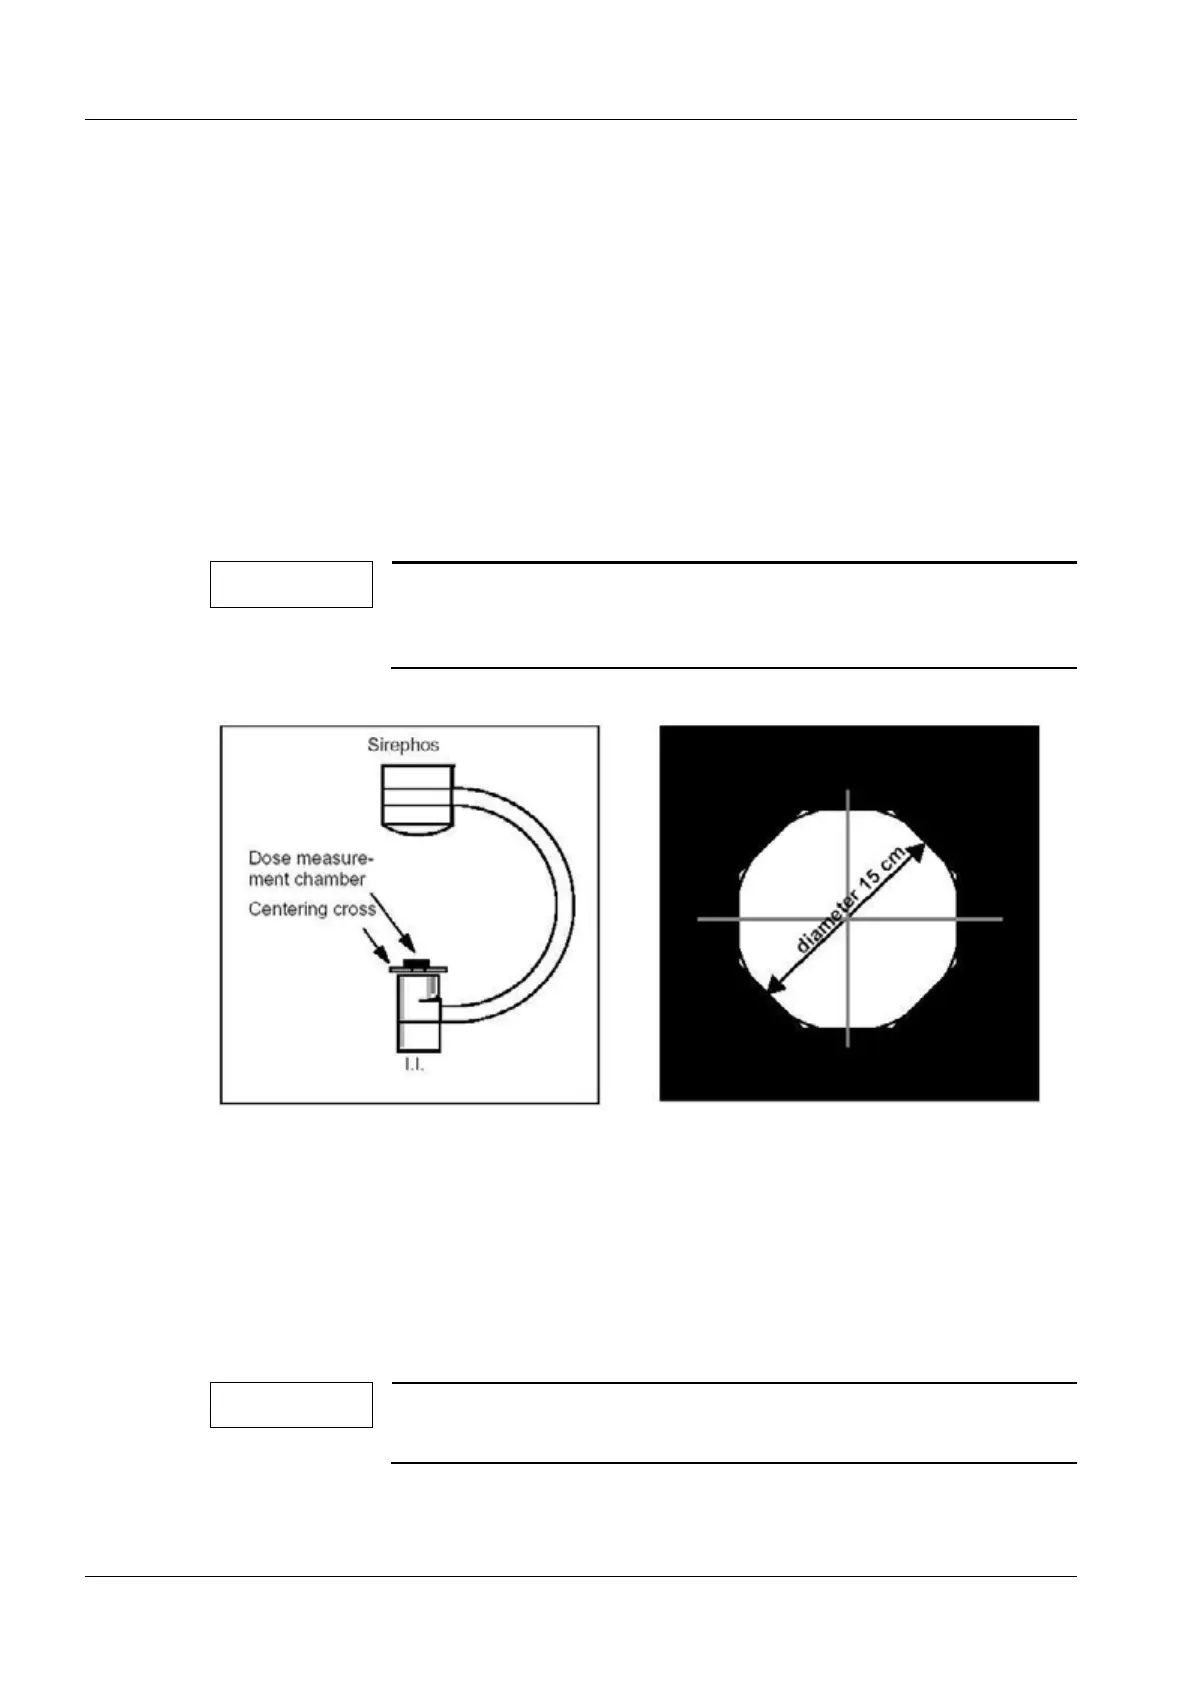
2. Attach and center the centering cross on the I.I. (Fig.7/p.24).
X 3. Briefly release fluoroscopy and adjust the collimator X-iris on the X-ray field to a diame-
ter of approx. 15 cm (Fig.7/p.24).
4. Record the diameter of the octagonal area of the radiation field and remove the center
cross.
5. Attach the small dose measurement chamber (1cm
3
) into the center of the I. I.
NOTE
Make sure that the dose meter is adjusted for about 2.5mm AL fil-
tration during the “DAP accuracy check”.
DAP accuracy check
Fig. 7: Accuracy of the Dose Area Product

 Loading...