Commissioning
5.5 Using QuickConnect
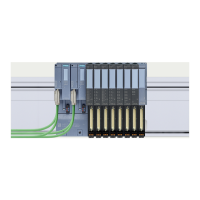
ET 200pro distributed I/O EtherNet/IP interface module
62 Manual, 03/2016, A5E32861915-AB
Using a robot system as an example:
1. The controller inhibits current connections to QuickConnect modules, and the robot arm
physically disengages the current tool.
2. The robot arm physically attaches a new QuickConnect module.
3. The new QuickConnect module powers up.
4. The controller acknowledges a successful attachment to a new tool via an electrical lock
signal.
5. Upon receiving the electrical lock signal, the controller waits for the devices to start up
before uninhibiting a new set of I/O connections and then connects to the new
QuickConnect module.
6. When all connections are established, the robot is ready for operation.
Procedures for using QuickConnect
Rate 100 Mbps
Auto-MDIX Off
To enable the use of QuickConnect, perform the following steps:
1. Connect the ET 200pro EtherNet/IP module to a managed switch with the switch port set
to autonegotiation off and auto crossover (auto-MDIX) off, with the same fixed baud rate
and duplex as the device. You can use an EtherNet straight-through cable (1:1) by
connecting to Port 2 on the ET 200pro EtherNet/IP module because Port 2 is crossed
over internally. (A connection to Port 1 on the ET 200pro EtherNet/IP module would
require a crossover cable). Another option is to have more than one ET 200pro module
set up this way and connect them in a daisy chain with Port 2 of one device connected to
Port 1 of the other. This can be done with straight-through cables.
2. Use the EIP ET200 Configuration Tool, turn autonegotiation off and set a fixed baud rate
and duplex.
3. Turn on QuickConnect with the Configuration Tool.

 Loading...