4. The following description applies to installed motors that are pre-assembled with transport
locks:
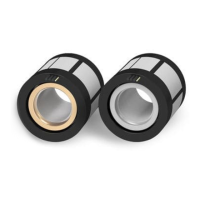
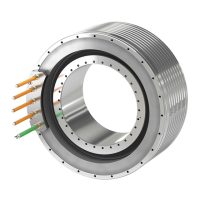
In the delivery state, the stators and rotors of frame size 1FW6090 and 1FW6130 are only
equipped with transport locks on the ange surface with the cable outlet.
For all other motors, the transport locks are mounted on both ange surfaces.
If you want to secure motors of the size 1FW6090 or 1FW6130 on the cable outlet side, then
you must rst mount the transport locks on the opposing side.
To do this, rst loosen a transport lock. Mount the rst transport lock on the other side.
Then loosen the second transport lock and also mount the second transport lock on the other
side.
If there are still transport locks on the securing side, remove these transport locks.
If you want to secure motors of dierent frame sizes, then you must remove the transport
locks from the securing side.
For problem-free mounting, you must loosen the opposing transport locks.
Once you have removed or loosened transport locks, you may only move the motor with care.
Keep the transport locks in a safe place. Keep the transport locks as they may be needed again
in the case of maintenance and when removing the motor.
5. This point only applies to motors with cooling jackets, frame sizes 1FW6090, 1FW6130, and
1FW6150:
Position the motor with the free ange surface pointing forward in the machined precisely
dimensioned bore of the machine housing.
O-rings must not be pressed out of the groove or damaged during this step.
Ensure that the motor does not become tilted in the installation space during installation.
Slight tilting of the motor can be remedied by careful blows with a rubber hammer on the
ange.
6. Screw the ange face of the stator to the machine housing and the ange face of the rotor
to the moving axis. In this case, observe the specied torques and the mounting technology
specications.
A special mounting device is required when installing the stator and rotor on opposite ange
faces on the machine construction.
7. Completely remove any existing transport locks.
8. Remove the spacer foil. When the stator and rotor are correctly centered, the spacer lm can
be easily removed by hand.
Keep the spacer lm. You may need the spacer lm for subsequent transport, packaging and
storage of the motor.
Installation
5.7Procedure for installing the motor
1FW6 built-in torque motors
Operating Instructions, 09/2022, A5E52220812B AA 79