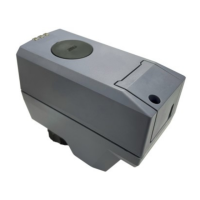
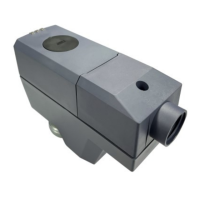
3. Adjust the position of the actuator stem by rotating Allen wrench (b) illustrated below
clockwise or counter-clockwise.
– The actuator stem moves down if you rotate clockwise; it moves up if you rotate
counter-clockwise. The manually set position is retained.
4. To release the actuator from manual operation mode, press and hold down button (a)
illustrated below again for at least three seconds.
– The actuator runs a self-calibration automatically. Control signal sent from the
controller takes effect.
5. Close the cover.
If operating voltage is applied to actuator, press button (a) before and after manually
adjusting the position of the actuator stem. If no operating voltage and control signal are
applied, manual operation can be done without pressing button (a).
Cabling operation
1. Unscrew cover screw
2. Remove cover
3. Remove terminal block and connect or disconnect wire terminals.
4. Re-install the terminal block
5. Install the cover
6. Screw in the cover screw
Maintenance
The actuators require no maintenance.
A
6
V
1
1
8
5
8
2
7
8
Z
1
2
3 mm
(b)
(a)
> 3s

 Loading...