en Installation instructions
52
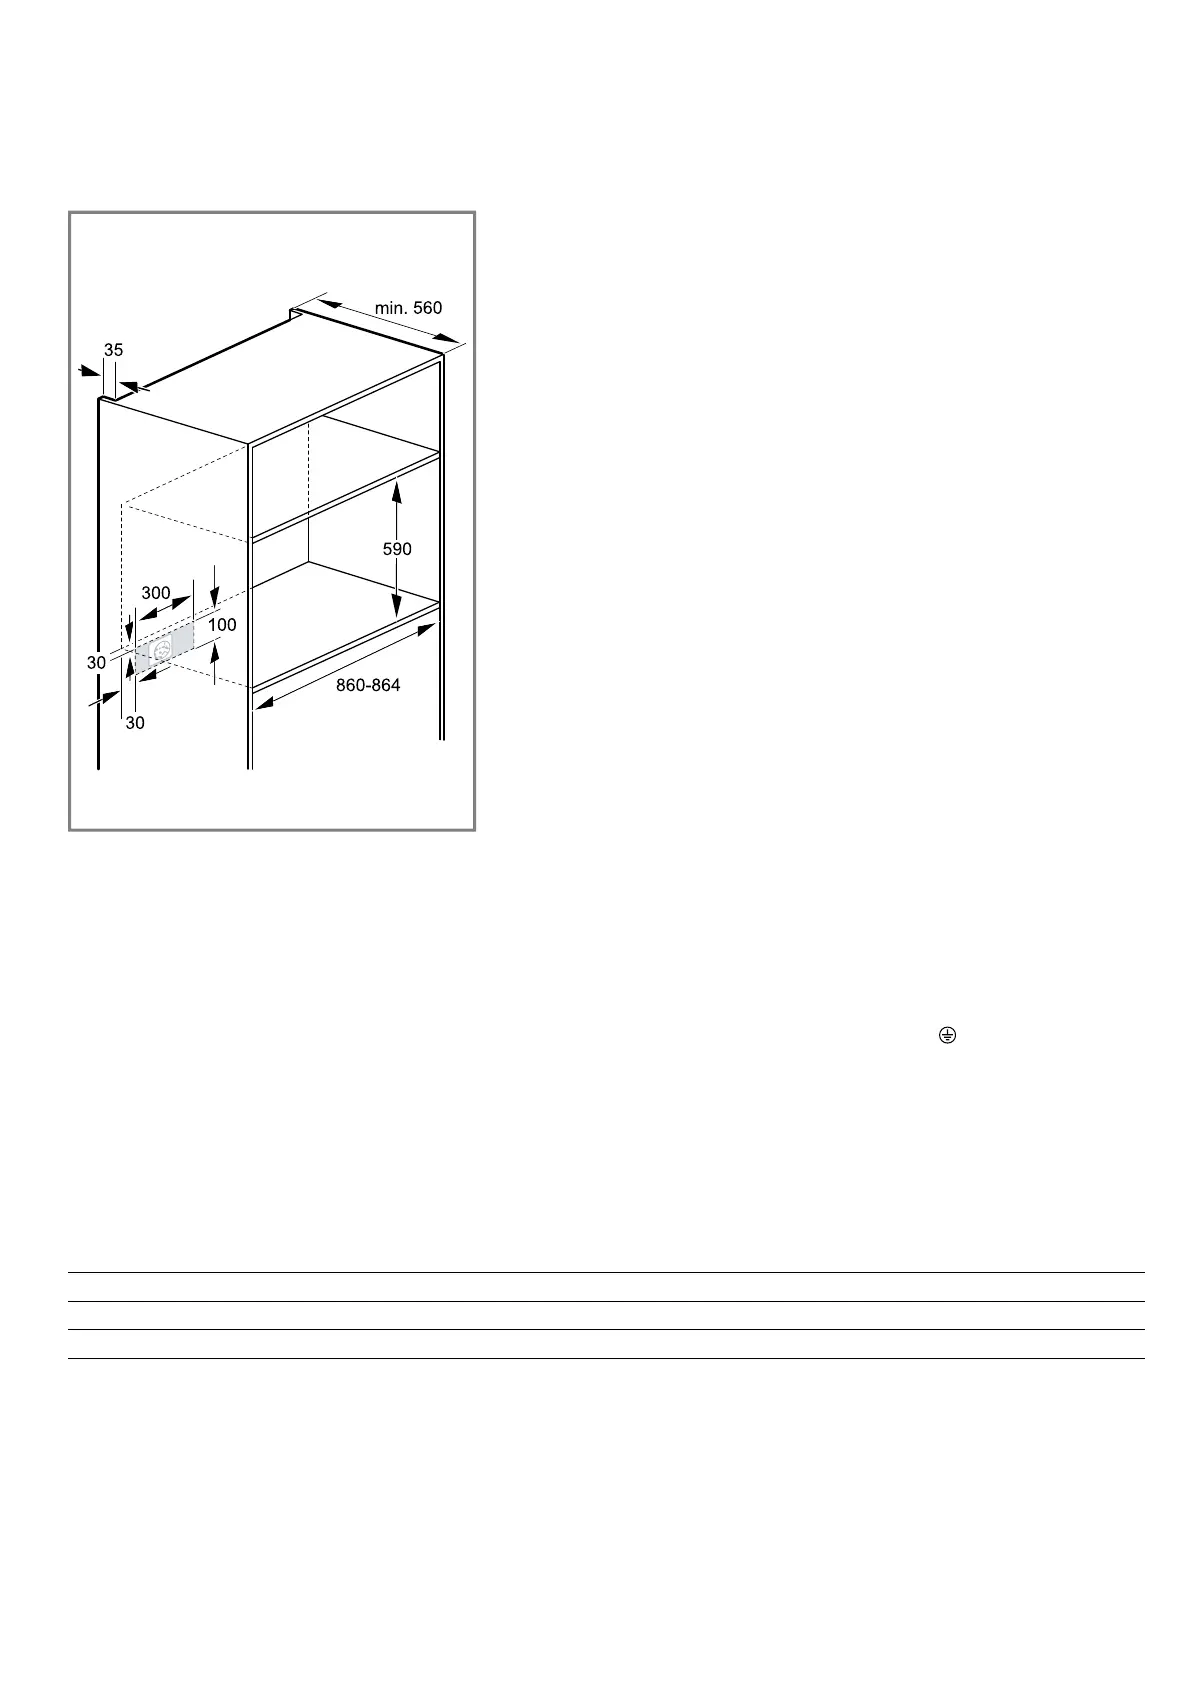
19.5 Installation in a tall unit
Observe the installation dimensions and the safety
clearances in a tall unit.
¡ Ensure that the intermediate floor has a gap to the
installation wall in order to ventilate the appliance.
¡ If the tall unit has another back panel in addition to
the element back panels, this must be removed.
¡ Only fit the appliance up to a height which allows
accessories to be easily removed.
19.6 Installing two appliances on top of
each other
Your appliance can also be installed above another ap-
pliance.
19.7 Electrical connection
In order to safely connect the appliance to the elec-
trical system, follow these instructions.
¡ The fuse protection must correspond to the power
rating specified on the appliance's rating plate and
to local regulations.
¡ The appliance corresponds to protection class I and
must only be operated with a protective earth con-
nection.
¡ The appliance must be disconnected from the
power supply whenever installation work is being
carried out.
¡ Contact protection must be ensured by the installa-
tion.
¡ Only a licensed professional may connect appli-
ances without plugs. They are subject to the require-
ments of the local electricity provider.
Electrically connecting an appliance without a
protective contact plug
Note:Only licensed specialists may connect the appli-
ance. Damage caused by incorrect connection is not
covered under the warranty.
An isolating switch must be integrated into the perman-
ent electrical installation according to the installation
regulations.
1.
Identify the phase and neutral conductors in the
socket.
The appliance may be damaged if it is not connec-
ted correctly.
2.
Only connect the appliance to a mains voltage
between 220 und 240V.
3.
Connect the wires of the mains power cable accord-
ing to the colour coding:
‒ Green/yellow = Conductor
‒ Blue = Neutral conductor
‒ Brown = Phase (external conductor)
Appliance connected loads
You can select a different connection depending on the appliance model. In this case, you must connect the appli-
ance on the rear of the appliance using the power cord in accordance with the connection diagram.
Ensure that the power cord corresponds to H05VV-F or higher. Determine which wire cross section you require in ac-
cordance with the current load. If required, install copper bridges. Incorrect connections may damage the appliance.
Appliance connected load Min. fuse protection at 1~ Min. fuse protection at 2/3N~
3.3kW 16A
4.2kW 20A 12A
19.8 Installing the appliance
1.
Slide the appliance and centre it.
Do not kink the connection cable.
2.
Open the oven door completely.