22 User Manual
Setup Assistant
10. Z Axis calibration
To carry out the following
process, when indicated on
the screen, apply a thin and
uniform layer of glue stick on
the entire printing surface
glass to ensure a better
calibration.
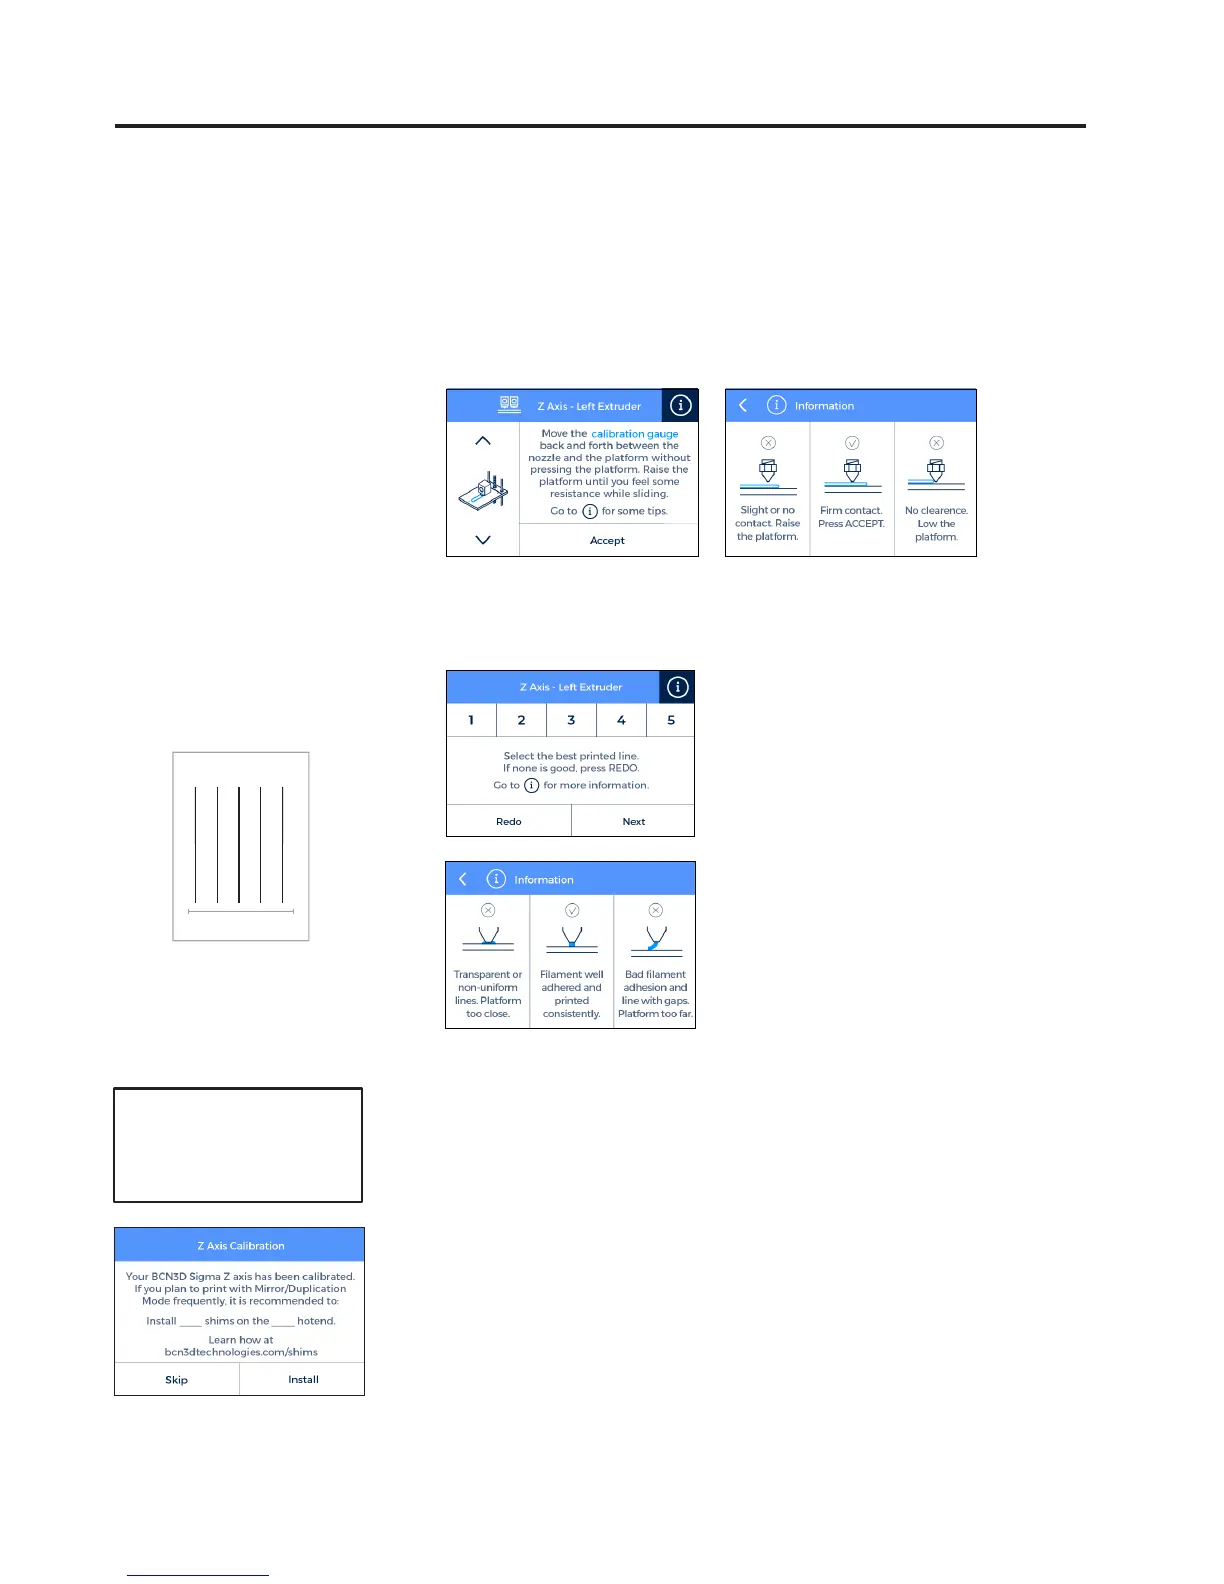
11. Place the Calibration Gauge between the nozzle and the
printing surface glass. Hold the gauge by the end and move
it back and forth, without pressing the platform. Raise the
platform until you feel some resistance while sliding the
gauge. The gauge should not flex.
· If the nozzle is too close
to the glass, the line will be
transparent or non-uniform.
· The line must be adhered to
the printing glass and with
no gaps.
· If the nozzle is too far to
the glass, the line won’t
be properly adhered to the
printing glass and will be
gaps in it.
13. Select the best line. 12. The printer will print a
test to validate the previous
process.
1 5
NOTE: Depending on the
Z axis calibration, it may
appear this recommendation
screen.
If so, please check next
section: “Installing shims”
(page 26) for a detailed
explanation of the reason,
benefits and procedure to
perform this operation.
14. Repeat processes 11-13
for the second extruder.