AFTER SALES SUPPORT
1300 7 77 137
service@unclebills.com.au
MODEL: EA2476 PRODUCT CODE: 715222 03/2024
18
GETTING STARTED (CONT.)
NOTE: Remove all Alkaline batteries from the
battery compartment before charging via the
USB-A to USB-C cable (supplied).
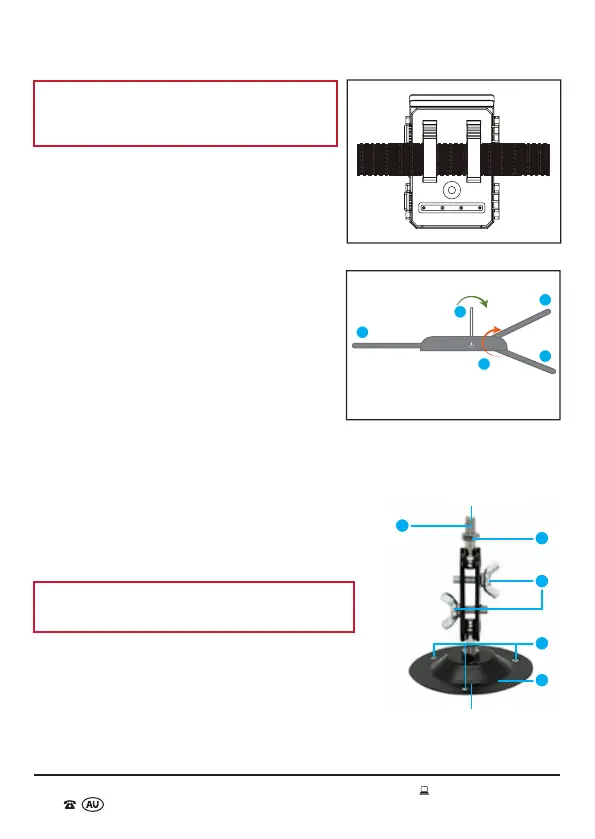
Securing the Mounting Strap
A mounting strap has been supplied to secure
the Wildlife Camera to a tree, post, or other
objects.
1. Thread the mounting strap through the
brackets located on the back of the Wildlife
Camera (Fig. 4).
2. Position the Wildlife Camera in the desired
location.
3. Lift the tab of the buckle. Thread the strap
through the buckle, pulling the loose end of
the mounting strap until the strap is tight
(Fig. 5).
4. Press the tab down to lock the buckle and
secure the Wildlife Camera into position.
5. To release the strap again, lift the tab of the mounting strap buckle and pull the
strap back through.
Installing the Camera Mount
The camera mount (supplied) can be securely
attached to walls, ceilings, posts etc. Please follow the
steps below for how to install the camera mount.
WARNING: Check that there are no cables, wiring
or piping in the wall etc. before you drill.
1. Mark the holes to be drilled (A), by holding the
base of the camera mount against the location for
installation.
2. Use a suitable drill bit to drill the holes.
3. Insert the plastic anchors (supplied) into the drilled
holes so that they are flush with the surface.
B
C
E
D
A
Fig. 6
Camera Mount Base
Fig. 5
1
1
2
1
3
Buckle
1 - Strap
2 - Tab
3 - Buckle
Fig. 4