BRAVO MAXIMA II Operating manual - English
26 Copyright Silca 2011
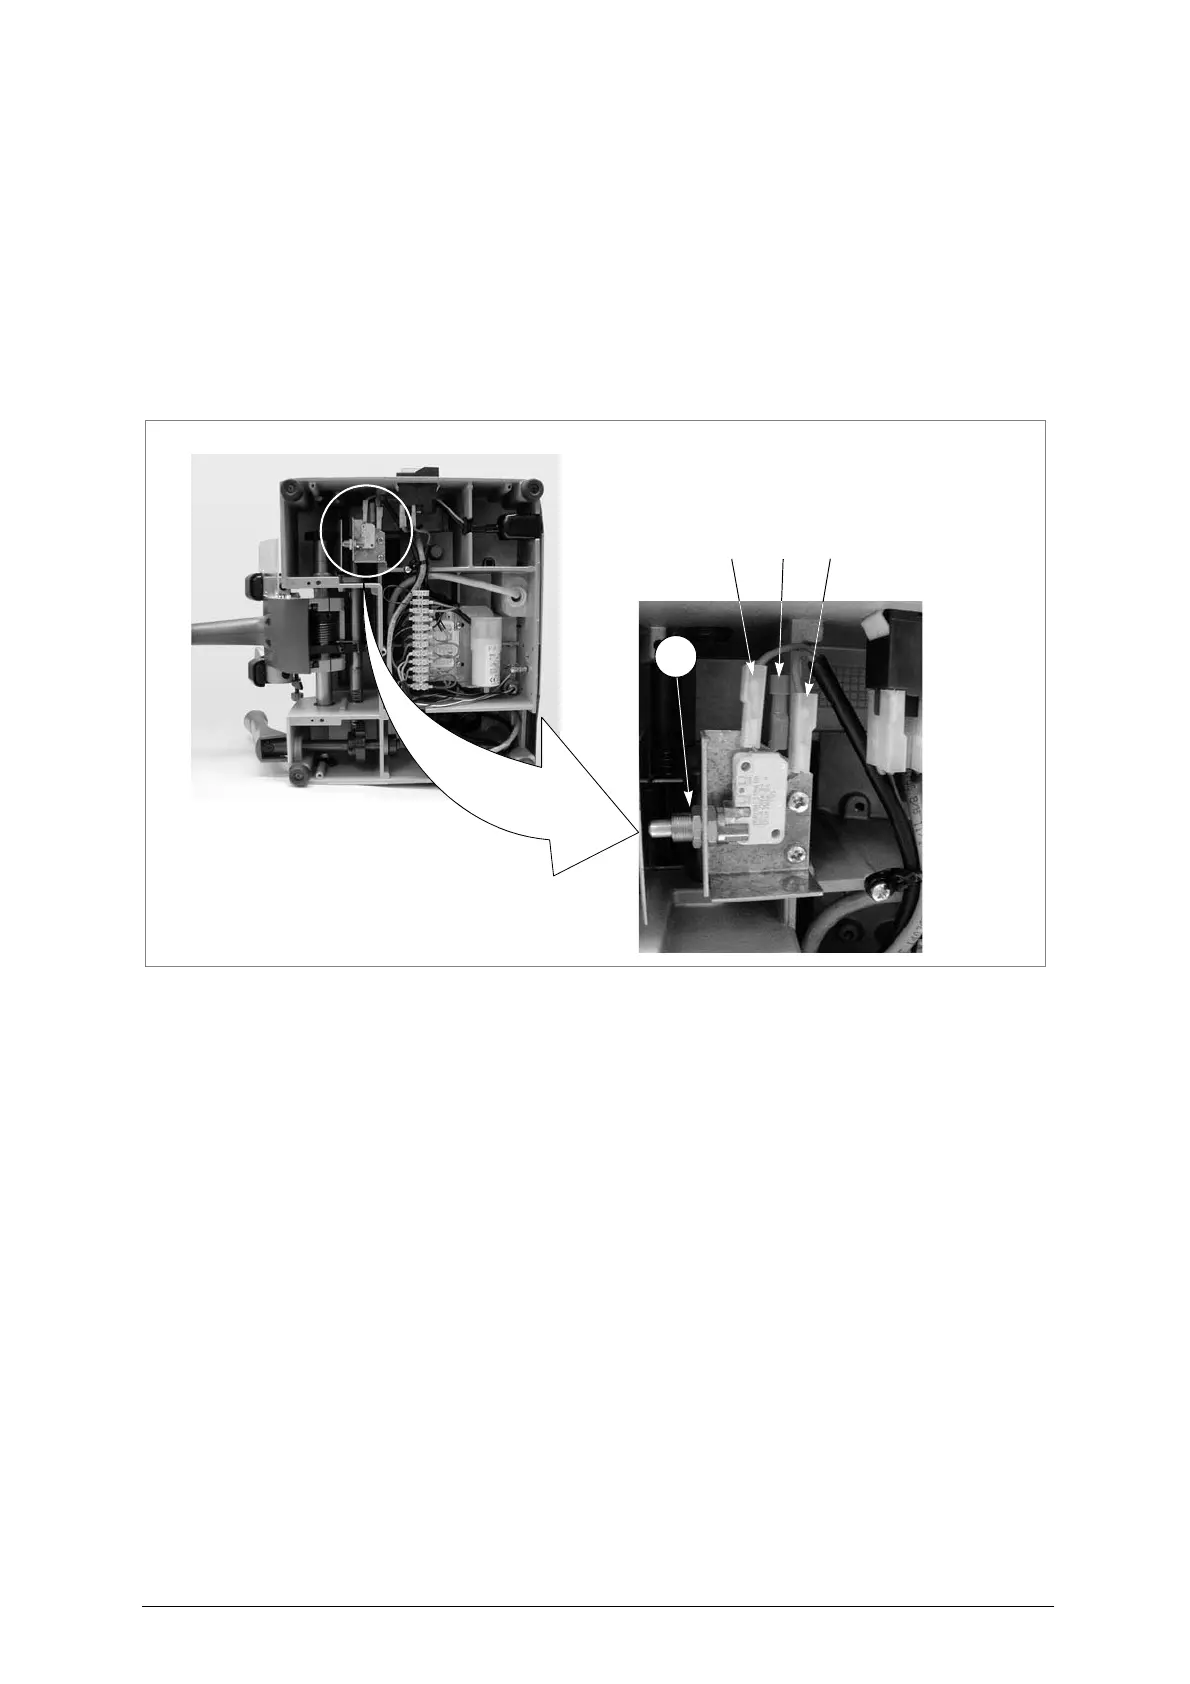
7.10 Replacing the microswitch
1) Turn the machine off and unplug it.
2)
Release the carriage and leave it in the working position (towards the tracer point
).
3) Remove the bottom panel (ch.7.7, page 24).
4)
Loosen the nut (Q1) and remove the microswitch
(fig.35).
5)
Detach the connectors (1, 2 and 3) paying attention to their positions
.
6)
Fit the new microswitch into the seat of the previous one, and secure with the nut
(Q1).
7)
Connect the connectors
(1, 2 and 3).
8)
Raise and lower the carriage to check that the microswitch works properly (click
).
9)
Replace the bottom safety plate and secure with the 7 screws (W) and 2 feet (W1) (fig. 31, page
24). Fit the swarf tray
.
Fig. 35