Copyright © 2003 Silicon Image Inc. SATARaid User’s Manual
52
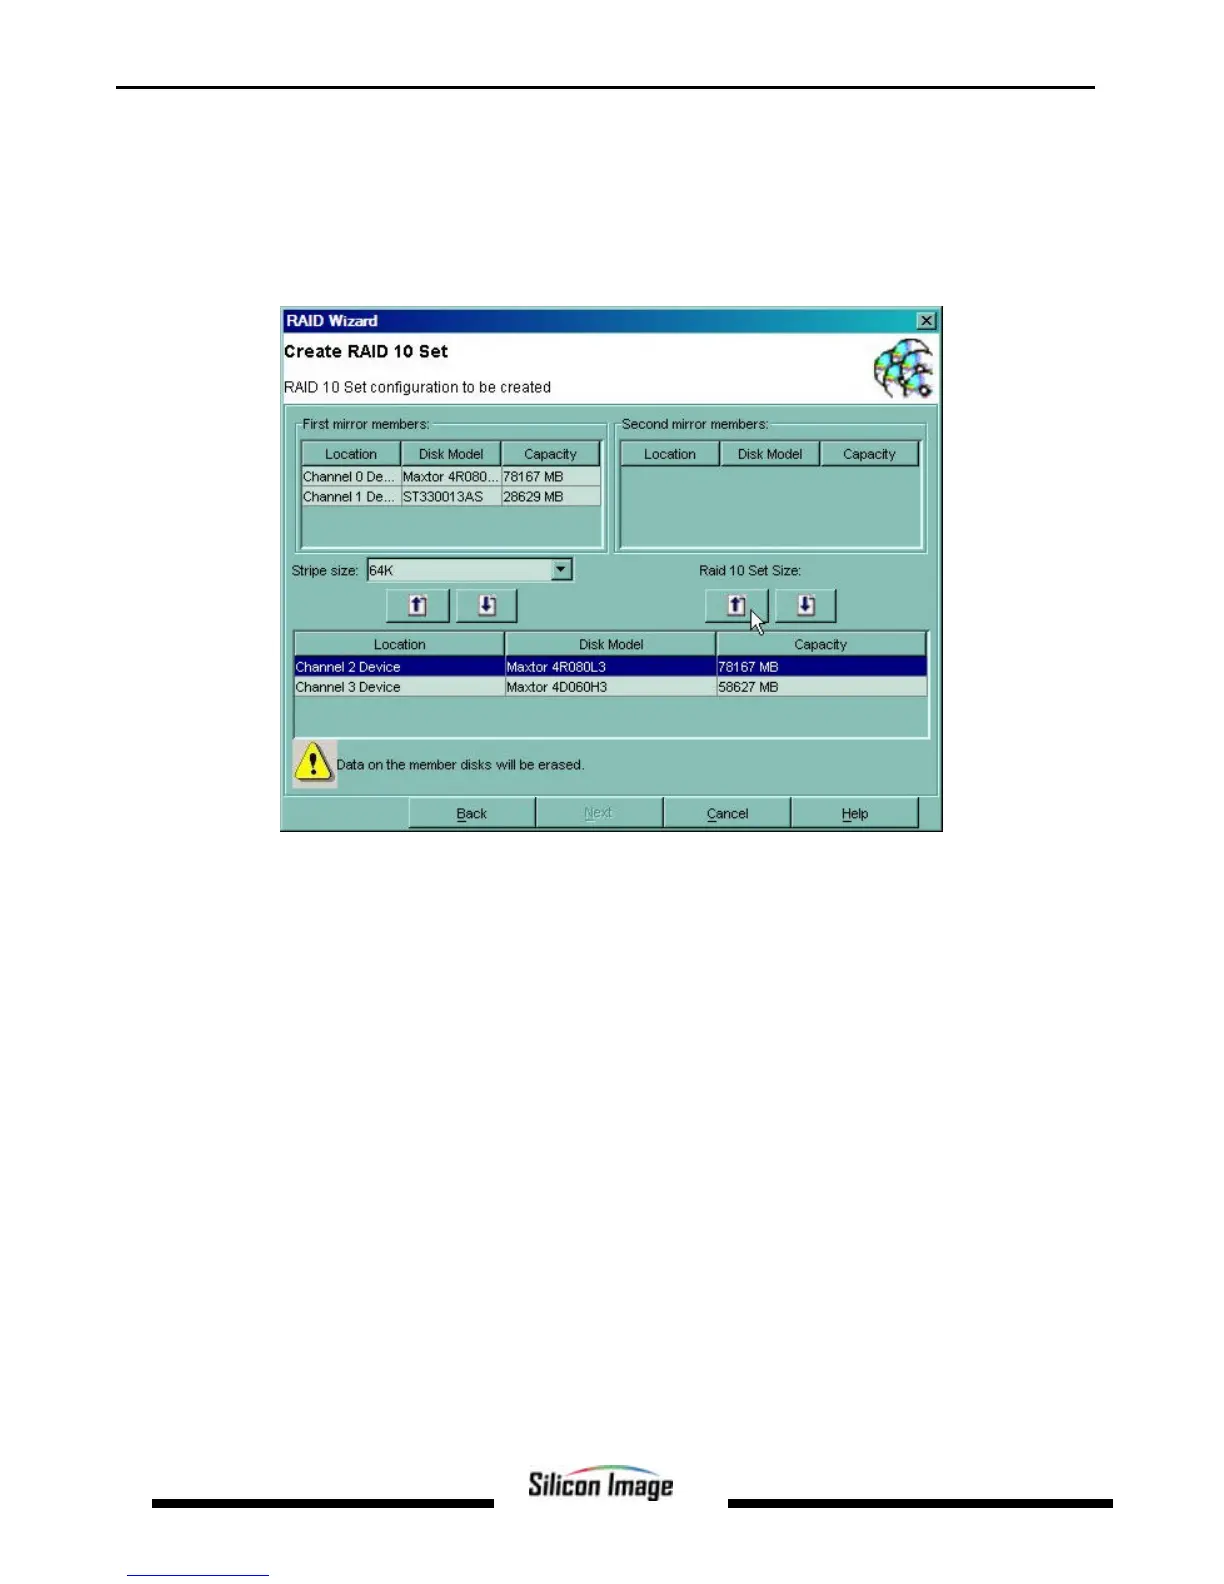
Creating a RAID 10 Set
1. Referring to the example above for creating a RAID 1 Set, start the RAID Wizard. Select “Create RAID Set” and click
Next. Select ‘Create RAID 10 Set’ and click Next.
2. Highlight the device to add in the lower section of the Create RAID 10 Set window. Click the up arrow under the First
mirror members section to add the first device to the RAID Set. Repeat for the second device. Click the up arrow under
the Second mirror members section to add the third device to the RAID Set. Repeat for the fourth device. A RAID 10
set must contain at least four members. When done adding members, click Next.
3. An acknowledgement window will appear. Click Finish. A moving bar will appear in the window while the operation is
in progress. Once the window closes, the operation is complete. When the window closes, the new RAID Set will
appear in the SATARaid window under RAID Sets. After allocating any other RAID sets, you will need to create and
format the new partitions. See Section 7 - Allocating Partitions for instructions.