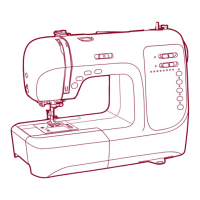
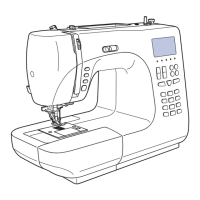
Function of machine
Pattern selection buttons (8)
Turn on the power switch and the LED indicator above the straight
stitch pattern will be lit.
To select other patterns, press the pattern selection button to the right
of the row that contains your desired pattern. Stop when the LED
indicator above your pattern is lit.
Stitch length adjustment lever (7)
When you select a stitch, the machine will automatically set the
recommended stitch length. The stitch length can be regulated by
sliding the stitch length adjustment lever.
Auto settings are easily determined by sliding the lever. The LED
indicator next to the lever will blink and beep 1 time to indicate the
setting is at the auto position.
When the setting is at the auto position, you can manually change the
length according to your preference. Starting at the auto position,
slide the lever to the left or right to locate each potential adjustment.
At each manual adjustment point, the LED will blink 3 times and
beep once.
To shorten the stitch length, slide the lever to left. For a longer stitch
length, slide the lever to right. The stitch length can be adjusted
between "0.0-4.5". Certain stitches have limited lengths.
19