59
GB
CAUTION:
~ Never use any abrasive, corrosive or
scratching cleaning agents. These might
damage the device.
NOTE:
• Certain food or spices (e.g. curry) may
discolour plastic. This is not a defect
with the device and harmless to health.
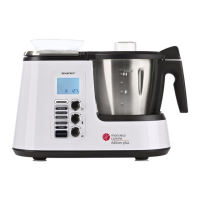
15.1 Cleaning the base unit
1. Clean the outside of the base unit12
with a damp cloth. You can also use
some detergent.
2. Use clear water and wipe with a clean
cloth.
3. Do not use the base unit12 until it is
completely dry again.
15.2 Cleaning in the dish-
washer
The following parts are dishwasher-safe:
- Blender jug5
- Measuring beaker33
- Lid for blender jug32
- Seal for the lid of the blender jug31
- Blade assembly27
- Seal for blade assembly26
- Cooking pot28
- Mixer attachment29
- Spatula30
- Steamer basket, deep3
- Seal of the deep steamer basket4
- Steamer basket, shallow2
- Lid for the steamer baskets1
Never use a dishwasher to clean the fol-
lowing parts:
- Base unit12
15.3 Cleaning the accessories
1. Rinse the blender jug5 with warm wa-
ter and dump the water.
2. Remove the blade assembly27 (see
“Using and removing the blade assem-
bly” on page 50) and take the seal26
off (see “Cleaning, checking and re-
placing seals” on page 59).
3. Clean all accessories by hand in a sink
with dishwater or in the dishwasher.
4. When cleaning by hand, rinse all parts
with clean water.
5. Allow the parts to dry completely before
using them again.
6. Before using the device again, reinsert
the blade assembly27.
15.4 Cleaning, checking and
replacing seals
Remove seals26,31 and4 for cleaning
and check them for damage. Pay attention
to changes (e.g. porous material or tears).
- The removed seals26,31 and4 can
be cleaned in the dishwasher.
- Damaged seals26,31 and4 must be
replaced with new ones. You can reor-
der new seals (see “How to order acces-
sories” on page 63).
CAUTION:
~ Prior to the next use, damaged
seals26,31 and4 must be inserted
again or replaced with new ones. An
operation without seals26,31 and4
in place is not permitted.
Blade assembly27
1. Remove the blade assembly27 from
the blender jug5 (see “Using and re-
moving the blade assembly” on
page 50).
2. Pull seal26 off the blade assembly27.
BB&3(B(6ERRN6HLWH)UHLWDJ-XQL
 Loading...