24
25
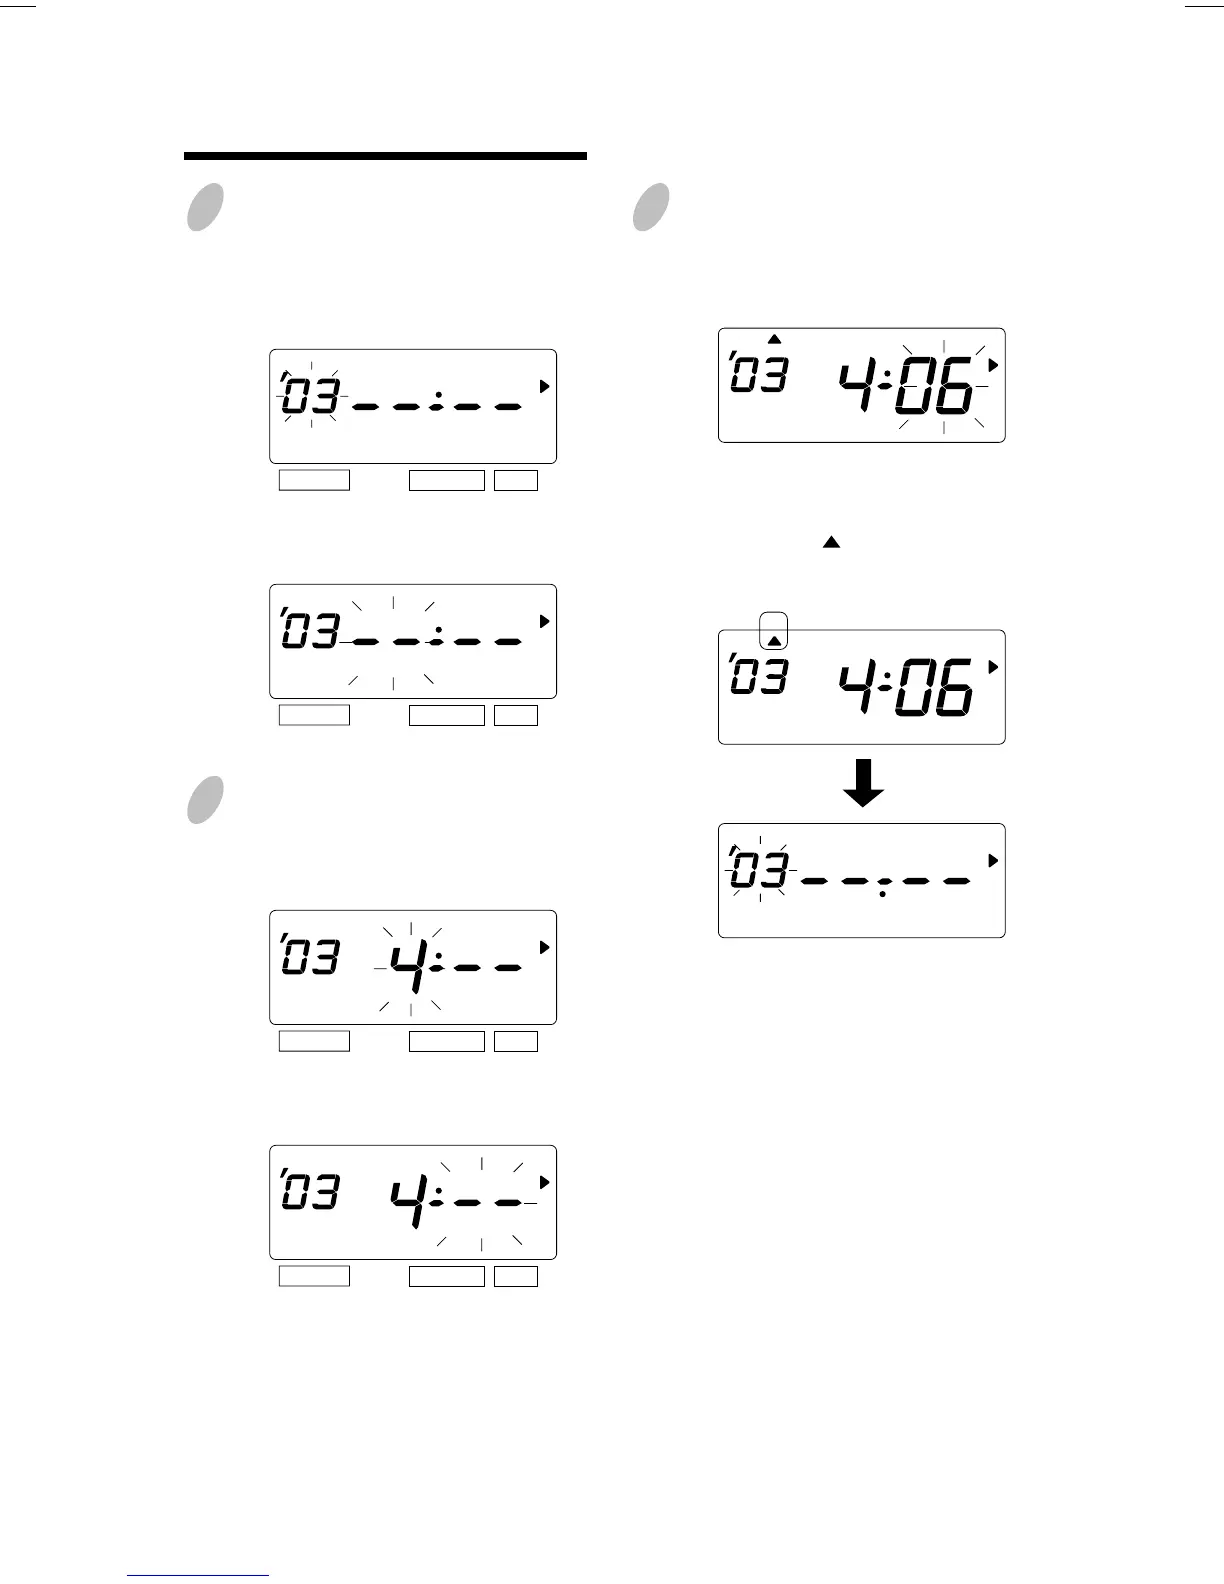
2
Change the "Year".
In case of the example, press the
[SET] button because the year 2003 is
not to be changed.
At the moment, the flashing changes
from "Year" to "Month".
4
Change the "Date".
Push the [CHANGE] button to set at
"6" and push the [SET] button.
At the moment, the "startingt date" of
the display changes from flashing to
steady and the " " mark is displayed
under "SU".
After a few second, go on to the "set
the ending date".
Please see the following page.
SELECT CHANGE SET
SELECT CHANGE SET
SELECT CHANGE SET
SELECT CHANGE SET
3
Change the "Month".
Push the [CHANGE] button to set at
"4" and push the [SET] button.
At the moment, the flashing changes
from "Month" to "Date".
Set the starting date.
SU
SU
MO TU WE TH FR SASU
33
26
25
5
Change the "Year".
In case of the example, press the
[SET] button because the year 2003 is
not to be changed.
At the moment, the flashing changes
from "Year" to "Month".
7
Change the "Date".
Push the [CHANGE] button to set at
"26" and push the [SET] button.
At the moment, the "ending date" of
the display changes from flashing to
steady and the " " mark is displayed
under "SU".
SELECT CHANGE SET
SELECT CHANGE SET
SELECT CHANGE SET
SELECT CHANGE SET
6
Change the "Month".
Push the [CHANGE] button to set at
"10" and push the [SET] button.
At the moment, the flashing changes
from "Month" to "Date".
Set the ending date.
SU
8
After you finish setting the daylight
saving time, press the [SET] button
once again.
Now the daylight saving time setting
has been completed. Replace the cover
and lock.
Important: If you do not complete Step
8, the Time Recorder will not print.
MO TU WE TH FR SASU
SU
Year
Month
Date
DAYLIGHT SAVING TIME
" " mark means
"ending date" setting
ENGLISH