26. INSTALLING THE Ni-Cd BATTERY
27. CONNECTING THE OPTIONAL FUNCTIONS
59
52
53
1
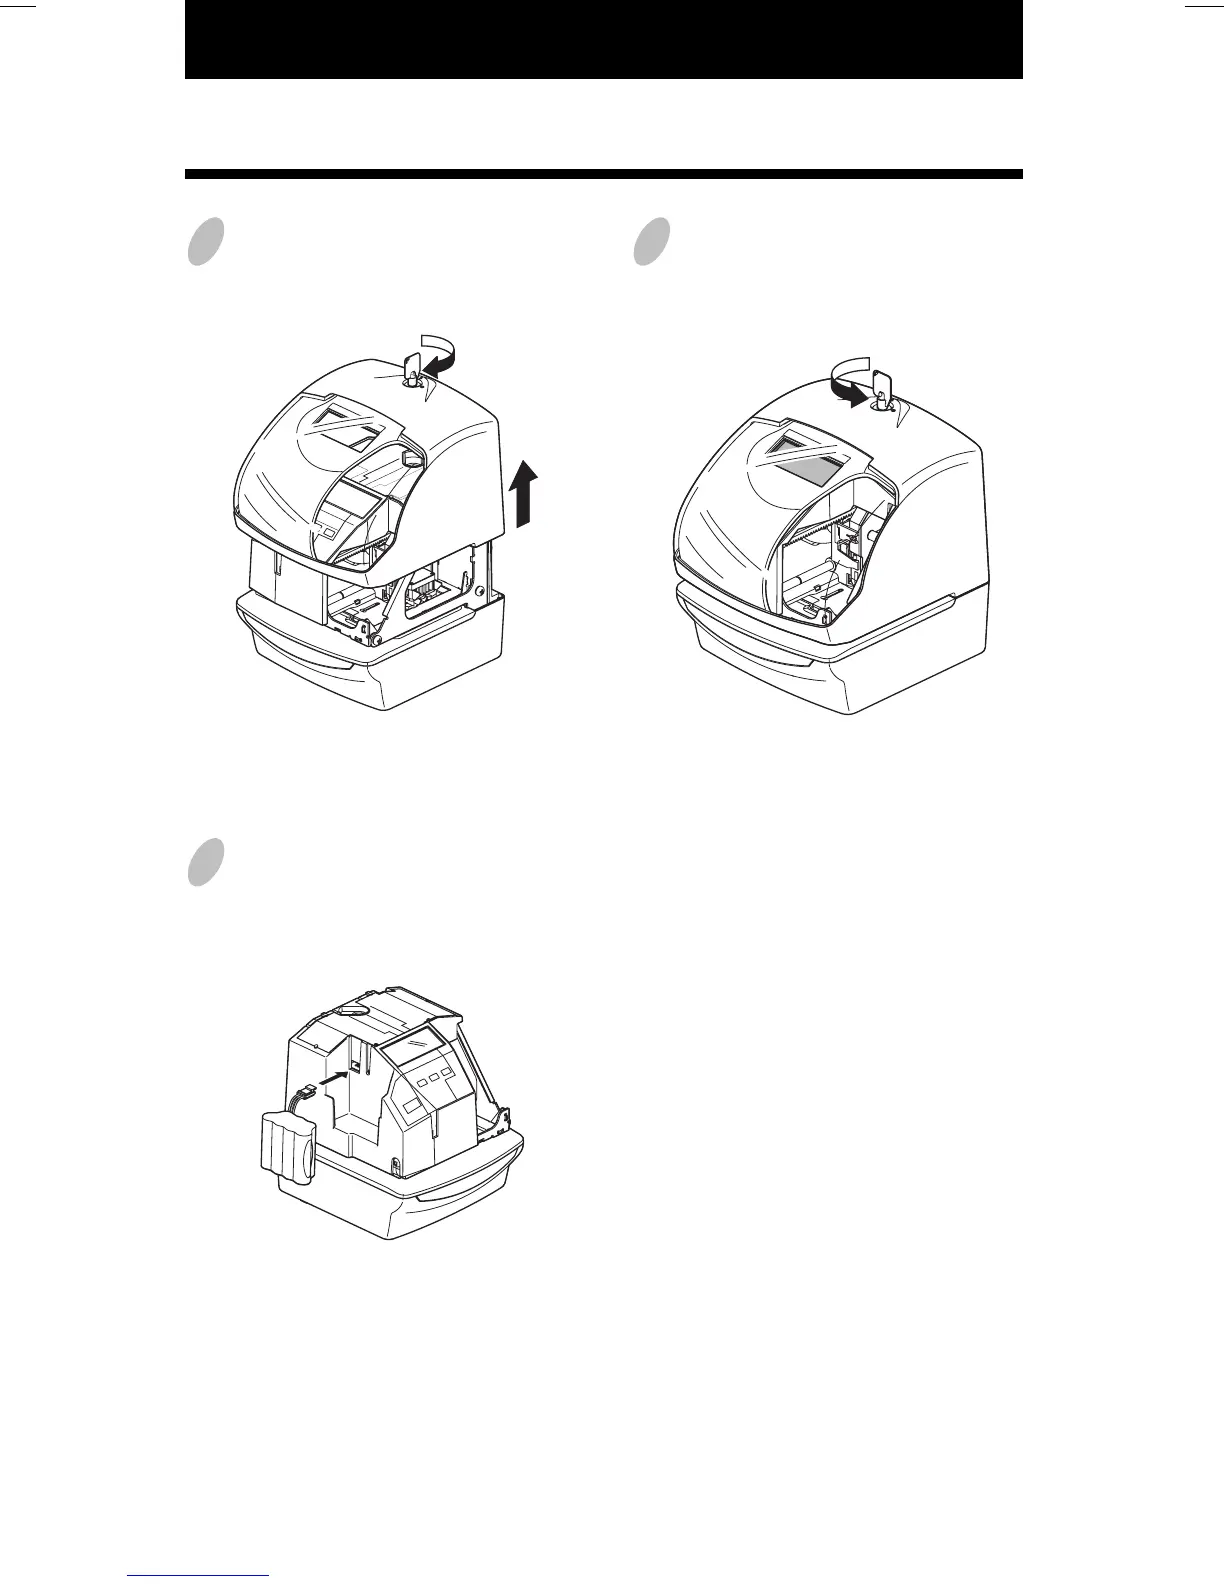
Unlock the key and remove the cover.
3
Insert wires into two left terminals for
the master clock, and tighten both
screws.
4
Replace the cover and lock.
2
The connector for the master clock
signals is on the back of the Time
Recorder.
MASTER
CLOCK
UNIT
Insert the " - "
signal cable.
Insert the "AB"
signal cable.
Insert the " + "
signal cable.
Connecting the Master Clock
CAUTION: Be sure to pull out AC cord from AC outlet before connecting wires of the
Master Clock.
Improper connection may cause a malfunction of the unit.
Also refer to "Attaching the wire Clamp" to secure wires with the wire
clamp.
connector
30/60 second
reversal
59 mintue
impulse
(2-wire)
59 mintue impulse
(2-wire)
30/60 second reversal
Insert the " PC "
signal cable.
ENGLISH