30
22
23
3
After you finish setting the print
method, press the [SET] button once
again.
Now the print method setting has been
completed. Replace the cover and
lock.
Important: If you do not complete Step
3, the Time Recorder will not print.
Automatic will allow the Time
Recorder to print by simply inserting a
card or piece of paper.
Semi-automatic will allow the Time
Recorder to print by pressing the push
bar only when a card or piece of paper
is inserted.
Manual will allow the Time Recorder
to print by pressing the push bar.
Combina tion will allow the Time
Recorder to print by pressing the push
bar or inserting a card or piece of
paper.
MO TU WE TH FR SASU
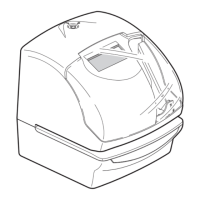
Push bar
15. SETTING THE DAYLIGHT SAVING TIME
24
1
Press the [SELECT] button and position the " " next to the "DAYLIGHT SAVING
TIME" mark. (The flashing means it can be changed.)
SELECT CHANGE SET
Year
Month
Date
Daylight Saving Time function
D.S.T. execution time
At 2:00 a.m. on the first day of DST, the clock automatically gains
one hour to show 3:00 a.m.
When 2:00 a.m. comes on the last day of the DST, it loses one hour
and returns to 1:00 a.m.
Setting D.S.T.
Current D.S.T. Rules:
Start: Second Sunday in March
End: First Sunday in November
The unit remembers the start date as the second Sunday of March
and the end date as the first Sunday of November. Once set, the unit
automatically updates the settings every year thereafter. No further
manual setting is necessary.
1
2
The setting for daylight saving time will be
described using the example below.
Today (present day)
Starting date of daylight
saving time
Ending date of daylight
saving time
Wednesday, January 29, 2003
Sunday, April 6, 2003
Sunday, October 26, 2003
Example
DAYLIGHT SAVING TIME
" " mark means
"starting date" setting
ENGLISH