3-3
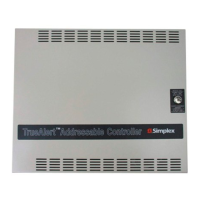
Use the following instructions to add a 4009 IDNet point for the 4009 TrueAlert Addressable
Controller.
1. From the Programming: [Configure Points] menu item, press ENTER.
2. Press NEXT until the Configure Point: [ZAMS/IAMS/RIAMS] menu item comes up.
Press ENTER.
3. The IDNet: [Add IDNet Point] menu item appears. Press ENTER.
4. The display now reads IDNet Device: M1-x where x is the first available IDNet address.
If needed, use the PREVIOUS or NEXT buttons to scroll through the addresses. Press
ENTER on the address to which you want to add the 4009 TrueAlert Addressable
Controller.
5. You now have to tell the 4010 that the IDNet device type will be a 4009. Press ENTER
on the menu item Point Label Function: [Edit Device Type]. When the display reads
Point Label: [PHOTO], use the PREVIOUS key to scroll to the appropriate device type.
The 4010 sees a 4009 TrueAlert Addressable Controller as a 4009 IDNet NAC Extender.
This means only the 4009 IDNet NAC Extender is available on the list of device types.
There are four 4009 IDNet NAC Extender device types, and only two that you can use.
Press ENTER on one of the following:
• [4009A (4 NAC)]. Normally used for the 4009 IDNet NAC Extender, this also
denotes the 4009 TrueAlert Addressable Controller.
• [R4009A (4 NAC)]. Normally used for the 4009 IDNet NAC Extender with
Repeater Option, this also denotes the 4009 TrueAlert Addressable Controller with
Repeater Option.
Note: [4009A (8 NAC)] and [R4009A (8 NAC)] cannot be used for the 4009
TrueAlert Addressable Controller.
6. When prompted, press ENTER to confirm your selection. The display reads
** Operation Complete **, and you are returned to the
IDNet Device: M1-x display, which shows the next available IDNet address. Note
that if you press the PREVIOUS button, the address you just configured has disappeared
because it is now being used.
7. At this point, repeat steps 4 through 6 for each 4009 TrueAlert Addressable Controller
you need to add. A total of five can be used. When you are done, press EXIT twice so
that the display reads Configure Point: [ZAMS/IAMS/RIAMS].
Continued on next page
4010 Programming Steps, Continued
Step 2:
Adding an IDNet
Point for the 4009
TrueAlert
Addressable
Controller

 Loading...