Landlord / 1700 / 2700 Series
1/2001 11
TP 300-2226-02-LL-SMA
Mower
Assembly
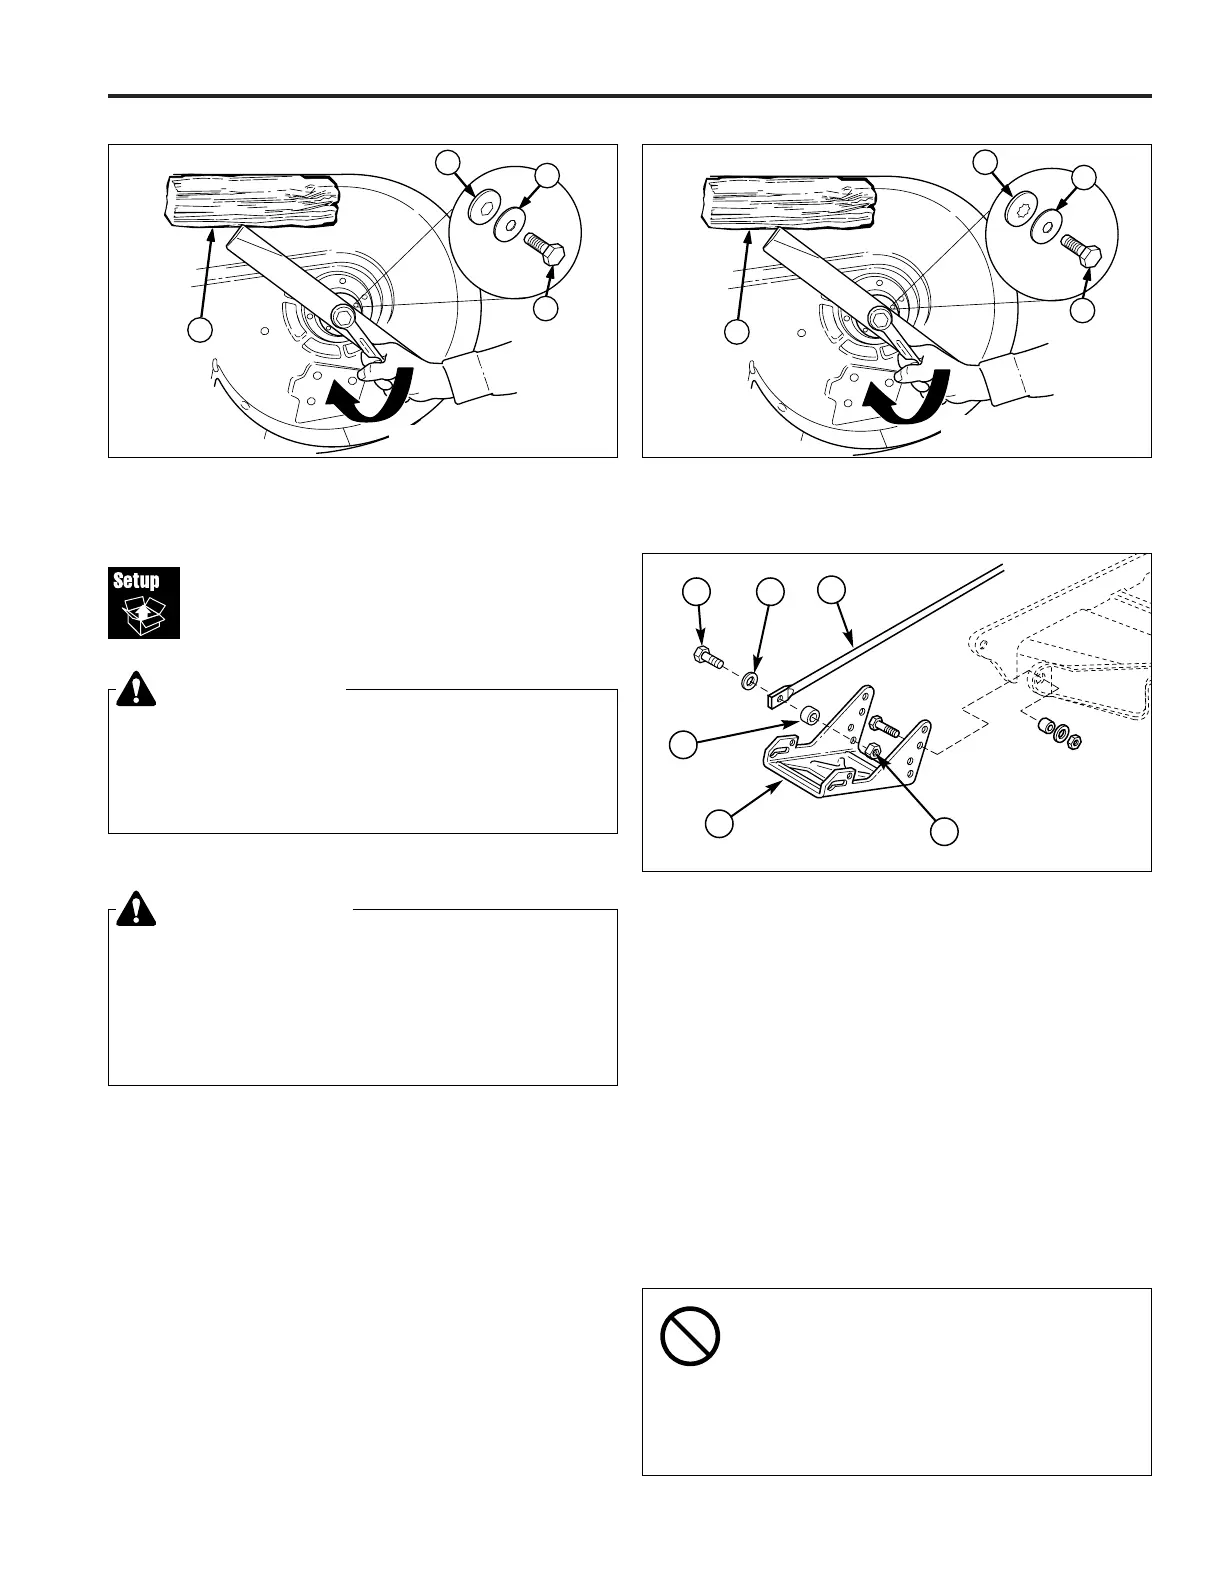
Figure 22. Mower Hitch Assembly - 44” & 50” Mowers
A. Leveling Rod D. Spacer
B. Flat Washer E. Mower Hitch
C. Capscrew F. Locknut
WARNING
Mower blades are sharp. For your personal
safety, do not handle mower blades with bare
hands. Careless or improper handling of blades
may result in serious injury.
E
A
BC
D
F
Torque Mower Blades
44” & 50” MODELS
1. Reinstall each blade with the tabs pointing up toward
deck as shown in Figure 20. Secure with a capscrew,
spring washer and hex washer (be certain the hex
washer is aligned with the hex shaft). Use a wooden
block to prevent blade rotation and torque capscrews
to 45-55 ft.lbs. (61-75 N.m.).
54” MODELS
1. Reinstall each blade with the tabs pointing up toward
deck as shown in Figure 21. Secure with a capscrew,
spring washer and spline washer (be certain the
spline washer is aligned with the shaft). Use a wood-
en block to prevent blade rotation and torque cap-
screws to 45-55 ft.lbs. (61-75 N.m.).
WARNING
For your personal safety, blade mounting
capscrews must each be installed with a hex
washer and spring washer, then securely
tightened. Torque blade mounting capscrew to
45 - 55 ft. lbs. (61 - 75 N.m.)
Figure 21. Installing The Blade - 54” Models
A. 4x4 Wood Block C. Spring Washer
B. Spline Washer D. Blade Bolt
Hitch & Leveling Rod Assembly
1. Remove the hardware (B, C, D, F, Figure 22) from
mower leveling rod (A) and flip hitch (E) over from the
shipping position.
2. Reinstall the leveling rod (A) in the bottom hitch hole
using the hardware removed in step one. Install the
hardware as shown in Figure 22.
IMPORTANT NOTE
DO NOT REMOVE THE MOWER DECK
BAFFLES. The baffles help prevent grass
clippings from becoming airborne and plug-
ging up the engine cooling grates. Plugged
cooling grates can cause engine over-heat-
ing and create a potential fire hazard.
Mower Deck Baffles
(Liquid Cooled Models)