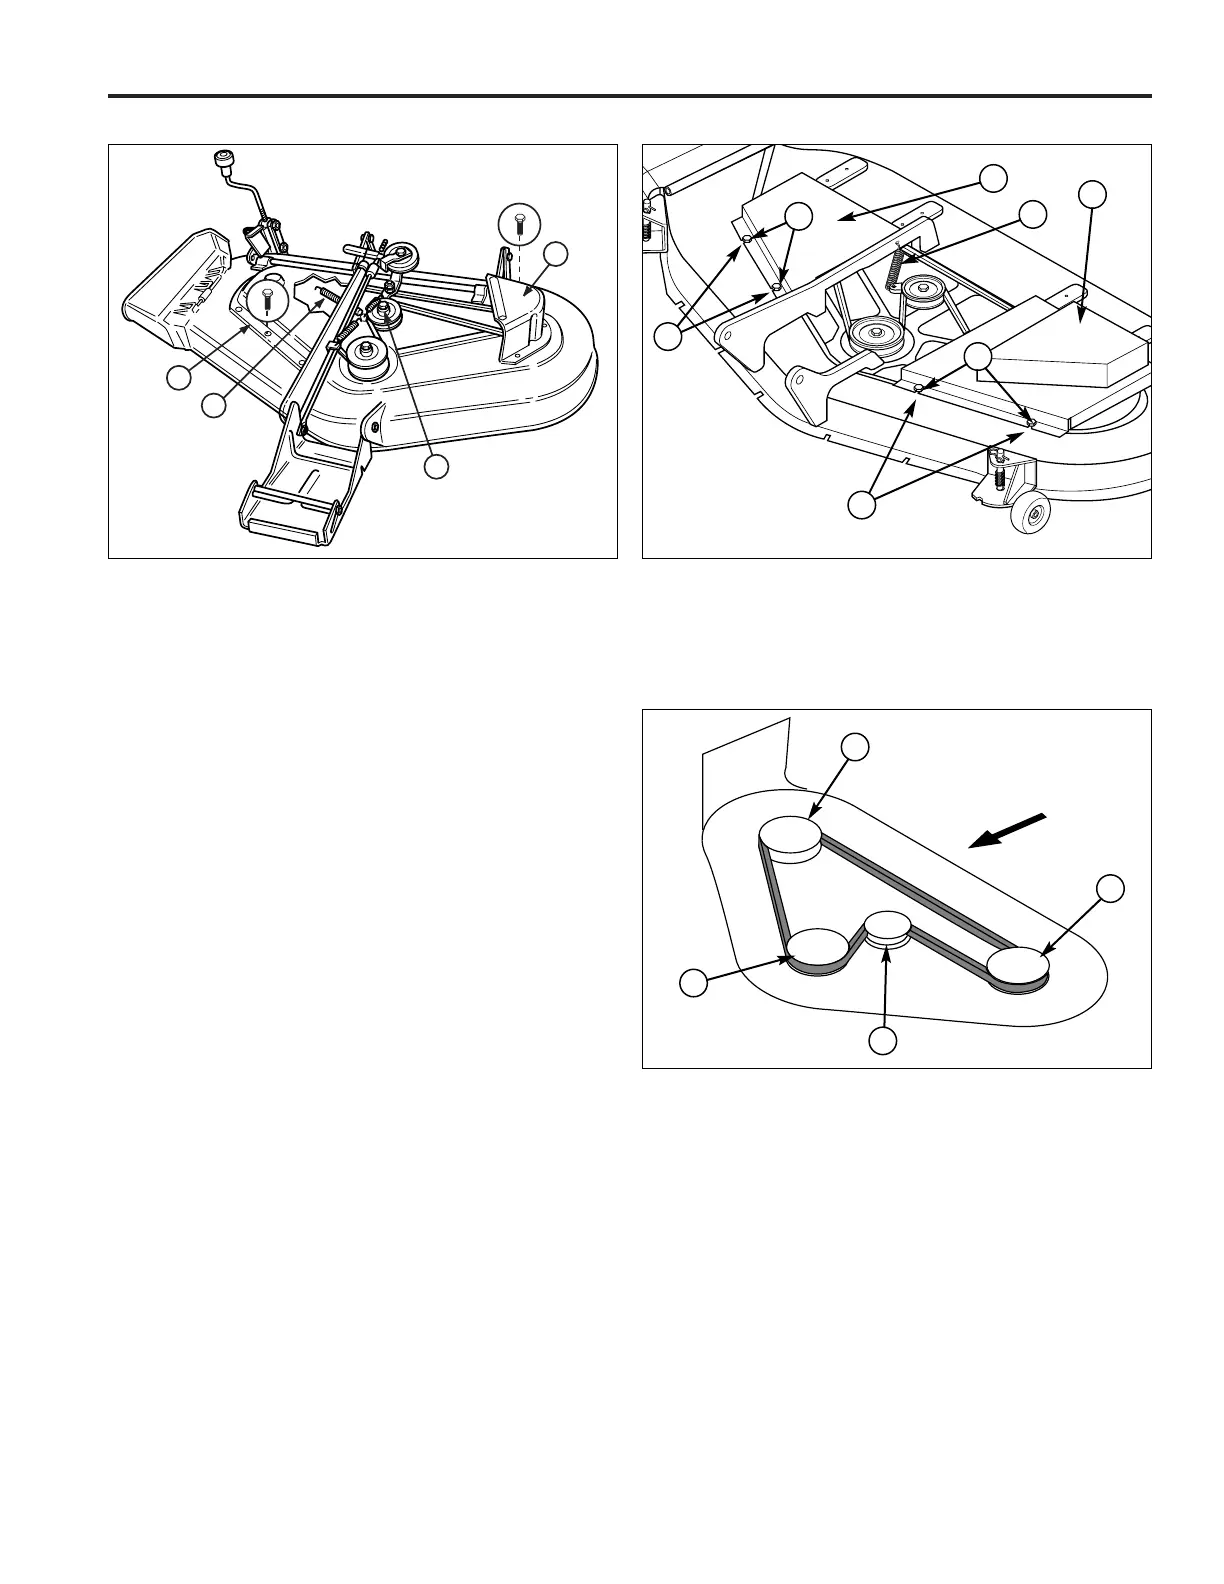
Figure 50. Mower Deck - 44" & 50” Mowers
A. Capscrew
B. Right-hand Arbor Cover
C. Spring
D. Left-hand Arbor Cover
E
E
B
A
D
C
A
Arbor Drive Belt Replacement -
All Models
NOTE: Be sure to use only genuine Simplicity replace-
ment parts.
1. Park the tractor on a smooth, level surface such as a
concrete floor. Disengage the PTO, turn off the
engine and lock the parking brake. Remove the key.
2. Remove the mower from the tractor. See Mower
Removal in the Operation section.
44” &50” MODELS
3. Remove the capscrews securing the right-hand arbor
cover (B, Figure 50). Remove three capscrews secur-
ing left-hand arbor cover (D).
54” MODELS
3. Remove the PTO belt. Remove the taptite screws
(A, Figure 51) securing the belt covers and remove
the belt covers (B, D).
ALL MODELS
4. Using a pair of locking pliers or a spring puller,
remove the idler pulley spring (C, Figures 50, 51)
from slot in deck.
5. Loosen capscrew (A, Figure 50) securing the idler
pulley to the bracket. The belt can now be slipped
between the pulley and idler bracket hub.
6. Install a new belt as shown in Figure 52. Make sure
that V-side of belt runs in arbor pulley (A) grooves
and flat side of belt runs against idler pulley (B).
7. Tighten the capscrew (A, Figure 50).
8. Reinstall spring (C, Figures 50, 51) into its slot in
mower deck.
9. Reinstall the left and right arbor covers (B & D,
Figures 50, 51). 54” Models: To provide proper belt
cover clearance, make sure the alignment notches
(E, Figure 51) are centered on the taptite screws (A).
10. Install the mower onto the tractor.