REPAIR PROCEDURES
AB18EJ&18HJ Maintenance Manual 6-9 © Oct 2020
4. Fit the washer with the mounting surface, apply
threadlocker Loctite 272 to the bolts,and intall in
turns.
5. Tighten the bolts with a torque wrench.
6. After all installed, add a suitable level of gear oil.
7. Clean the mount surface, lift the motor and align it
with the reducer: the motor spline shaft in mesh with
the inner gear of reducer, the motor mounting slot
aligned with the reducer mounting screw by slowly
rotating the motor housing.
8. Apply the threadlocker Loctite 272 to the bolts and
torque the bolts after pretightening.
9. Attach the hrdraulic hoses.
10. Install the wheel.
Turntable Slewing Mechanism
Figure 6-10
Table 6-2
No. DESCRIPTION
1 Slewing buffer valve
2 Slewing motor
3 Slewing reducer
4 Slewing bearing
Removal of slewing drive device
1. Tag, disconnect and plug the hydraulic hoses of
slewing buffer valve and slewing reducer brake.
2. Remove the bolt and washer from the slewing
buffer valve, and then remove the slewing buffer
valve from the slewing motor.
3. Remove the bolts securing the slewing reducer to
the turntable, and then remove the slewing reducer.
Installation of slewing drive device
1. Clear the foreign matters and burrs on the mounting
surface and gears of slewing reducer.
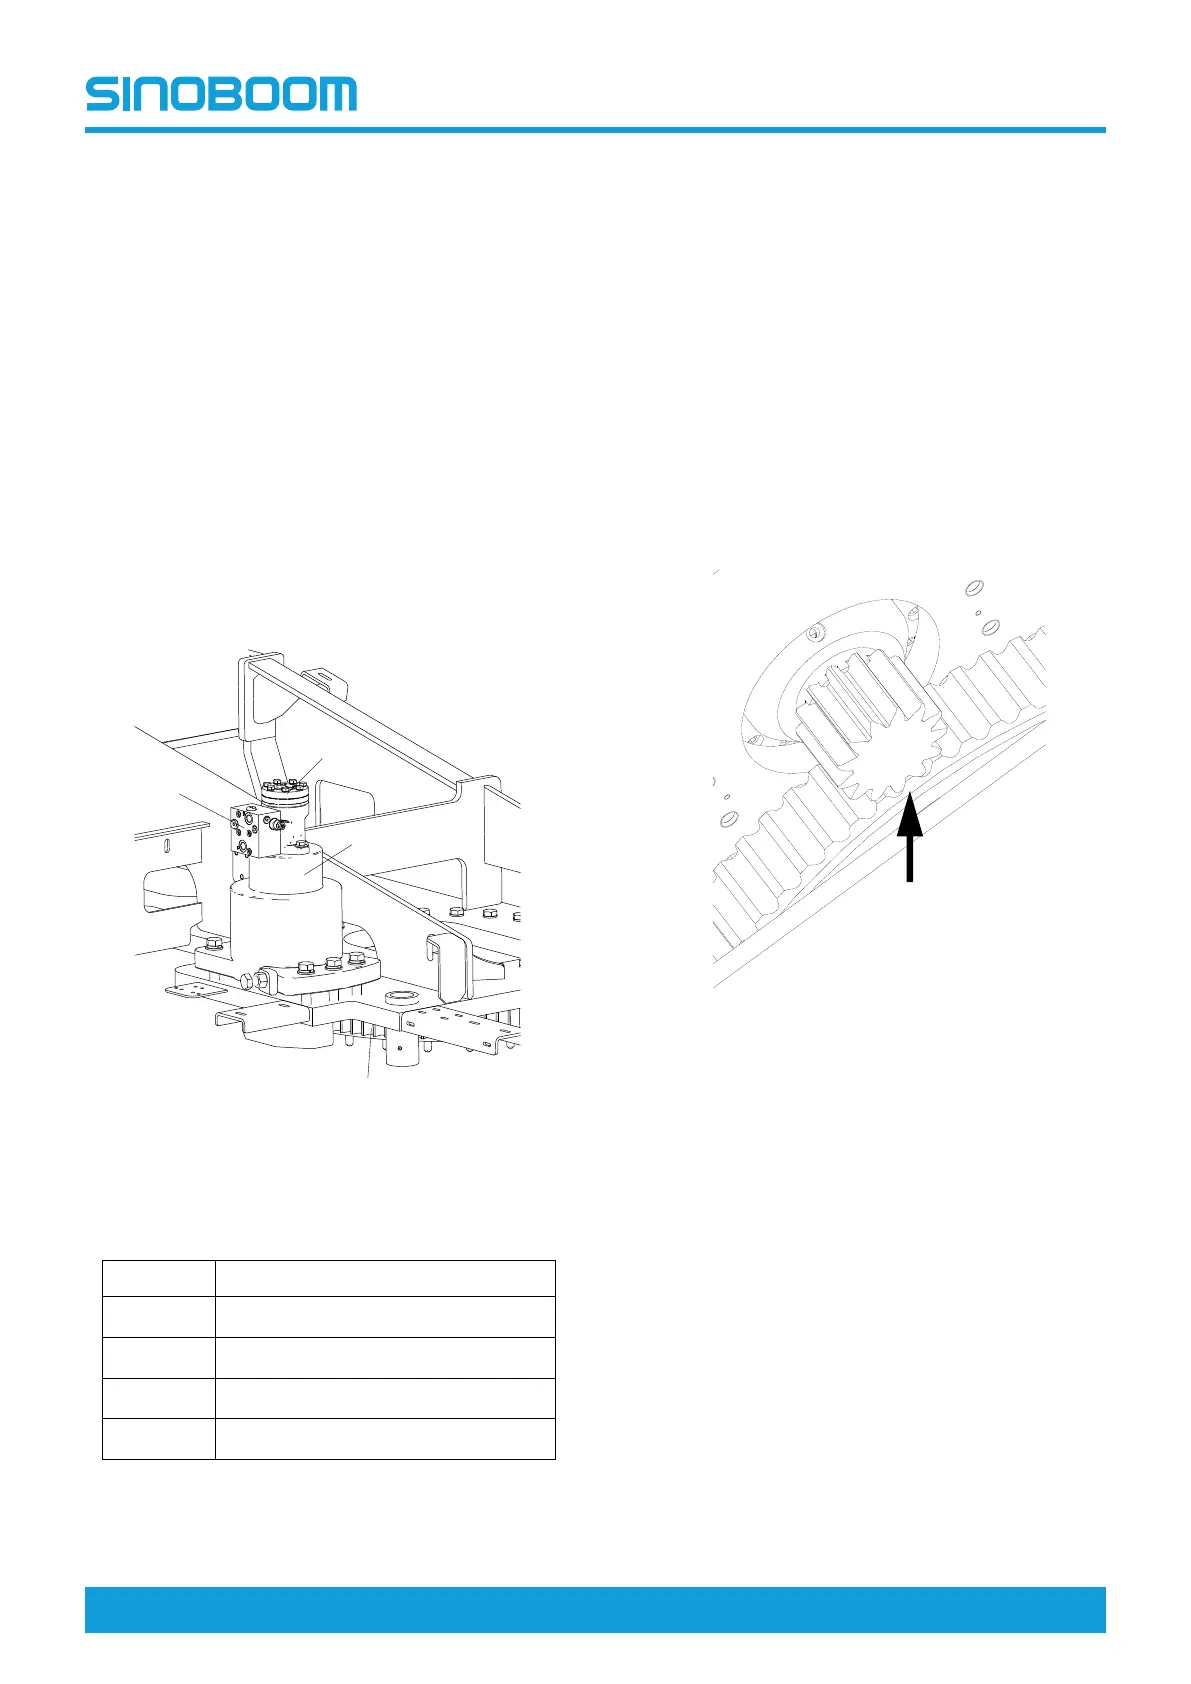
2. Place the slewing reducer on the turntable
mounting surface, use a feeler gauge to measure
the gear backlash relative to the slewing bearing,
be sure the gear backlash falls within 0.15—
0.25mm (0.006–0.01in).
Figure 6-11
3. If the gear backlash exceeds the specification,
adjust the nut to specification.
4. With washer on the bolt, apply threadlocker Loctite
272. Install the mounting bolts to secure the slewing
reducer to the turntable, after installation pre-tighten
in diagonal order.
5. Ensure the slewing reducer fits in well with the
turntable.
6. Use a wrench to tighten the bolts in diagonal order.
7. Add gear oil to the slewing reducer until the gear
surface is covered.
8. Clean the mounting surface of slewing reducer, and
mate the axis pin of slewing motor with the reducer
pin hole.
9. Rotate the motor housing to align the slewing motor
bolt hole with the reducer bolt hole. Apply
threadlocker Loctite 272 to the bolt with washer on,
install the bolt and tighten.