11
Danger!
- Do not extent the arbor nut wrench.
- Do not tighten arbor nut by tapping on the wrench.
- After tightening the arbor nut do not forget remove
the saw spindle lock bar!
- Fixing of saw blade to spindle.
- When the spindle diameter is less than the saw
blade bore diameter, flanged bushed provided by
the machine manufacturer should be used to make
up the difference. The use of loose rings or bushes
is not permitted.
11. Loosen screw (a) of the riving knife bracket.
12. Adjust the distance between the saw blade’s outer
edge and the riving knife (b). it must be 3-8mm.
13. Reinstall the throat plate and blade guard.
Slot for the saw blade in the table.
The total width of the slot for the saw blade is 12mm,
the tilting direction is opposite to the ordinary item,
so the distance between the fixed saw flange and
the edge of the table slot is 8mm.
Selection of saw blade and riving knife.
The range of saw blade diameters and thickness is
below:
Saw blade diameter: 254mm
Saw blade thickness: 3mm
The operator should only select saw blade of a
diameter and thickness suitable for the machine, as
specified in the instruction handbook.
Selection of the riving knife is dependent on the saw
blade thickness and saw blade diameter. The
operator should ensure that the riving knife selected
is suitable for the saw blade being used.
The riving knife-guiding slot should be no more than
0.5mm wider than the riving knife guiding elements.
10.2 Cleaning the saw
1. Lay machine on its side.
2. Remove chips and saw dust with vacuum cleaner or
brush:
- from saw blade setting guide elements
- from traveling sizing table guide elements
- from motor vent slots
10.3 Machine storage
Danger!
Store saw so that
- it can not be started by unauthorized persons
- nobody can get hurt.
Caution!
Do not store saw unprotected outdoors or in damp
environment.
10.4 Maintenance
Before switching on
Visual check if distance saw blade- riving knife is
3-8mm.Visual check of power cable and power cable plug
for damage; if necessary have damage parts replaced by
a qualified electrician.
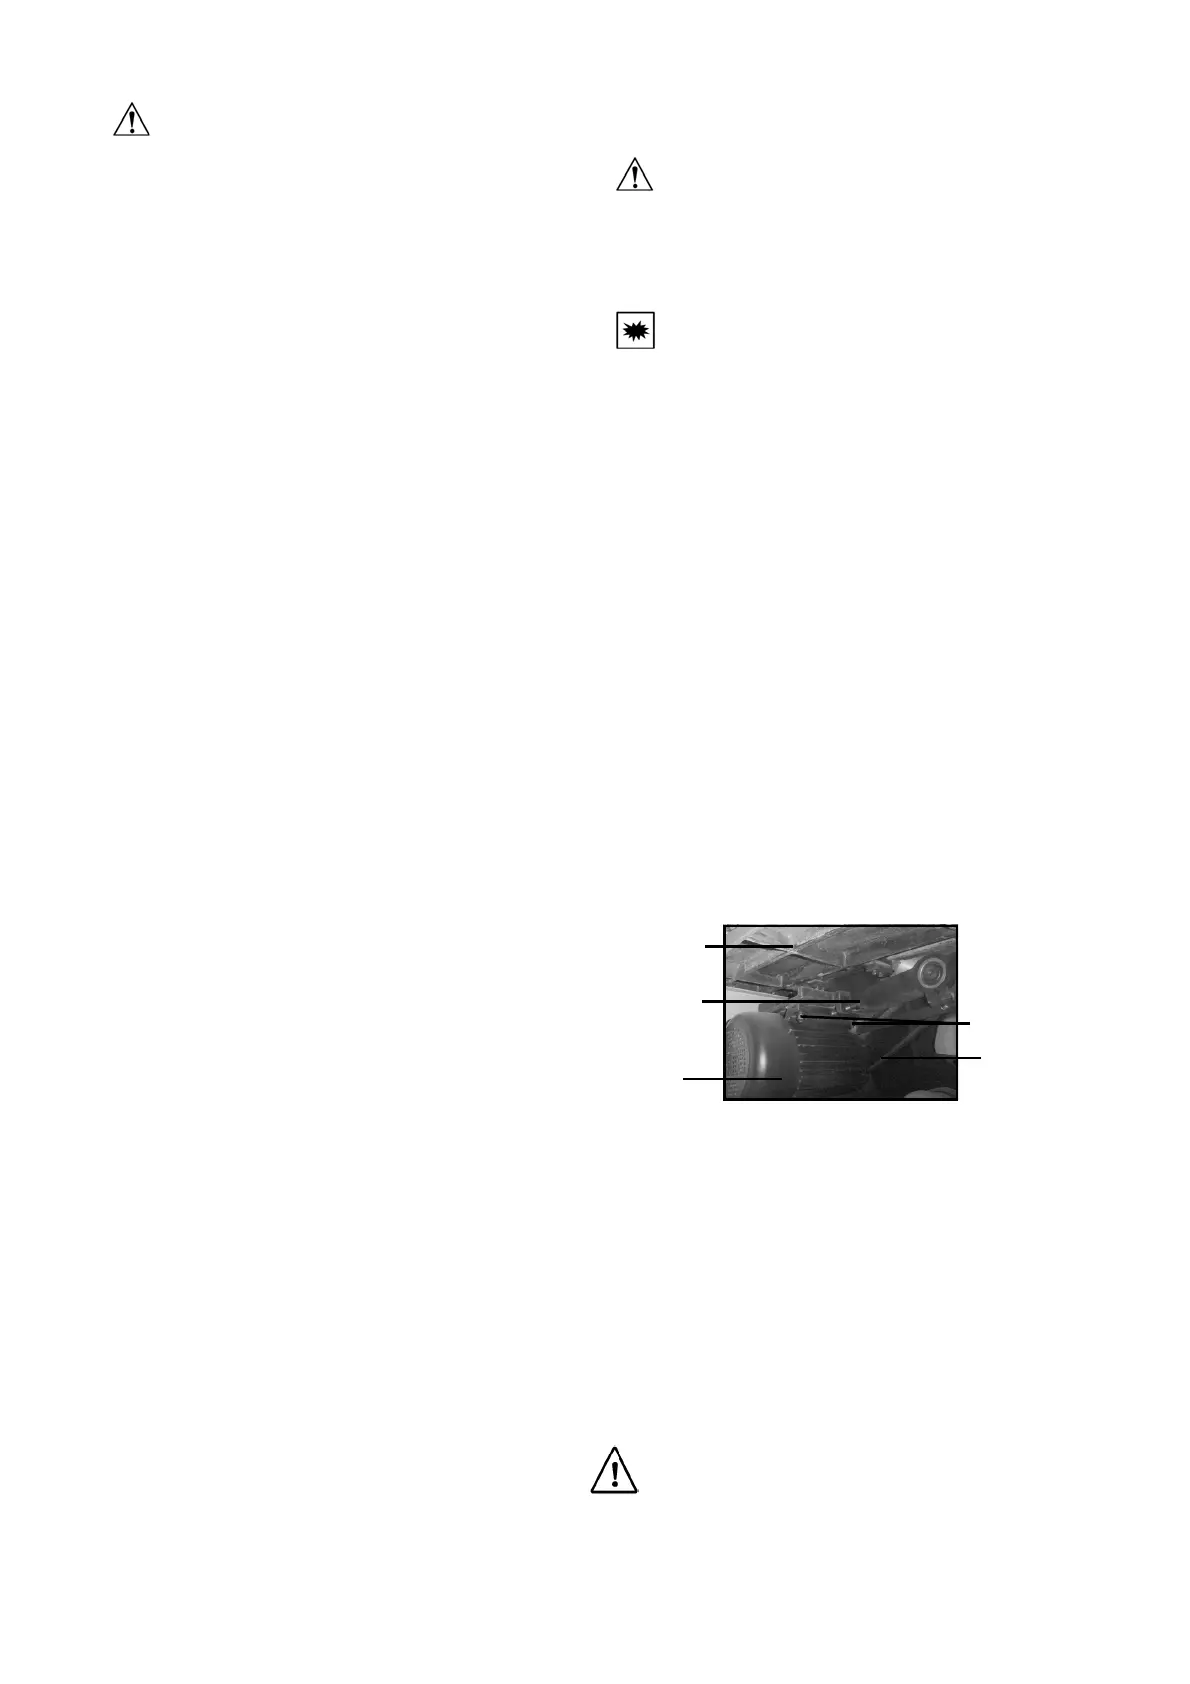
To re-tension the drive belt:
•
Motor
Tension bolt
Motor mount bolts
Main saw bed
Drive belt
• Loosen the 4 x (2 on each side) motor mount bolts.
• Turn the tension bolt whilst checking the tension of the belt.
• Once the correct tension has been achieved (approximately 1”-1
1
/
2")
re-tighten
the motor mount bolts to secure.
To replace the drive belt:
• Release the tension from the belt by following the instructions above.
• Remove the blade (see instructions on page 24).
• The belt can now be removed and replaced.
• Follow all previous instructions in reverse to re-fit the blade, blade guard etc.
Caution: Check for alignment of moving parts, free running of moving parts,
breakage of parts, and any other conditions that may affect its operation Be-
fore restarting the saw.
The main drive belt is set at the factory to the correct tension,
but time and use may mean that the belt needs to be re-tensioned.
Open the main side door of the saw and make yourself
familiar with the internal components(see picture below)
10.5 Replacing/tension the drive belt